
Working with the automation process designer
Enterprise license required
Features described on this page require the Kentico Xperience Enterprise license.
This chapter describes the process designer, a built-in tool that provides a visual representation of marketing automation processes. The designer allows you to define the steps that implement the functionality of automation processes.
Accessing the process designer
To open the process designer for an automation process:
- Open the Marketing automation application.
- Edit () the process that you want to design.
- Switch to the Process tab (in Design mode).
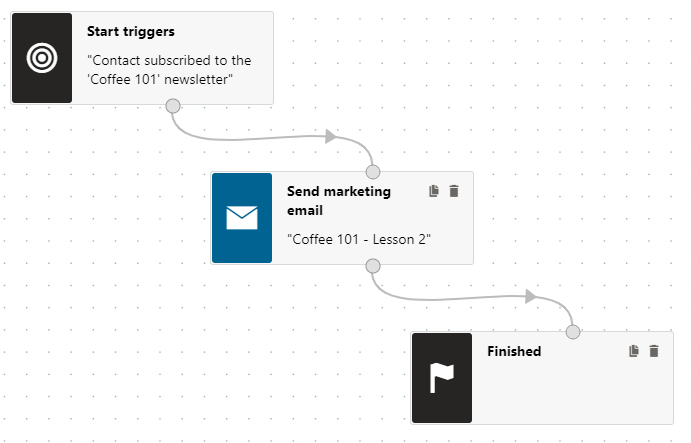
The following image shows the appearance of the designer for an automation process consisting of the Start triggers, Send marketing email and Finished steps. The steps are connected by transition lines. The direction of the arrows indicates which way the process moves forward.
Tip
If your graph does not fit into the designer area, click an unoccupied area of the grid and drag to expose additional free space.
Prerequisite
Windows Communication Foundation must be configured for the advanced workflow designer to work.
Flow steps
Every process contains the Start triggers step, which is where all contacts begin when you run the process for them. You also use the Start triggers step to set up triggers for the process.
Additionally, you can add the following types of steps to control the flow of the automation process:
Step | Description |
Approve progress | Basic approval step. Allows designated users or roles to decide whether the process continues to the next step. |
If/Else | Splits the process into multiple branches based on a set of conditions. The process automatically continues through the first branch whose condition is fulfilled. |
Manual choice | Splits the process into any number of branches. Designated users need to manually choose the next step for each contact in the process. |
Wait | Halts the process for a specified amount of time before continuing to the next step. See: Adding wait steps |
Finished | Represents the end of the process. |
Contact actions
You can also embed actions into processes. When a contact reaches an action step in a process, the system automatically performs the given action.
Action step | Description |
Change account | Adds or removes the contact from an account. |
Change group | Adds or removes the contacts from a contact group. |
Delete contact | Deletes the contact currently going through the automation process. |
Import to Salesforce | Replicates the contact into a lead in a target Salesforce organization. You need to have Salesforce replication set up to use this action. |
Log custom activity | Logs a custom activity for the contact. |
Newsletter subscription | Subscribes or unsubscribes the contact from a newsletter. |
Send marketing email | Sends a marketing email (i.e., part of a newsletter or email campaign) to the contact. Note: When performing this action step, the process automatically adds the contact as a recipient. |
Send transactional email | Sends an email (for example subscription confirmation) to any address. The email content can be based on an email template or defined directly within the step properties. |
Set contact property | Inserts a new value into one of the contact’s properties (fields). Culture-dependent data used in the ‘Property’ value of this action need to be entered in the ‘en-US’ culture format. For example, the MDY format should be used for dates (12.21.1989). |
Set contact status | Changes the contact’s status. |
Start another process | Triggers a different marketing automation process for the contact. Based on the recurrence settings of the target process, this action can result in multiple unnecessary instances of the process running concurrently. |
Tip
If your developers create custom actions, you can add them through the designer as well.
Adding notes to the process designer
Notes allow you to add comments or explanations into the process designer graph. This can be useful when working with a team of other marketers or if you wish to document your automation processes for future reference.
To add a note to your automation process:
- Place a Note onto the grid from the designer toolbar.
- You can find notes under the Other category of the toolbar.
- Click the note content and type in any required text.
- Click outside of the note (the system automatically saves any content changes).
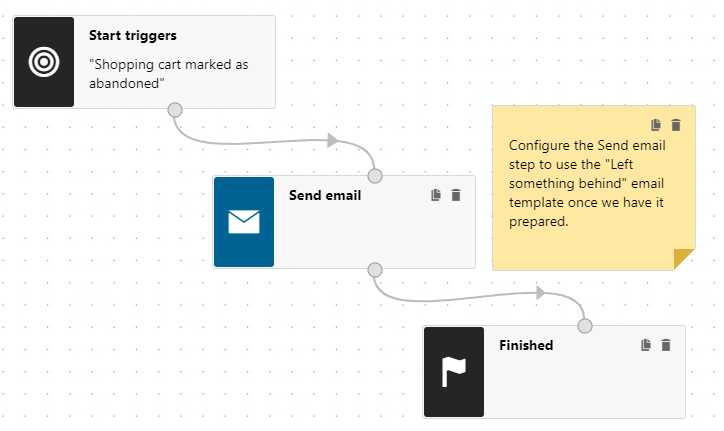
Such notes are visible to any users viewing the process, both on the Process tab in Design mode and when managing contacts within the process. Notes cannot have any connections with other steps and do not change how the process runs in any way.