Displaying data on application tiles
You can modify application tiles on the Xperience administration dashboard to display various data. Tiles that display application data are called Live tiles. Live tiles display a numerical value and a description of the numerical value.

The following Xperience applications work as live tiles by default
Content management
- Forms – displays the number of forms submitted by users in the last 7 days.
- Pending pages – displays the number of pages pending the user’s approval.
- Translations – displays the number of translation submissions waiting for import.
On-line marketing
- A/B tests – displays the number of running A/B tests.
- Contact management – displays the number of new contacts in the last 7 days.
- My pending contacts – displays the number of contacts waiting for the user’s action in a Marketing automation process.
- Web analytics – displays the number of site visits in the last 7 days.
E-commerce
- Buy X Get Y discounts – displays the number of running Buy X Get Y discounts.
- Catalog discounts – displays the number of running catalog discounts.
- Free shipping offers – displays the number of running free shipping offers.
- Gift cards – displays the number of running gift card offers.
- Order discounts – displays the number of running order discounts.
- Product coupons – displays the number of running product coupon offers.
Configuration
- Email queue – displays the number of e-mails that could not be sent.
- Licenses – displays days left until license expiration.
- System – displays the time since the last application restart.
- Users – displays the number of registered users waiting for approval.
The purpose of Live tiles is to display information that may require the attention of users. When users can access information directly on the application dashboard, they do not need to navigate to the application itself unless necessary.
You can modify existing Live tiles to display different data or make static tiles into Live tiles.
Example
Edit your Xperience administration project in Visual Studio.
Create a class that implements the ILiveTileModelProvider interface.
Define the GetModel method within the class. The method needs to return the data of the Live tile in one of the following formats:
LiveTileModel object containing:
- Value – the numerical value displayed on the Live tile
- Description – the description of the numerical value
null – in cases where you want the tile to stay static. For example, when the number of objects displayed by the tile is 0.
 using System;

 using CMS.Activities;
 using CMS.ApplicationDashboard.Web.UI;
 using CMS.ContactManagement.Web.UI;
 using CMS.Core;
 using CMS.Helpers;

 public class ContactManagementLiveTileModelProvider : ILiveTileModelProvider
 {
     public LiveTileModel GetModel(LiveTileContext liveTileContext)
     {
         if (liveTileContext == null)
         {
             throw new ArgumentNullException("liveTileContext");
         }

         return CacheHelper.Cache(() =>
         {
             if (!ActivitySettingsHelper.OnlineMarketingEnabled(liveTileContext.SiteInfo.SiteName))
             {
                 return null;
             }

             var newContactsCount = GetNewContactsCount();

             return new LiveTileModel
             {
                 Value = newContactsCount,
                 Description = "New contacts in the last 14 days",
             };
         }, new CacheSettings(2, "ContactManagementLiveTileModelProvider", liveTileContext.SiteInfo.SiteID));
     }

     /// <summary>
     /// Gets the total number of new contacts created in the last 14 days.
     /// </summary>
     private static int GetNewContactsCount()
     {
         return ContactInfo.Provider.Get()
                           .CreatedAfter(DateTime.Now.AddDays(-14))
                           .Count;
     }
 }
Register the provider via the RegisterLiveTileModelProvider assembly attribute. Set the following parameters:
module code name – the code name of the module containing the application represented by the live tile.
UI element code name – the code name of the UI element that defines the application represented by the live tile.
live tile provider type – the System.Type of the Live tile’s provider class.
[assembly: RegisterLiveTileModelProvider(ModuleName.ONLINEMARKETING, "ContactsFrameset", typeof(ContactManagementLiveTileModelProvider))]To find the required code name values, edit the related module in the Modules application:
- The module code name is on the General tab.
- To find the UI element code name, switch to the User interface tab, select the application’s UI element in the tree, and open the General tab.For the code names of the system’s default modules, you can also use the constants defined in the CMS.Core.ModuleName class.
Note: Registering an existing live model provider overrides the functionality. This way, you can change the behavior of the default Live tiles.
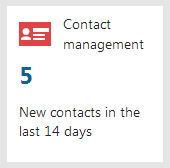
The example above modifies the Contact management tile so that it displays the number of contacts added in the last 14 days.