
Running Xperience behind a proxy server
If you wish to host Xperience behind a proxy server or another service that takes over the application’s public domain (e.g., Azure Application Gateway), you need to ensure request URLs from all parts of the application are generated correctly (targeting the proxy domain). Otherwise, you may encounter issues with Cross-Origin Resource Sharing (CORS) policies when performing certain actions (such as uploading images to Media libraries).
To correctly configure Xperience running behind a proxy service, you need to:
- Set up Forwarded Headers Middleware for your live site project.
- Configure the site’s Presentation URL.
- Consider licensing and domain alias requirements.
Setting up Forwarded Headers Middleware
See the Configure ASP.NET Core to work with proxy servers and load balancers article to learn about Forwarded Headers Middleware.
The following example shows basic forwarded headers configuration in a .NET application’s startup class (Program.cs).
...

// Configures the Forwarded Headers Middleware options
services.Configure<ForwardedHeadersOptions>(options =>
{
    // Enables processing of all 'X-Forwarded' headers (-For, -Host, -Proto and -Prefix)
    // The 'X-Forwarded-Host' header is required, other headers can be enabled or disabled as required by your proxy environment
    options.ForwardedHeaders = ForwardedHeaders.All;
});

...

// Enables the Forwarded Headers Middleware
app.UseForwardedHeaders();

...

app.UseStaticFiles();
app.UseKentico();

...
Adjust the configuration based on the requirements of your proxy environment.
- Set the CMSUrlHost configuration key for the live site application.
- Configure the site’s Presentation URL.
- Consider licensing and domain alias requirements.
Setting the CMSUrlHost configuration key
In the live site application, set the CMSUrlHost configuration key to the host component of the proxy server’s public domain.
Edit your live site project’s web.config file.
Add the CMSUrlHost key into the <appSettings> section of the file. Set the key’s value to the host component of the proxy server’s URL (omitting the port number).
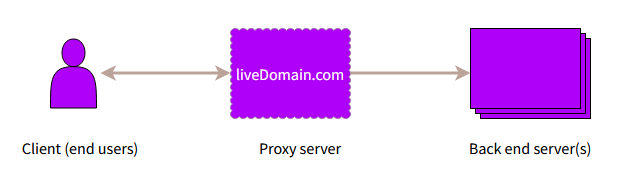
- For example, assuming the site is running behind the https://liveDomain.com proxy server, set the key to: liveDomain.com
<add key="CMSUrlHost" value="liveDomain.com" />Save the file.
Setting the site’s Presentation URL
Configure the Presentation URL property (via the Sites application) of the front-end site to target the public domain provided by the proxy server:
- Open the Xperience administration interface in your browser.
- Navigate to the Sites application and edit the site.
- Set the Presentation URL property to the full domain name of the proxy server.
- For example, assuming the site is running behind the https://liveDomain.com proxy server, set Presentation URL to: https://liveDomain.com
- Save the changes.
The system is now configured to generate URLs targeting the specified proxy server.
Licensing and domain aliases in proxy scenarios
If you need to access the Xperience application through a different domain than the proxy server’s public domain (for example a back end server domain in a local development or testing environment), you also need to add:
- A valid license for the given domain.
- Domain aliases for your site.