
Using and configuring web parts
This page describes how to work with web parts when editing Portal Engine templates for administration interface pages.
To edit the web part content of a template:
- Open the Administration interface application and switch to the Page templates tab.
- Select a template in the tree and switch to the Design tab.
Alternatively, you can design templates directly when editing UI elements (for elements whose content is based on a template):
- Open the Modules application.
- Edit a custom module.
- Open the User interface tab.
- Select a UI element in the tree and switch to the Design tab.
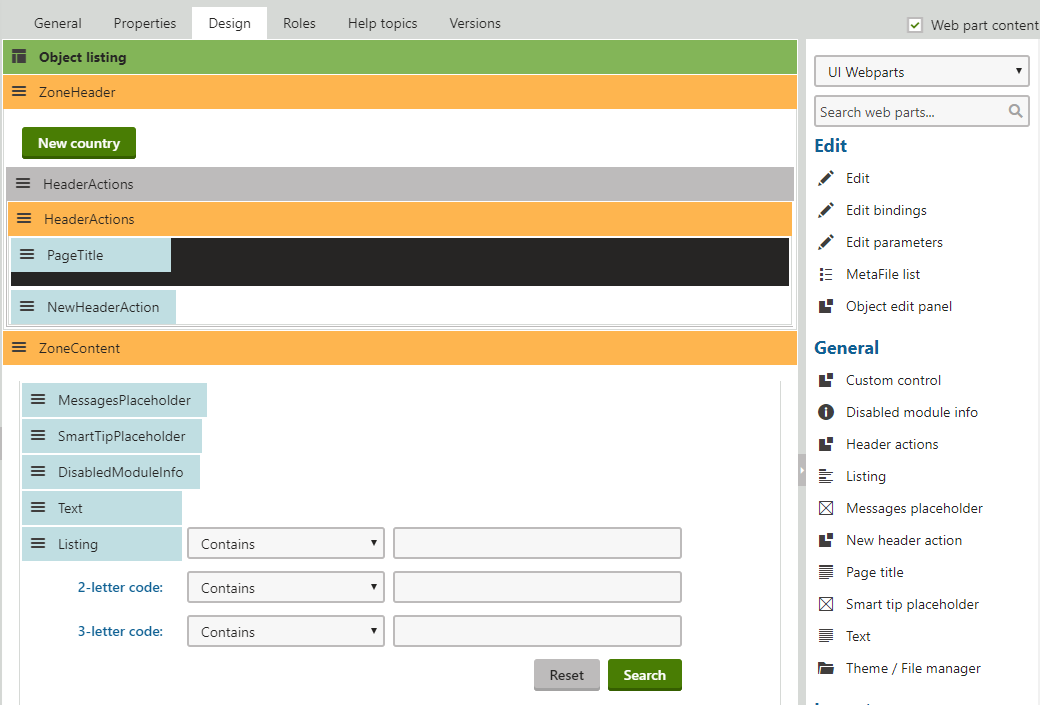
The Design tab allows you to view the structure of the page’s template and manage the template’s web parts.
Impacts of modifying page templates
When you edit the web parts on a page template that is shared by multiple UI elements, the changes affect all of the resulting administration pages.
You can use object versioning to keep track of the changes made to a template, including its web part content (and roll back to previous versions if necessary).
Adding web parts
From the web part toolbar
The most direct way to add a new web part to the template is provided by the web part toolbar, which appears on the right side of the Design tab:
- Find the required web part in the toolbar’s list – you can use two approaches:
- Type the name of the web part or its part into the search box. The toolbar searches for both individual web parts and entire categories.
- Select a web part category at the top of the toolbar.
- Drag the web part from the toolbar and drop it into the desired location in one of the template’s web part zones.
Using zone actions
If you do not wish to use the toolbar, you can add new web parts into specific zones:
- Right-click the header of the required zone, or click the zone’s menu icon ().
- Click Add new web part in the menu.
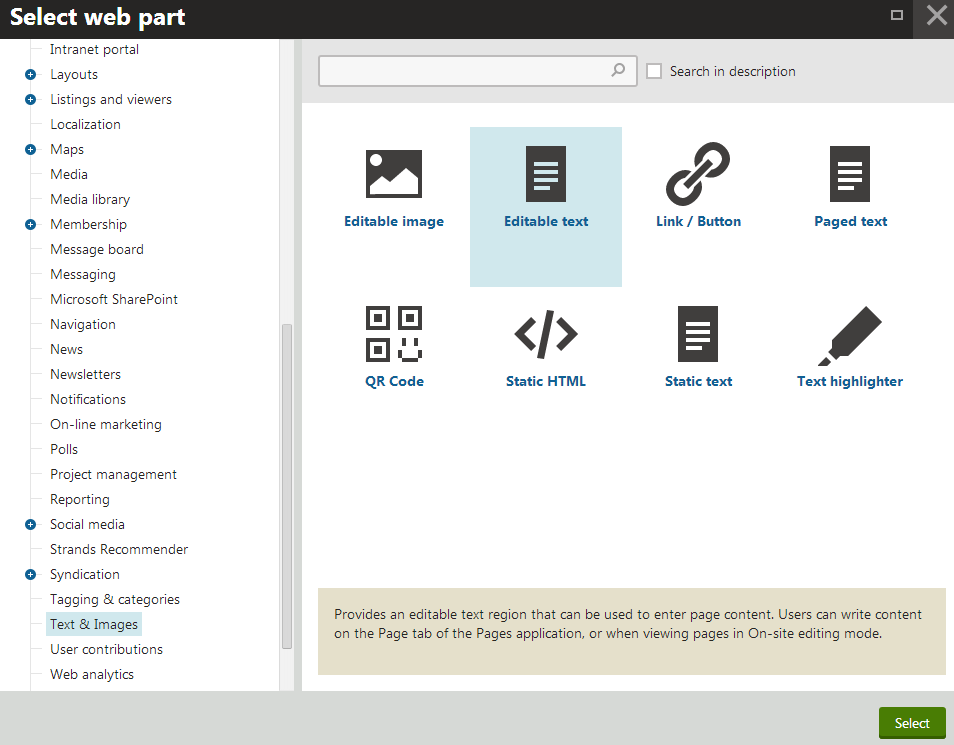
The Select web part dialog opens, which contains a catalog of all available web parts. Locate specific web parts by browsing through the category tree or using the search. Click Select to confirm your selection.
Configuring web parts
When you add a new web part instance into a zone, using either the toolbar or the zone action buttons, the Web part properties dialog opens. Here you can set up the behavior of the web part by entering values into its properties.
Note
Web parts can skip the initial configuration dialog when users add new instances. To enable this behavior for a web part:
- Open the Administration interface application and switch to the Web parts tab.
- Select the web part in the tree catalog.
- Check Skip initial configuration on the General tab.
- Click Save.
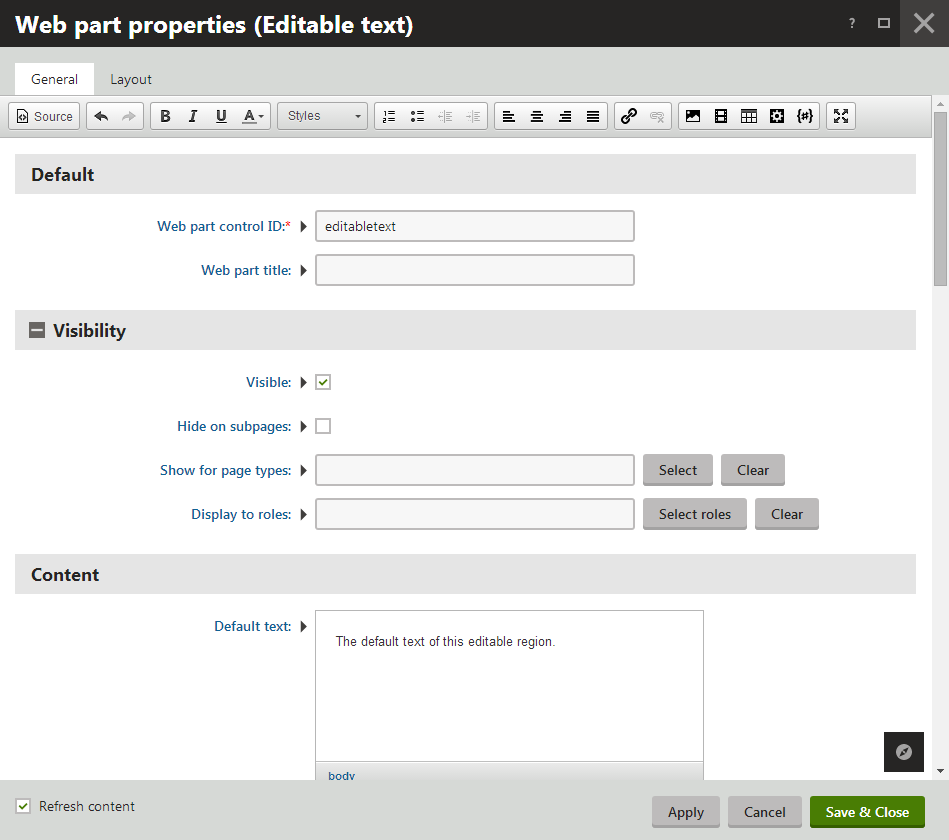
To open the configuration dialog for existing web part instances, double-click the web part’s header on the Design tab or open the web part’s menu () and select Configure. You can also edit properties for entire Web part zones by double-clicking their header.
Macros in web part properties
All web part properties support macro expressions. Macros allow you to insert dynamic values instead of constants. The system evaluates macros at run-time, so the web parts can work based on context-dependent values.
For web part properties that do not have text values (such as checkboxes), insert macro expressions by clicking Edit value () next to the given property. This opens a dialog where you can write the required macro.
Loading values from the properties of other web parts
Macro expressions allow you to connect the functionality or content of multiple web parts. By adding the following macros into properties, you can set up web parts that automatically adjust their behavior based on the configuration of other web parts or zones.
Note: The connected web parts or zones must be placed on the same page template.
- {% WebPart.GetValue(“WebPartControlID”,“PropertyFieldName”) %} – gets the value of a web part’s property. To identify the property, fill in the Web part control ID of the source web part and the Field name of the given property. You can find the field names of properties by editing web parts on the Properties tab in Administration interface -> Web parts.
Tip: To get the value of a property of the current web part, use only: {% PropertyFieldName %} - {% WebPartZone.GetValue(“ZoneId”,“PropertyColumnName”) %} – gets the value of a zone’s property. To identify the property, fill in the ZoneID of the web part zone and the column name of the given property. You can find the IDs of zones in the template’s Page layout code, and the column names of zone properties in the XML files in ~\App_Data\CMSModules\PortalEngine\Properties\WebPartZone.
When the system displays the page, the macros resolve into the values of the specified properties.
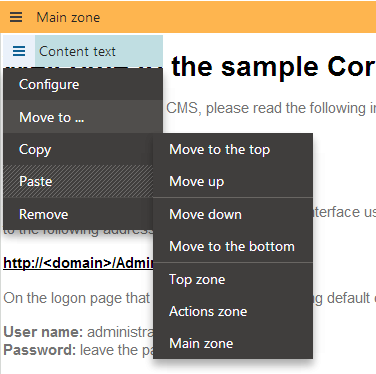
Moving web parts
To relocate a web part to different positions or to other zones, drag the web part’s header to the desired location.
Alternatively:
- Right-click the web part’s header.
- Hover over Move to.
- Select one of the options to move the web part up/down in the current zone, or to one of the other zones on the template.
To move all web parts in a specific zone:
- Right-click the header of the zone.
- Hover over Move web parts to.
- Select the target web part zone.
Copying web parts
Copying allows you to duplicate web parts and paste them into any web part zone.
You can copy:
- Individual web parts – right-click the web part’s header, click Copy
- All web parts in a zone – right-click the header of the zone, click Copy all
The system saves the web parts and their configuration into an internal component clipboard. To paste the copied web parts into a zone, choose the target location:
- At the end of the zone – right-click the header of the zone, click Paste
- Directly below a specific web part – right-click the given web part’s header, click Paste
You can paste the web parts any number of times. Copying different web parts overwrites the clipboard content. Every user in the system has their own separate clipboard.
Removing web parts
To remove existing web part instances from the page template:
- Right-click the header of a specific web part and select Remove.
- To remove all web parts in a zone, right-click the zone header and select Remove all web parts.
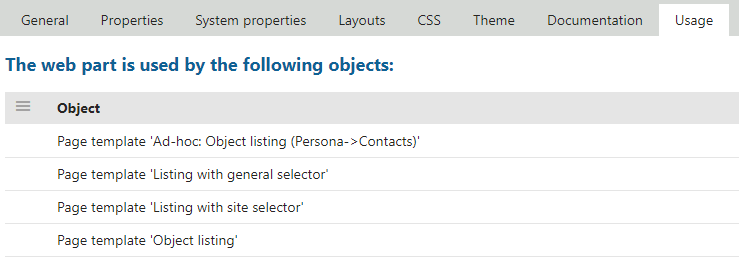
Finding where specific web parts or widgets are used
You can see which objects use a specific web part or a widget. The objects are:
Web parts
- Page templates
- Web parts – for inheriting web parts
- Widgets – for widgets based on the web part
Widgets
To find specific web part or widget usage
- Open the Web parts (or Widgets) tab in the Administration interface application.
- Select a specific web part (or widget).
- Switch to the Usage tab.
- Here, you can see listed the objects that use the web part.
Resolving web part errors
In rare cases, web part errors may prevent the Design tab from working correctly. For example due to invalid configuration of a web part or when testing custom web parts.
You can fix the page by manually editing the web part XML source of the page template:
- Open the Administration interface application and switch to the Page templates tab.
- Edit the given template.
- Open the Web parts tab.
- Remove the source of the error by editing the XML data.
- You can modify the values of properties for all web parts on the template.
- You can remove web parts from the template by deleting entire <web part> elements.
- Click Save.