
Building website navigation
Navigation is a necessary part of every website. The purpose of navigation menus is to provide an overview of the website’s content and allow visitors to easily move between pages.
Xperience stores pages in the website content tree. As a developer, you can build navigation menus by loading page data, such as page names, and using the data to generate links. The appearance of the resulting menu is fully under your control and depends on the website’s design and styling.
Website navigation menus tend to change based on the site’s current content and the requirements of its owner. This page describes how to create dynamic menus whose content can be controlled by editors in the administration interface. This approach avoids the need to frequently adjust and redeploy the site’s code due to menu updates.
The following steps outline the process for creating dynamic menus:
- Prepare page types that have the navigation feature enabled.
- Configure individual pages to be included in menus.
- Implement code in your live site application that loads the appropriate page data and displays the menu.
Your website may also require “secondary” menus that link to the same set of pages as your primary navigation. We recommend using a different approach to build such menus – see Creating secondary menus.
Enabling the navigation feature for page types
When creating new page types, select and enable the Navigation item feature (within the New page type wizard).
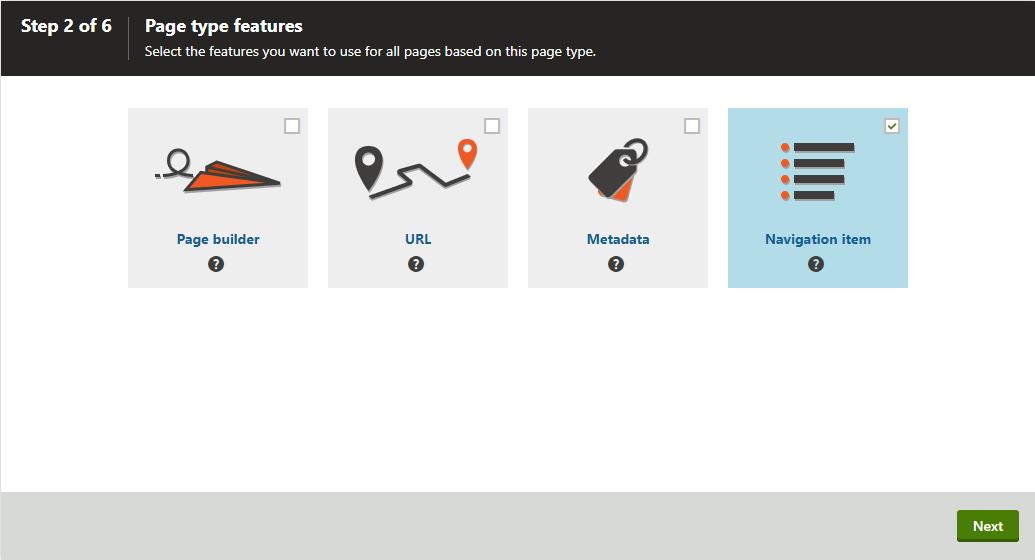
The feature allows content editors to set the Show in menu flag for individual pages of the given type, and thus control which pages from the content tree appear in navigation menus.
You can also enable or disable the Navigation item feature when editing an existing page type in the Page types application on the Features tab. Note that this may impact navigation menus on all sites in the system that have existing pages of the given type.
Choosing which pages are displayed in menus
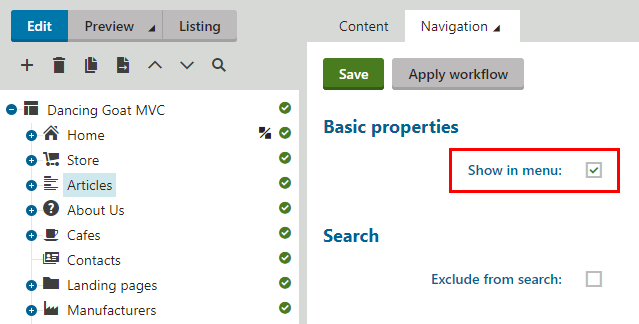
Once you have page types with the Navigation item feature enabled, content editors can control which pages of the given types are displayed in navigation menus:
- Open the Pages application.
- Select a page in the content tree.
- Switch to the Properties -> Navigation tab.
- Enable (or disable) the Show in menu option.
- Click Save.
The page now appears in menus according to the configuration (provided that the site’s developers have correctly implemented the menu functionality).
Writing the menu code
On the side of your live site application’s code, you need to retrieve page data based on the Show in menu flag, and then handle the menu’s presentation, design and behavior.
Consider the following points when loading page data for a navigation menu:
- Menus typically contain pages of multiple different page types. Call the DocumentQuery API (or use the IPageRetriever service) to load pages of all types.
- Filter pages using the MenuItems DocumentQuery method. The method ensures you only load pages for which the Show in menu flag is enabled, and also only includes pages whose page type has the Navigation item feature enabled.
- For optimal performance on sites that use content tree-based routing, add the WithPageUrlPaths method to your DocumentQuery call. The method loads pages together with their URL path data, which saves additional SQL queries when you later retrieve URLs for navigation links.
- Use additional DocumentQuery methods if you wish to limit the scope of the menu to specific sections of the content tree.
- To reflect the page order from the content tree in your menus, sort the page data according to the NodeOrder column. If you load pages from multiple levels of the content tree, sort the pages by both their NodeLevel and NodeOrder.
- On multilingual sites, load the pages according to the current culture of the active request. In scenarios where all pages on your website are not translated to all cultures, consider whether you want the menu to offer untranslated pages in the site’s default culture, via the CombineWithDefaultCulture method.
- You may wish to filter pages from menus based on their permissions and authentication requirements (hide pages that require authentication for users who are not signed in). Adjust your page query as described in Implementing page permission checks.
using System.Collections.Generic;

using CMS.DocumentEngine;
using CMS.DocumentEngine.Routing;
using CMS.SiteProvider;

// Retrieves a collection of pages (of all page types) for a menu
IEnumerable<TreeNode> menuItems =
    new DocumentQuery()
            .OnSite(SiteContext.CurrentSiteName)
            .Culture("en-US") // Gets the page in a specific culture (use the request's current culture in real-world scenarios)
            .CombineWithDefaultCulture()
            .FilterDuplicates() // Filters out any duplicates resulting from linked pages
            .MenuItems() // Gets only pages that have the "Show in menu" flag enabled
            .WithPageUrlPaths() // Loads pages together with URL path data for sites using content tree-based routing
            .OrderByAscending("NodeLevel", "NodeOrder") // Orders pages according to the content tree
            .ToList();
Caching menu item data
To improve performance, you may wish to use caching for the retrieved menu item data.
To ensure that your menus always reflect the status of the Navigation item feature configured for your page types, you need to add cache dependencies on the given page types. For example, you can use the following cache dependency keys:
- cms.documenttype|all – invalidates the cached data when any page type is modified (may be inefficient, as this includes page types not related to menus)
- cms.documenttype|byname|<page type code name> (e.g. cms.documenttype|byname|DancingGoatMvc.Home) – invalidates the cached data when the specified page type is modified
Your code should retrieve the menu item data in the form of TreeNode objects. We recommend creating a dedicated model class for menu items and using it to pass the minimum required data to your views – typically at least a text caption and a URL for the navigation link.
To get the URL of a page, obtain an instance of the IPageUrlRetriever service (for example through dependency injection in your controller constructor) and call its Retrieve method. Use the page’s TreeNode object or its alias path as the parameter of the Retrieve method.
The IPageUrlRetriever.Retrieve method returns a PageUrl object, with properties containing the given page’s URL:
- RelativePath – the virtual path of the specified page, which you can resolve to an application absolute path at runtime (for example using the UrlHelper.Content method).
- AbsoluteURL – the page’s absolute URL, including the scheme and domain name.
The URL is automatically adjusted for the current culture (i.e. any language prefixes in the URL path or the domain in the absolute URL).
using CMS.DocumentEngine;
using Kentico.Content.Web.Mvc;

public class MenuItemModel
{
    public string Caption { get; set; }
    public string RelativeUrl { get; set; }

    // Method that creates a menu item view model based on the data of a TreeNode object
    public static MenuItemModel GetViewModel(TreeNode menuItem, IPageUrlRetriever pageUrlRetriever)
    {
        return new MenuItemModel
        {
            Caption = menuItem.DocumentName,
            RelativeUrl = pageUrlRetriever.Retrieve(menuItem).RelativePath
        };
    }
}
Use the model to pass data from your controllers to the views that display the menu. For example, you can implement menus via a partial view which is then included within your site’s pages (or in the main layout).
@model IEnumerable<MenuItemModel>

<nav role="navigation">
    <ul>
        @foreach (MenuItemModel menuItem in Model)
        {
            <li>
                <a href="@Url.Content(menuItem.RelativeUrl)">@menuItem.Caption</a>
            </li>
        }
    </ul>
</nav>
Creating secondary menus
Websites often provide additional menus that contain page links, but are not the primary navigation tool. For example, such menus can appear in the site footer or in page sidebars. The pages included in secondary menus typically overlap with the primary navigation, but do not mirror it exactly.
We recommend leveraging the Reusable pages feature to create secondary menus, as described in the following steps:
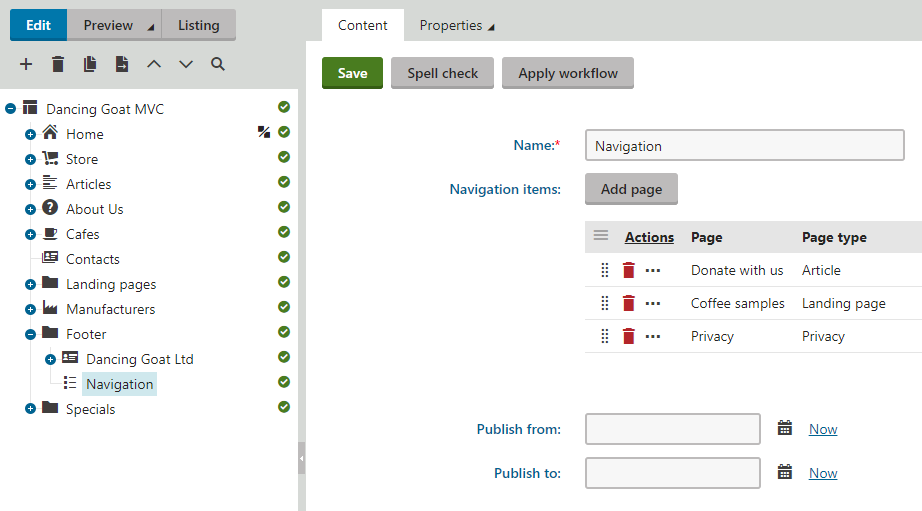
Prepare a page type representing a navigation menu, with a field of the Pages data type. See Reusing existing page content for details.
Create a page of the given type in your site’s content tree for every secondary menu (in the Pages application).
- Editors can then select pages for the menu on the page’s Content tab. See Reusing other pages when editing content.
- Editors can then select pages for the menu on the page’s Content tab. See Reusing other pages when editing content.
In your live site application’s code, retrieve the data of the pages selected for the menu. See Displaying reusable content and related pages.
Use the approach described for primary navigation menus to get the page URLs for links and display the menu (call the IPageUrlRetriever.Retrieve method).
By creating secondary menus using this approach, you allow content editors to separately choose the pages for each menu without affecting the primary navigation. Additionally, you ensure that all menus on your site have the same URL for links to the same page.