
Kentico Xperience Service Manager
Kentico Xperience Service Manager is an external Windows utility which allows you to manage external Windows services used by Xperience. Via the utility, you can:
- Install
- Uninstall
- Start
- Stop
- Restart
Windows services for individual instances of Xperience. You can perform the installation and uninstallation of Windows services from the command line and stop and restart them from Windows Service manager (services.msc). However, this utility integrates these tasks into a single tool, where you can manage Xperience services separately from other services running in Windows.
Launching the utility
Kentico Xperience Service Manager is automatically installed with Xperience installations. There are two ways to launch the Kentico Xperience Service Manager:
From Windows
- Launch the Kentico Xperience Service Manager from Windows Start menu.
- Select the root of the Xperience instance, whose services you want to manage, in the Browse For Folder dialog box.
- Click OK.
From KIM
- Run Kentico Xperience Installation Manager.
- Select an instance of Xperience.
- Click the Services button on the toolbar.
Using the utility to manage Xperience services
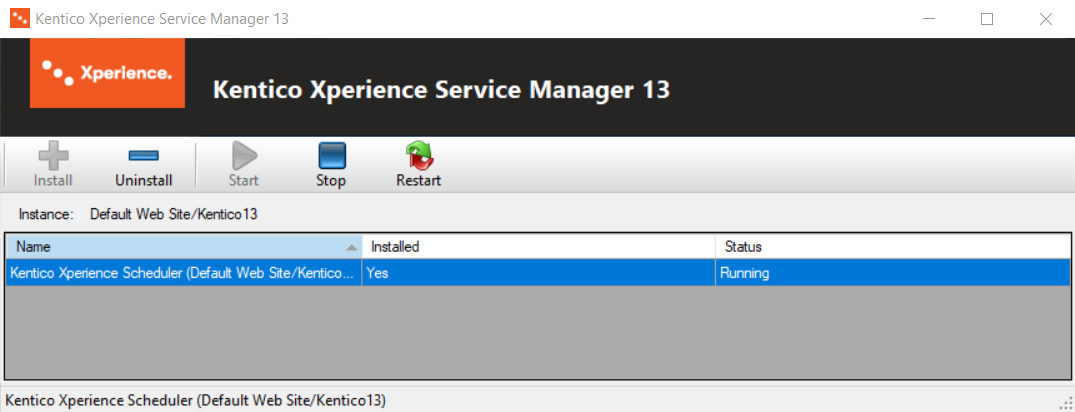
After launching the utility (and successful selection of the managed Xperience instance when launched from Start menu), available services are listed in the main area. The following information is listed for each services:
- Name – name of the Windows service in format <service name> (<CMSApplicationName web.config key value>).
- Installed – shows if the service is installed or not.
- Status – shows if the service is running or stopped, or intermediate statuses when the service is being started, stopped or restarted.
If you select a service in the listing, the following management actions are available in the top toolbar. The same actions are also available in a context menu accessible by right-clicking a service.
- Install – installs the selected service. Only available if the service is not installed.
- Uninstall – uninstalls the selected service. Only available if the service is installed.
- Start – starts the selected service. Only available if the service is installed and not running.
- Stop – stops the selected service. Only available if the service is installed and running.
- Restart – restarts the selected service. Only available if the service is installed and running.
Defining custom services in the definition XML file
All Windows services that can be managed by Kentico Xperience Service Manager are defined in ~/App_Data/CMSModules/WinServices/services.xml file. If you want to add a custom service, which should work with the respective Xperience instance, you have to define it in this file.
The XML has a root <Services> element containing any number of <Service> elements, each of which represents a single Windows service. Each <Service> element contains the following sub-elements:
- <basename> – identifying name of the service, identical for all instances of Xperience.
- <name> – the same as <basename>, with the {0} part appended. The {0} part gets replaced with the value of the CMSApplicationName or alternatively CMSApplicationGuidweb.config keys to differentiate services of particular Xperience instances.
- <displayname> – name of the Windows service in friendly format, displayed in user interfaces of Windows Services manager (services.msc) and Kentico Xperience Service Manager.
- <description> – text describing the functionality provided by the service.
- <assemblyname> – name of the service’s executable file stored inside the bin folder in the application root.
Here you can see the default content of the services.xml file with the Scheduler service defined.
<?xml version="1.0"?>
<Services>
  <Service>
    <basename>KenticoCMSScheduler</basename>
    <name>KenticoCMSScheduler{1}</name>
    <displayname>Kentico CMS Scheduler ({0})</displayname>
    <description>
        Processes Xperience scheduled tasks that have the 'Use external service'
        option enabled. Processing is performed in regular intervals and only
        tasks with the mentioned option enabled are processed by the service.
    </description>
    <assemblyname>SchedulerService.exe</assemblyname>
  </Service>
</Services>
Problems with required web.config keys
Xperience Windows services require the CMSApplicationName or CMSApplicationGuid keys to be added in the configuration file of the related project (web.config or appsettings.json file by default). The values of these keys are used in the names of the Windows services and for identification of the Xperience instance. These keys are included in the configuration file of new installations by default. If neither of the two keys is present for the selected instance (after being removed manually), you will encounter an error message with two options.
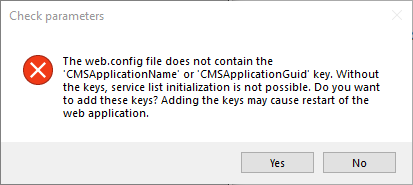
- Yes – the Service Manager generates and adds the keys so that services can work with the selected Xperience instance.
- No – services cannot be managed for the selected instance. In this case, you can select another instance after clicking Select on the toolbar.