
Administration interface UI tests
UI tests, or user interface tests, are a type of software testing that checks whether the user interface of an application or system behaves as expected.
UI tests can be performed manually or automated. Manual testing involves a human tester going through individual scenarios in the application’s user interface, and interacting with the controls and elements to verify their behavior. Automated testing, on the other hand, involves using software tools to automate the testing process.
This page focuses on the automated aspect of UI testing in Xperience, specifically in the administration interface. Writing UI tests is a good practice when introducing customizations or changes to the administration UI. Failing tests can help discover incorrect behavior early in development and mitigate regression in existing functionality.
UI test support in the admin UI
To facilitate the creation of UI tests, HTML elements in the admin UI have a data-testid attribute that contains a static identifier of the component. This identifier is identical for each instance of the same component on a page. For example:
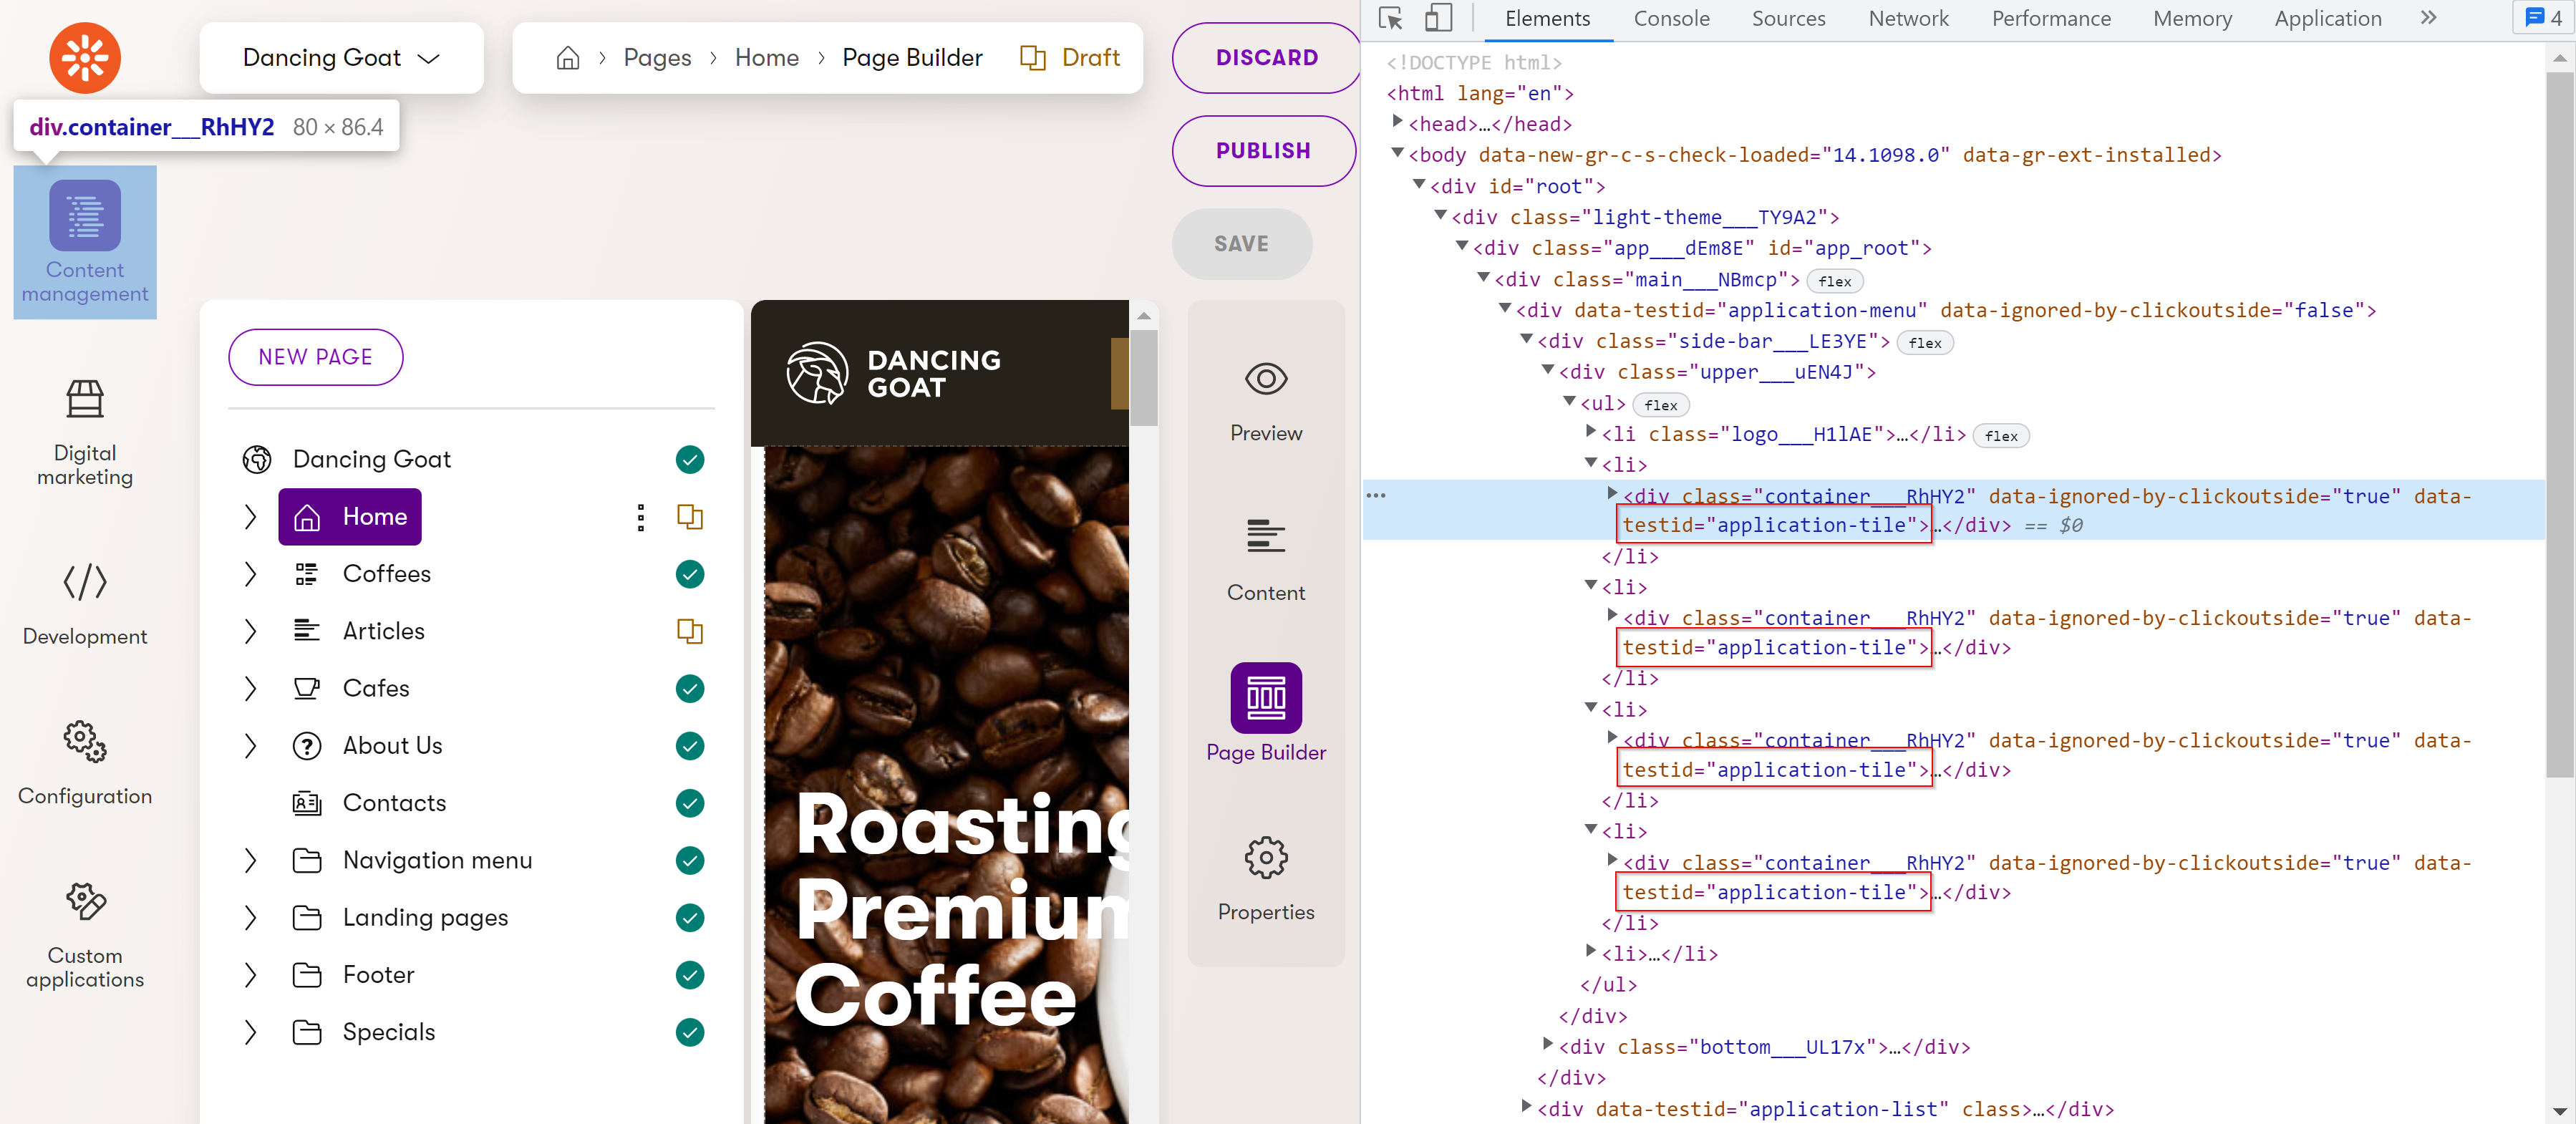
As you can see, all of the application tile components have identical data-testid attribute values. This allows UI tests to select desired elements that could otherwise only be identified via a random string generated by React.
The data-testid attribute is generated via a dataTestId prop on Xperience components. Using the Input component from \@kentico/xperience\-admin\-components as an example:
import { Input } from '@kentico/xperience-admin-components';

...

<Input markAsRequired={props.required}
                    invalid={props.invalid}
                    label={props.label}
                    value={name}
                    onChange={onNameChange}
                    disabled={props.disabled}
                    dataTestId="cool-input" />
The Input component when used as shown above, renders with data-testid="cool-input".
Supported testing flows
The admin UI currently supports only end-to-end (E2E) testing. Creating UI tests for individual React components (so-called Component testing) is not possible.
Cypress
We recommend using Cypress to UI test the Xperience administration interface. Cypress is a modern, open-source, JavaScript-based testing framework designed for E2E testing of web applications. See the Cypress documentation for a general introduction and overview of the framework.
To use Cypress in your admin UI modules, add it as a dependency via package.json.
"devDependencies": {
    "cypress": "^12.x.x"
}
Running npx cypress open from the root of your module now opens the Cypress GUI. You can see that bothE2E Testing and Component Testing are not configured. Select E2E Testing. This generates the cypress.config.js file and the cypress folder in the root of your module. Open the config file and add the baseUrl line as shown in the following snippet:
const { defineConfig } = require("cypress");

module.exports = defineConfig({
  // Configures Cypress for E2E testing
  e2e: {
    // Set 'baseUrl' to the domain URL:port where your Xperience web app is running
    baseUrl: 'http://localhost:18651',
    setupNodeEvents(on, config) {
      // implement node event listeners here
    },
  },
});
Run npx cypress open again. The E2E Testing mode is now configured, and you can start writing UI tests.
Example Cypress UI test
This section demonstrates creating and running a simple UI test using Cypress. The UI test navigates to the CustomApp application provided with the admin boilerplate project, selects the Get server time button, and checks that the server returned a response.
In the cypress folder, create a new e2e folder. Inside the folder, create a new tests.cy.js file and copy the following code:
describe('template spec', () => {
  it('tests CustomApp functionality', () => {
    // Signs in to the administration using specified credentials
    cy.login('administrator', 'admin')

    // Opens the admin UI dashboard
    cy.visit('/admin')

    // Opens the 'Custom' application list
    cy.obtain('application-tile').contains('Custom').click()

    // Opens 'CustomApp'
    cy.obtain('application-list-item').contains('CustomApp').click()

    // Selects the 'Get server time' button
    cy.obtain('button').contains('Get server time').click()

    // Checks that the label changed to display the server time
    cy.get('h1').should('not.contain', 'Click the button to get server time.')
  })
})
In the code above, the login and obtain are custom commands intended to simplify working with Xperience. They are not provided as part of the standard Cypress API. Define them in the commands.js file, in ~/cypress/support. See Custom commands for more information.
// Gets all elements with the specified testid
Cypress.Commands.add('obtain', (id) => {
  return cy.get(`[data-testid='${id}']`);
})

// Signs in to the admin UI
Cypress.Commands.add('login', (username, password) => {
  cy.session(
    username,
    () => {
      cy.visit('/admin')

      cy.obtain('userName').type(username)
      cy.obtain('password').type(`${password}{enter}`, { log: false })

      cy.url().should('include', '/dashboard')
    },
    {
      validate: () => {
        cy.getCookie('.AspNetCore.Xperience.Application').should('exist')
      },
    }
  )
})
To run the test:
- Start your Xperience application with the admin UI module mounted.
- Run
npx cypress open. - Select E2E Testing.
- Select the browser to use.
- Select Start testing in <selected browser>.
- Select tests.cy.js.
The test now runs in the selected browser.