Headless content
Headless content items store content that is intended for distribution to channels outside of the system through a headless API (GraphQL). This way, you can consolidate your various channels, like mobile apps, web apps, kiosks, etc. into the Xperience ecosystem. When modeling headless content, one headless item usually represents one unit of the presentation layer (page, screen, navigation, etc.) in the channel to which you provide the data.
Headless items for each channel are managed in respective headless channel applications – by default, the name of the application corresponds to the name of the channel. The application enables you to create, delete or edit the content and properties of headless items. It also provides intuitive headless item life cycle management.
Create headless items
To create a new headless item:
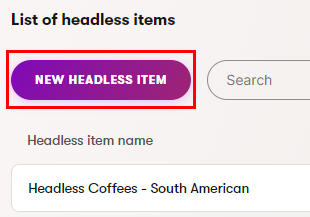
- Open a headless channel application.
- Select New headless item.
- Enter the headless item name.
- Select a content type from the list of available content types.
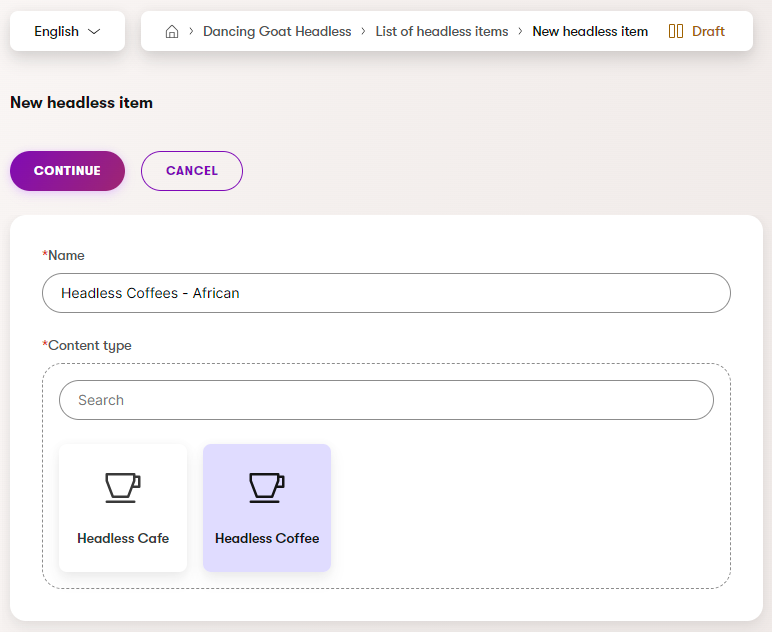
- Select Continue.
- Enter the values required by the selected content type.
- In many cases, headless items will have fields that allow you to add content by selecting reusable content items (blocks of text, images, etc.). See Content hub to learn more. When selecting reusable content items, note that secured items with the Requires authentication flag enabled are not included in headless content.
- Save or Publish the new headless item.
- Saving creates a Draft version of the headless item.
- Publishing immediately sets the headless item to the Published status.
The headless item is now created. Keep in mind that only Published items are available through the headless API.
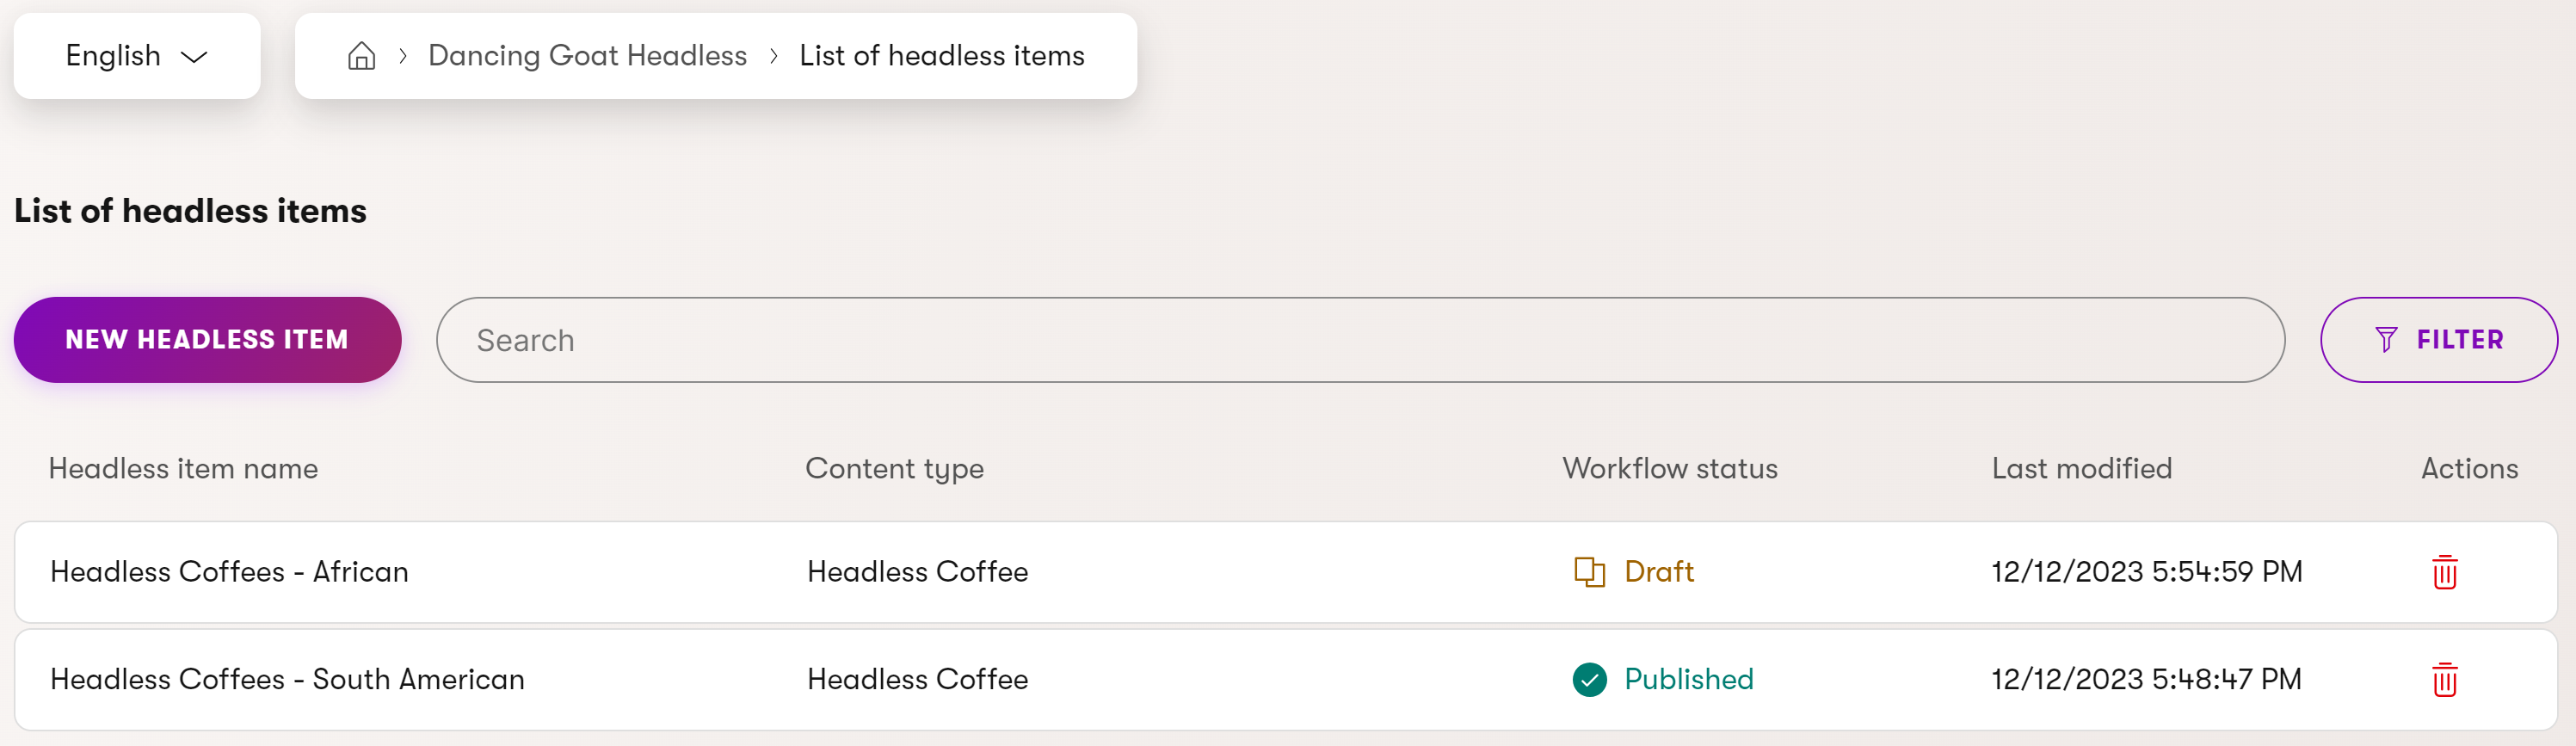
Find headless items
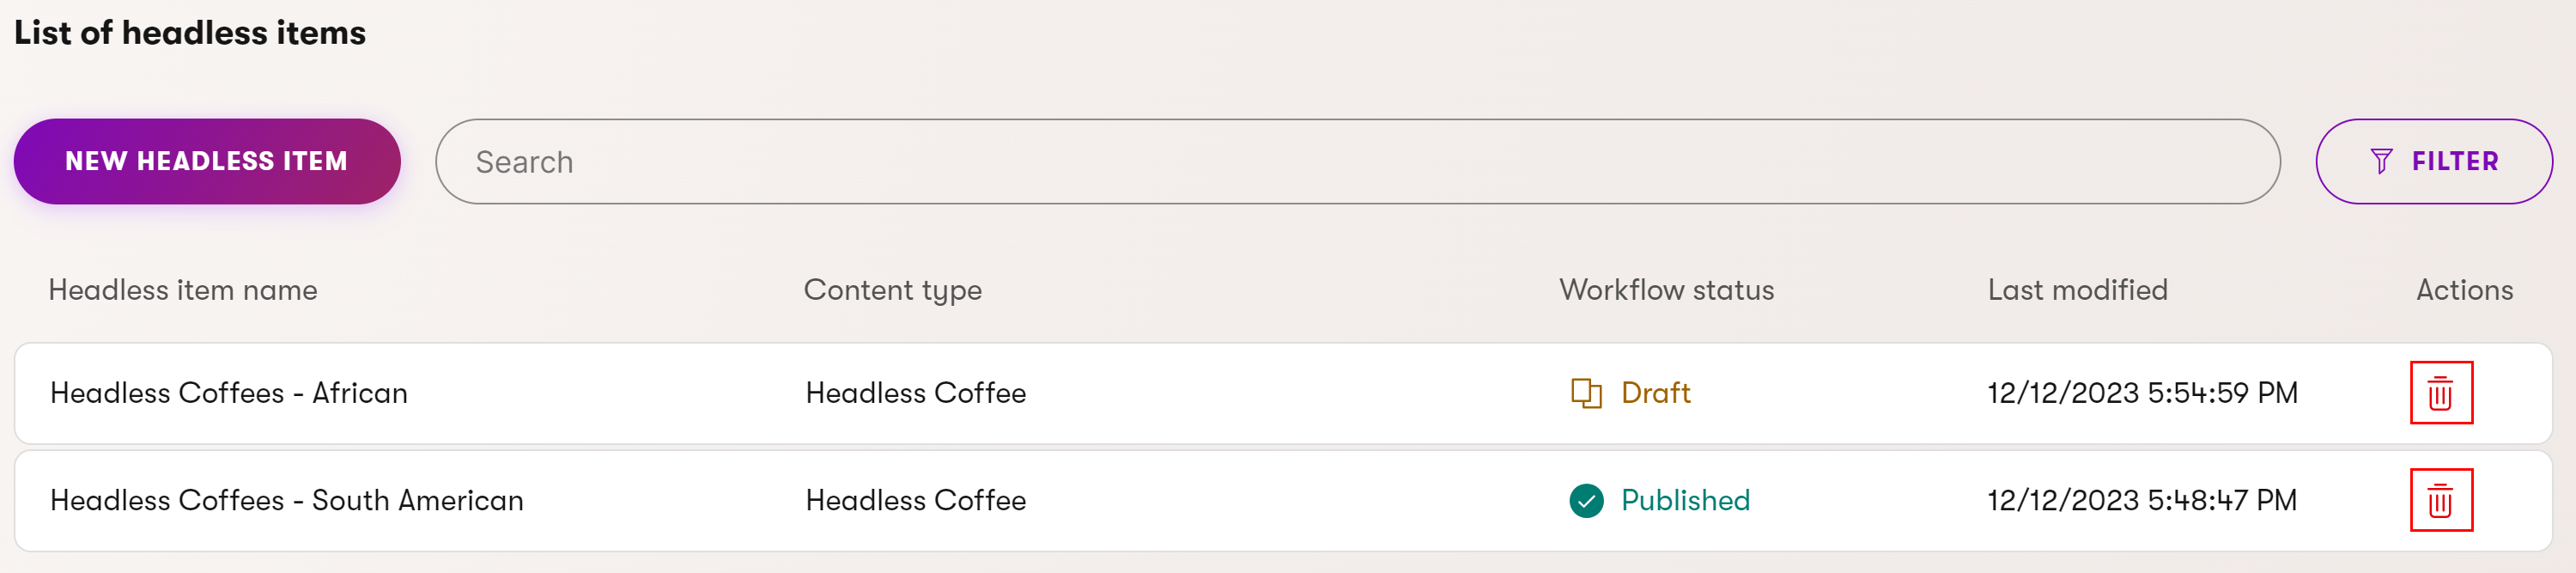
A headless channel application may contain a large number of headless items. The search bar allows you to find headless items with a name or content type matching the entered text.
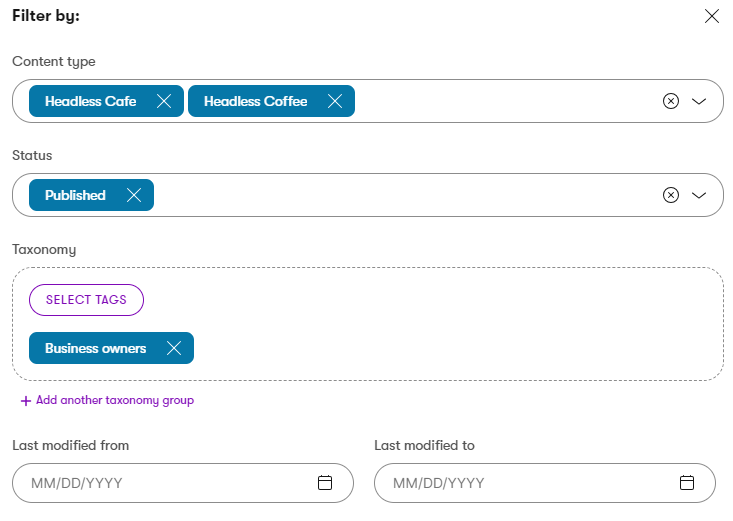
You can also Filter the list of headless items to display only selected content types or items with specific statuses.
Edit headless items
To edit a headless item:
- Open a headless channel application.
- Select the headless item you want to edit.
- Use the search bar or filter to find headless items.
- If you have multiple languages set up, select the language in which you want to edit the headless item from the language switcher.
- Make sure the headless item is in the Draft status or another custom workflow step.
- When a headless item is Published, select Edit item to move the headless item to the Draft step.

- When a headless item is Archived, select Create new version to move the headless item to the Draft step.

- When a headless item is Published, select Edit item to move the headless item to the Draft step.
- Edit the fields of the headless item.
- Save the changes.
The headless item is now edited.
Preview headless items
As headless content can have different presentations on multiple platforms, it is not possible to include a preview of headless items directly within Xperience. To see how your content will appear on a specific platform, you need to preview the content directly in the target environment.
You can use the Preview button to quickly get to your preview environment. The button links to a single URL, as it is not currently possible to assign a specific URL for each headless item separately.
However, before you can make use of the Preview button, you need to ask your administrators to set up a Preview URL in the channel settings. The button is present only once the Preview URL is set up.
Revert changes made to a headless item
After creating a new version of a headless item, the item goes through a new editing cycle with the Draft step and optionally other custom workflow steps.
At any time before the new version is published, you can revert the item back to the last Published status. All changes made in any workflow step will be lost.
- Open a headless channel application.
- Select the headless item whose changes you want to revert.
- Use the search bar or filter to find headless items.
- Expand the Publish or Change workflow step menu.
- Select Revert to published to revert the changes.

The headless item is now reverted to its Published status.
Publish headless items
Headless items can be published under the following conditions:
- If the headless item’s content type is under workflow, the item must be in the workflow’s last step.
- For headless items that are not under workflow, the item must be in the Draft step.
In order to publish a headless item:
- Open a headless channel application.
- Select the headless item you want to publish.
- Use the search bar or filter to find headless items.
- Make sure the headless item is in the Draft status or the last step in a custom workflow.
- When a headless item is Archived, select Create new version to move the headless item to the Draft step.
- When a headless item is Archived, select Create new version to move the headless item to the Draft step.
- Publish the headless item. For items under workflow, select Change workflow step and choose the Publish step.
If the headless item has fields linking to reusable content items, the Select what should be published dialog opens. You can view all linked content items that are currently not Published. Select any of the listed content items to publish them together with the headless item. To learn more about cascade publishing, see Content hub.
Cascade publishing is only supported for reusable content items (managed in Content hub). Headless items or pages linked in fields with the Headless items or Pages data type are not included in the Select what should be published dialog.
The headless item is now Published and available through the headless API.
Translate headless items
Before you can translate individual content items in your project into other languages, you need to set those up in the Languages application. For detailed info on how to configure multiple languages in Xperience, see Languages.
Afterward, you can start to translate and create language variants of your items:
Open a headless channel application.
In the header bar, open the language switcher.

The language switcher is available only if two or more languages are set up.
Select the language to translate headless items into.
Select the headless item to translate.
Use the search bar or filter to find headless items.
Untranslated pages are visually marked by the Not translated () status.
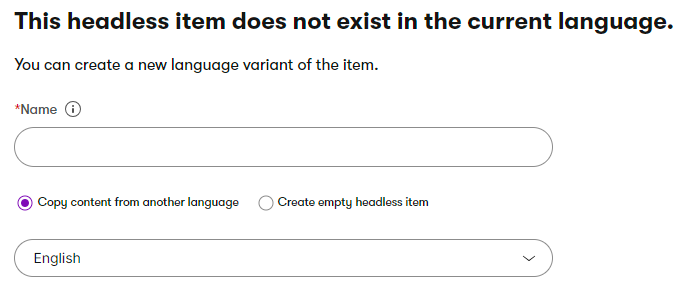
Enter the translated name of the headless item. You can now choose one of the following options:
- Copy content from another language is the preselected option. By default, the closest language in the fallback chain is preselected. You can choose a different language from the drop-down list. This option lets you prefill the headless item fields with the content available in the chosen language. If a linked headless or content item does not have a translated or published version, a warning will be displayed, and a fallback language variant of the item will be used.
- Create empty headless item allows you to create an empty headless item with blank fields. Linked headless and content items need to be re-linked, and files need to be re-uploaded into the new language variant of the translated headless item.
Select Continue.
Enter the translated values of the headless item’s fields.
Save the translated content item.
You have now successfully translated the headless item. Note that the new language variant is now only a Draft until you publish it.
Archive headless items
Archived headless items are not available through the headless API, but you can still access them from the administration.
To archive a headless item:
- Open a headless channel application.
- Select a headless item you want to archive.
- You can only archive Published headless items. See how to publish headless items.
- Use the search bar or filter to find headless items.
- Archive the headless item.

The content item is now Archived.
To edit or re-publish an archived headless item, use the Create new version action for the headless item. This creates a new version of the item in the Draft step.
Delete headless items
Deleting a headless item is a non-reversible action. Once you delete the item, it cannot be recovered.
To delete a headless item:
Open a headless channel application.
Locate the headless item you want to delete.
- Use the search bar or filter to find headless items.
Delete() the headless item.
You have successfully deleted the headless item.
If you have translated the headless item into multiple languages, this process deletes only the current language variant of the item. In order to delete the headless item completely, you need to delete its variants in all languages. Deleting the last language variant of the headless item deletes it permanently from the system.
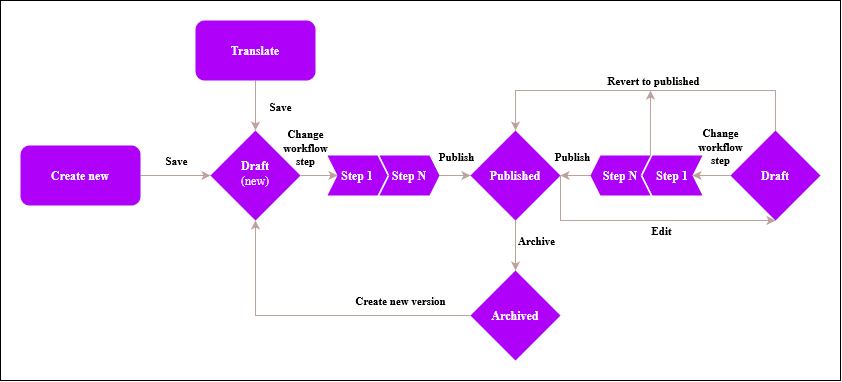
Headless items life cycle
Headless items can have one of the following statuses:
Draft (initial) – new headless items that have not been published yet.
- Can only be accessed through the headless API when using an API key with the Headless content - Draft access type.
Published – headless items that are ready for use.
- You can query published items using the headless API.
Draft – headless items that have already been published, but a new version is being edited.
- Can only be accessed through the headless API when using an API key with the Headless content - Draft access type.
- If queried with an API key using the Headless content - Published access type, the previously published version is returned.
Custom workflow step (the item is being edited, “between” the Draft and Published status)
- The item is accessible via the headless API as described for the Draft status.
Archived – headless items that used to be published but are no longer available through the headless API.
Not translated – headless item that are not yet translated into the currently selected language.
- If language fallbacks are set up, the headless items are accessible through the headless API in their fallback variants.
The following diagram illustrates the default headless items life cycle in a simplified way: