
Rich text editor plugins
The Froala rich text editor available in the admin UI allows you to integrate custom functionality in the form of plugins.
In Xperience’s implementation of Froala, plugins are stored in React components that are loaded as requested based on the configuration of the instantiated editor.
To customize the editor you can:
Default Xperience plugins
Xperience contains several Froala plugins by default. These plugins are available when the rich text editor is used within certain parts of the administration, for example when editing content items in the Content hub application or pages under a website channel.
You can also use the default plugins when creating your own editor configurations.
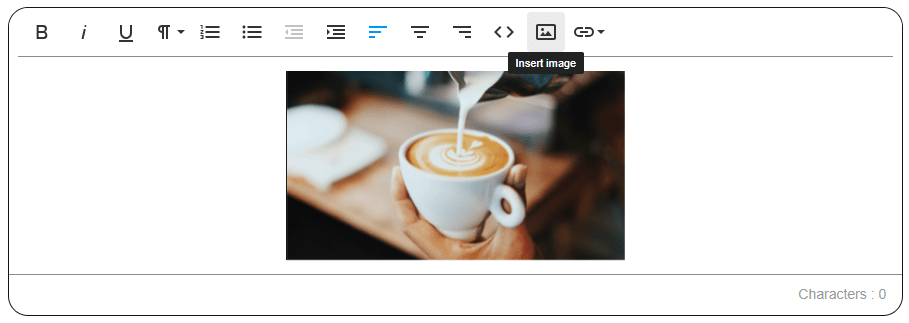
Asset plugin
Allows editors to select image files stored as content item assets, and insert them into the rich text content.
- Toolbar button command name:
insertAsset - Plugin name:
@kentico/xperience-admin-base/Asset
{
  "toolbarButtons": [
    ...
    "insertAsset"
  ],
  ...
  "customPlugins": [
    {
      "pluginName": "@kentico/xperience-admin-base/Asset"
    },
    ...
  ]
}
Link plugin
Allows editors to insert various types of links into the rich text content.

- Toolbar button command name:
insertLinkDropDown - Plugin name:
@kentico/xperience-admin-base/Link
You can configure which types of links are offered when the Insert link button is selected in the editor. Add pluginOptions configuration with one or more of the options shown below.
asset– links to files stored as content item assets.external– links to any manually entered URL.webpage– links to pages created under a web channel.
If the pluginOptions is ommited, the link plugin uses all of the available options.
{
  "toolbarButtons": [
    ...
    "insertLinkDropDown"
  ],
  ...
  "customPlugins": [
    {
      "pluginName": "@kentico/xperience-admin-base/Link",
      "pluginOptions": {
        "dropdownOptions": [
          {
            "linkOption": "asset",
            "componentName": "@kentico/xperience-admin-base/AssetPanel"
          },
          {
            "linkOption": "external"
          },
          {
            "linkOption": "webpage",
            "componentName": "@kentico/xperience-admin-websites/PageLink"
          }
        ]
      }
    }
  ]
}
Add existing community plugins
To add existing plugins to the editor (for example, from the plugin gallery on Froala’s website).
Most of the plugins available in Froala’s plugin gallery are already bundled within Xperience. To use such plugins, just enable them in the editor configurations.
To distinguish whether a plugin is bundled or not, e.g., check the format of the plugin’s JavaScript URL on the plugin’s site:
- …/js/plugins/<plugin_name>.min.js – bundled plugins
- …/js/third_party/<plugin_name>.min.js – plugins that need to be added by following the steps below
Download and modify the plugin files
Download the plugin resource files (typically a JavaScript file and a CSS file).
Open the plugin’s JavaScript file and make the following modifications:
 /* All Froala plugins begin with the following call that attempts to find a Froala instance inside linked JS files and attach the plugin to it (variable names can differ per file based on minification). This approach is not supported for the Xperience administration. */
 !function(e,c){"object"==typeof exports&&"undefined"!=typeof module?c(require("froala-editor")):"function"==typeof define&&define.amd?define(["froala-editor"],c):c(e.FroalaEditor)}(this,function(S){...

 // To make the plugin load correctly, replace
 "object"==typeof exports&&"undefined"!=typeof module?c(require("froala-editor")):"function"==typeof define&&define.amd?define(["froala-editor"],c):c(e.FroalaEditor)

 // With
 c(e.FroalaEditor)
 // Where FroalaEditor is the Froala editor instance exposed by the admin application

 // Modified output
 !function(e, c){c(e.FroalaEditor)}(this, function(S){...
Create a React component to load the plugin
Create a custom JavaScript module for the admin UI.
- Use the provided boilerplate project to simplify the set up. Make sure the project has the Kentico.Xperience.Admin NuGet package installed so it can access admin UI-related APIs.
Create a new React plugin component to load the plugin resource files.
 import React from 'react';
 import { RichTextEditorPluginProps } from '@kentico/xperience-admin-components';

 // Imports the plugin into the component as a dependency
 // This example loads the resources of the Embedly integration downloadable from the Froala plugin gallery
 import './embedly.min.js';
 import './embedly.min.css';

 // The component must be named 'PluginName' + 'RichTextEditorPlugin'
 // Xperience uses this convention to load requested plugins
 export const EmbedlyWrapperRichTextEditorPlugin = ({} : RichTextEditorPluginProps) => {
     return ();
 };
Export the component from the module.
entry.tsxexport * from './path/to/EmbedlyWrapperRichTextEditorPlugin';Add the plugin component to an editor configuration. Specify the component name without the RichTextEditorPlugin suffix.
The example extends an editor configuration to load the EmbedlyWrapperRichTextEditorPlugin component.
EditorConfiguration.json{ "toolbarButtons": [ "bold", "italic", "underline" ], ... "customPlugins": [ { "pluginName": "@orgName/projectName/EmbedlyWrapper" } ] }
The plugin is now available for use within editors that use the given configuration.
Implement custom plugins
The following general process outlines custom plugin development for the Xperience Froala implementation:
See the example at the bottom of this page for a step-by-step process that demonstrates how to implement a simple plugin and add it to an editor configuration.
- Create a custom JavaScript module for the admin UI.
- Use the provided boilerplate project to simplify the set up. Make sure the project has the Kentico.Xperience.Admin NuGet package installed so it can access admin UI-related APIs.
- Within the module, create a new file for the plugin code.
- Create a React component stub and a corresponding properties interface.
Plugin components must use a properties interface derived from
RichTextEditorPluginProps.Plugin component skeletonimport React, { useEffect } from 'react'; import { RichTextEditorPluginProps } from '@kentico/xperience-admin-components'; export interface CustomRichTextEditorPluginProps extends RichTextEditorPluginProps { } // The component must be named 'PluginName' + 'RichTextEditorPlugin' // Xperience uses this convention when loading requested plugins export const CustomRichTextEditorPlugin = ( {froalaEditorConfigurator} : CustomRichTextEditorPluginProps) => { useEffect(() => { // Call froalaEditorConfigurator methods within a 'useEffect' React Hook // to ensure correct behavior with multiple rich text editor instances on the same page }, [froalaEditorConfigurator]); return ( <></> ); }
RichTextEditorPluginPropsprovides properties that allow you to register plugins and use the API of the underlying Froala editor instance.froalaEditorConfigurator– contains global FroalaEditor API for plugin registration and other functionality as demonstrated in the Froala documentation.
The object provides the following methods:Method
Description
registerCommandDefines a new command for the editor (button, drop-down list, etc.). For more information and available options, see, for example, Custom Button.
defineIconDefines a new icon. Supports the text, image, and svg icon templates defined in the editor by default. See Custom Icons.
enableButtonEnables a button with the given name.
disableButtonDisables a button with the given name.
To ensure correct behavior of custom plugins on pages with multiple rich text editor instance, call the
froalaEditorConfiguratormethods within a React useEffect Hook.froalaEditorRef– points to the instance of the underlying Froala editor object. Get the current editor instance usingfroalaEditorRef.current.editor. For example,froalaEditorRef?.current?.editor?.html.get()selects all markup in the editor. For a reference of the available API, see Methods and Events.inputRef– points to an Xperience wrapper of the Froala editor that provides customized methods for inserting images and links and for executing UI form component commands from within the plugin.
The following snippet shows the basic structure of Froala plugins in Xperience:
import React, { useEffect } from 'react';
import { RichTextEditorPluginProps } from '@kentico/xperience-admin-components';

// Any required properties must extend 'RichTextEditorPluginProps'
export interface CustomRichTextEditorPluginProps extends RichTextEditorPluginProps {
}

// The component must be named 'PluginName' + 'RichTextEditorPlugin'
// Xperience uses this convention when loading requested plugins
export const CustomRichTextEditorPlugin = ({

    // Exposes registration API for plugins
    froalaEditorConfigurator,

    // Contains a reference to the underlying Froala editor object
    froalaEditorRef,

    // A reference to an Xperience wrapper for the Froala editor
    // contains customized support for inserting images and links (ensures correct URL format)
    // and for executing UI form component commands from within the plugin
    inputRef
} : CustomRichTextEditorPluginProps) => {
    // Call froalaEditorConfigurator methods within a 'useEffect' React Hook
    // to ensure correct behavior with multiple rich text editor instances on the same page
    useEffect(() => {
        // The name of a custom icon
        const iconName = 'customIcon'

        // The name of a command/action
        // Used to reference the command/action from editor configurations
        const commandName = 'customButton';

        const buttonName = 'Click me!';

        // Defines an icon
        froalaEditorConfigurator?.defineIcon(iconName, {NAME: 'star'});

        // Defines a custom action
        froalaEditorConfigurator?.registerCommand(commandName, {
            title: buttonName,
            icon: iconName,
            // Runs when the button representing the plugin is selected
            callback: async () => {
                window.alert("It works!");
                // Command code to execute
            }
        });
    }, [froalaEditorConfigurator]);

    return (
        // Markup inserted to the page by the plugin (e.g., an input dialog that opens when a button is selected)
        <>
        </>
    );
};
Add custom plugins to rich text editor configurations
To make custom plugins available within editor instances, you need to load them inside editor configurations:
- To add a toolbar button for the plugin, reference the plugin via the registered
commandNameunder thetoolbarButtonsarray (customButtonin the example below). - Load the plugin via the
customPluginsarray.
{
   "toolbarButtons": [
    "bold",
    "italic",
    "underline",
    "customButton"
   ],

    ...

    "customPlugins": [ { "pluginName": "@orgName/projectName/Custom" }, { "pluginName": "@orgName/projectName/<PluginName>" } ]
}
Example - Create a custom button
The following example shows how to create a simple plugin that replaces occurrences of the pronoun ‘you’ with ‘thou.’
Create a custom JavaScript module for the admin UI.
- Make sure the project has the Kentico.Xperience.Admin NuGet package installed so it can access admin UI-related APIs.
In a suitable location within the module, create a new file: ArchaicPronounsRichTextEditorPlugin.tsx
Copy and paste the following code into the file:
 import React, { useEffect } from 'react';
 import { RichTextEditorPluginProps } from '@kentico/xperience-admin-components';

 export interface ArchaicPronounsRichTextEditorPluginProps extends RichTextEditorPluginProps {
 }

 export const ArchaicPronounsRichTextEditorPlugin = ({froalaEditorConfigurator, froalaEditorRef} : ArchaicPronounsRichTextEditorPluginProps) => {
     useEffect(() => {
         const pluginIconName = 'archaicPronounsIcon';
         const buttonName = 'Archaify!';
         const commandName = 'archaicPronouns';

         froalaEditorConfigurator?.defineIcon(pluginIconName, { SVG_KEY: 'smile' });
         froalaEditorConfigurator?.registerCommand(commandName, {
             title: buttonName,
             icon: pluginIconName,
             undo: false,
             focus: true,
             showOnMobile: true,
             refreshAfterCallback: true,
             callback: async () => {
                 var htmlContent = froalaEditorRef?.current?.editor?.html.get();
                 htmlContent = htmlContent.replace(/you/gi, 'thou');
                 froalaEditorRef?.current?.editor?.html.set(htmlContent);
             }
         });
     }, [froalaEditorConfigurator, froalaEditorRef]);

     return (
         // No markup to return, the plugin requires only existing content
         <>
         </>
     );
 };
Export the component from the module:
entry.tsxexport * from './path/to/ArchaicPronounsRichTextEditorPlugin';The plugin is now ready to be loaded by the Xperience administration. You can include it in a chosen editor configuration using the
customPluginsarray:In the
customPluginsconfiguration, replaceorgNameandprojectNamewith your own values. By default, the boilerplate project usesAcmeandWeb.Adminrespectively.Editor configuration JSON{ "toolbarButtons": [ "bold", "italic", "underline", "archaicPronouns" ], ... "customPlugins": [ { "pluginName": "@orgName/projectName/ArchaicPronouns" } ] }
The plugin is now available under the registered custom button within editors using the modified configuration.