
Manage website content
Content is your number one digital marketing asset. Using it effectively stands at the core of managing digital experiences.
Xperience by Kentico can serve as a content repository for all your digital marketing content. Xperience applications can power up different marketing activities – from sharing your business information and increasing brand awareness to promoting new services on campaign pages.
You will learn about:
You will be working on:
Kentico Xperience’s intuitive interface and reusable components helped editors of the Be There charity launch a best-in-class website that brought 300k unique visitors in the first half of 2020 and won two Webby Awards in 2020.
First, you’ll learn about general concepts and applications you can use to manage your website’s content. Then, you’ll have a chance to practice working with the content on the KBank - a new Xperience by Kentico demo website.
Content in Xperience
Xperience by Kentico is a highly customizable solution that helps marketing teams achieve their goals. Commonly, one Xperience by Kentico implementation differs from another. Marketers have different ways of managing their content. They will use other tools to create marketing campaigns or share content on various channels. Depending on their business requirement, they will leverage integrations with different solutions.
Say a company hires you to run digital marketing in their application built on Xperience by Kentico because of your previous experience with this platform.
If different agencies implemented the applications, the new and the old applications might contain different features. For example, the content types might completely differ. Or, similar content types will have additional properties, such as Article, which might have different editing fields or available properties. Each website will also contain different widgets that dictate how to work with content in the new Xperience application.
However, no matter the implementation, several things stay the same.
Your content is based on a content type
You can imagine a content type as a cookie cutter for every content item. As you can create cookies of the same shape with one cookie cutter, editors use one content type and make the items with the same characteristics. The content type defines what data you’ll input and how Xperience displays this data across different channels, such as websites, emails, or app screens.
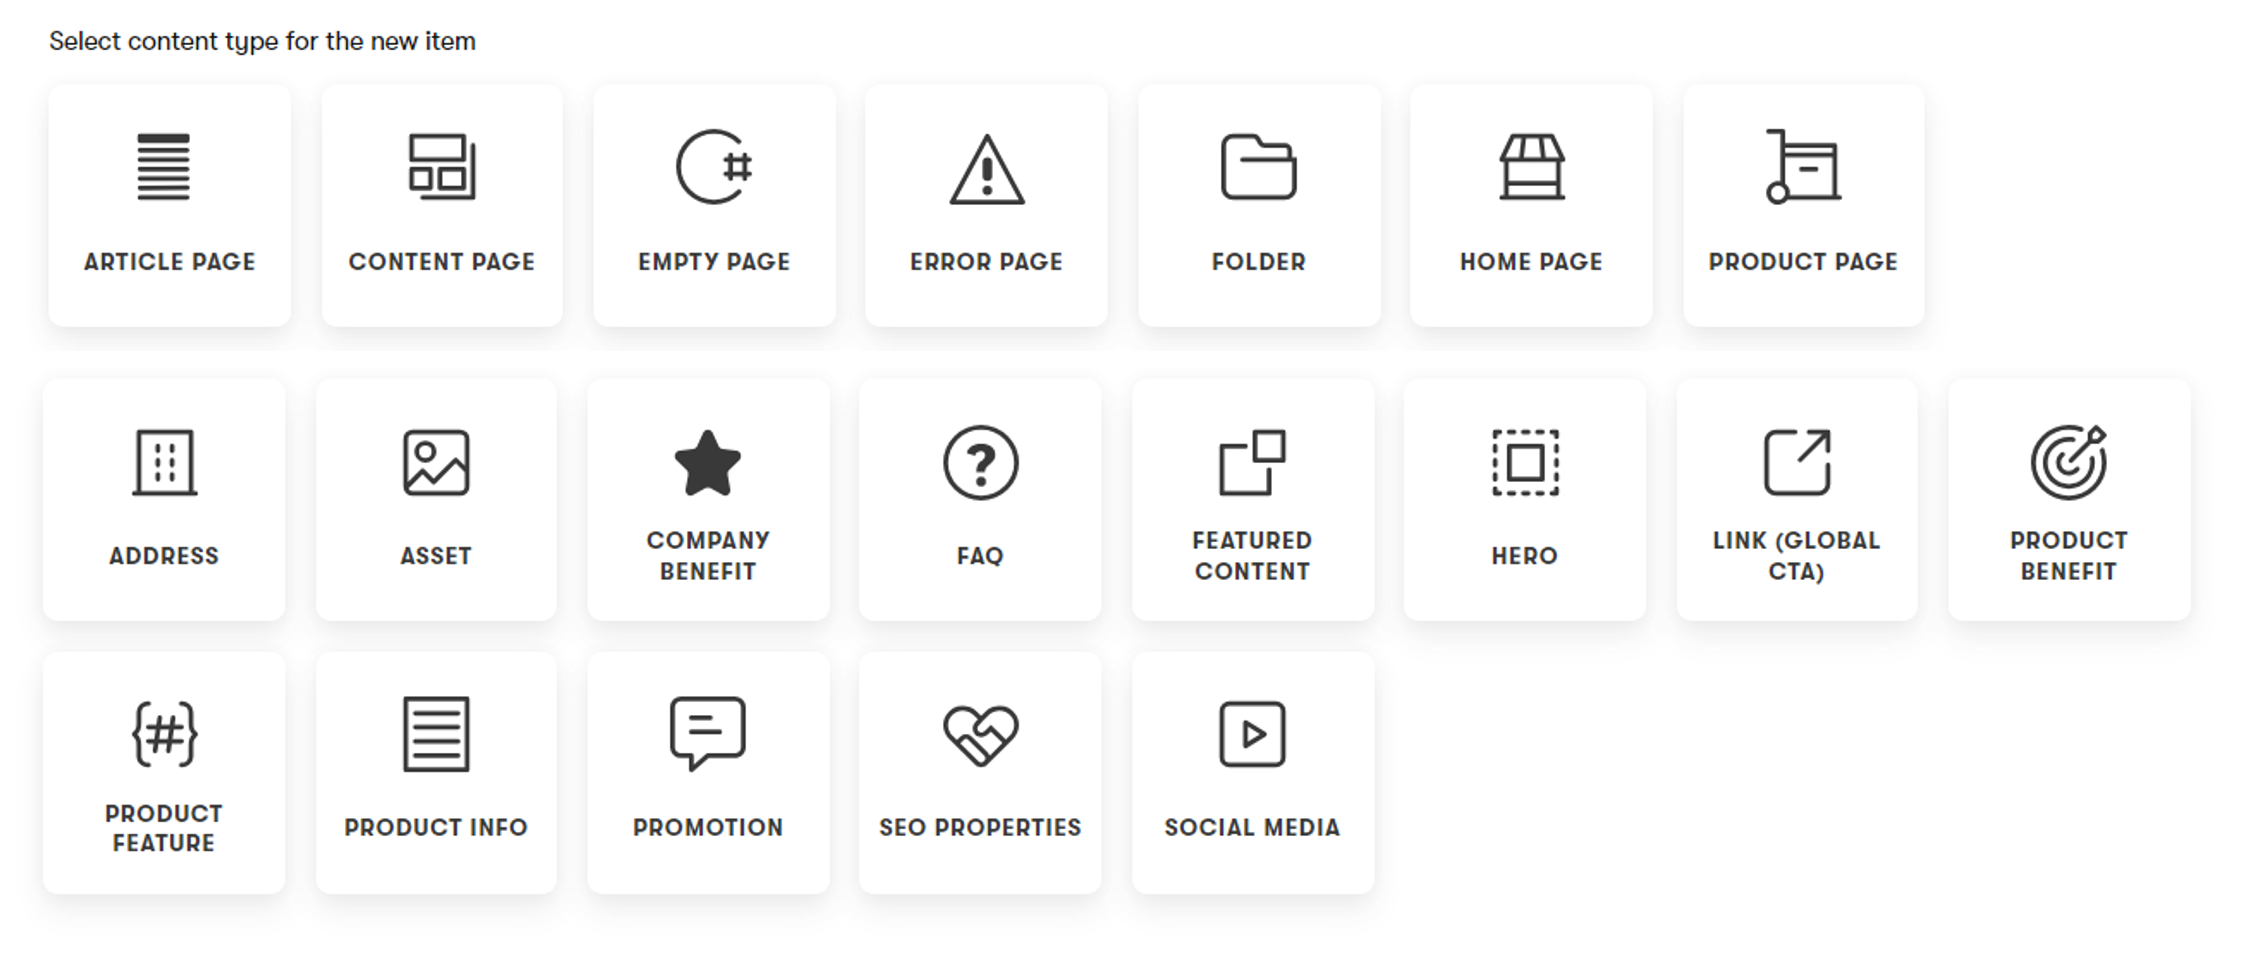
For example, the Article page content type allows you to create any number of articles that will always have the same properties.
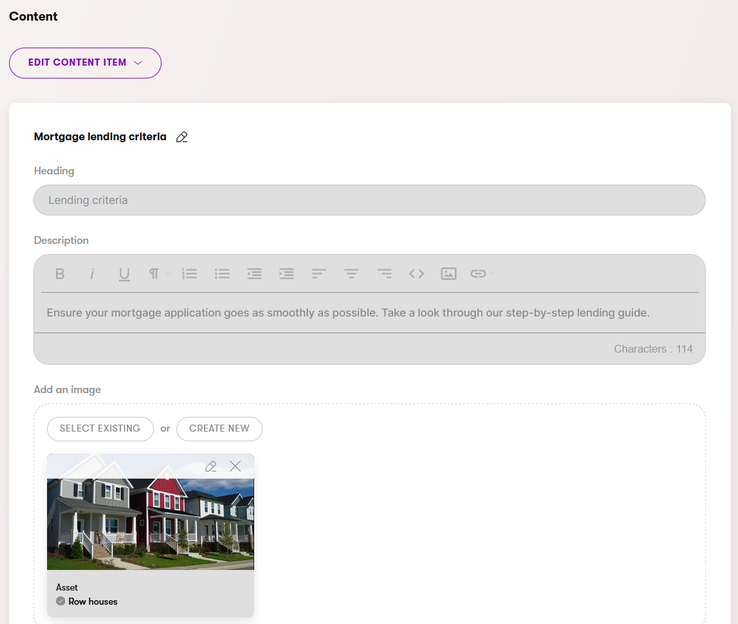
Similarly, if your Featured content content type contains a Heading, Description, and Image fields, every individual content item created with this content type will have the same properties.
Default content editing workflow
Each piece of content created in the website or the Content hub follows the same default content publishing workflow.
When you create a content item, Xperience puts the item into a Draft step. You can add your data, change its design, or reference other existing content. Once you save your changes, the data (and, in the case of pages, also their design) is available for preview in the administration interface. Still, it’s not available to your audience. The content item becomes publicly available once you Publish it.
You can create a new version if you need to update your content. Making a new version keeps the original content public and creates a version you can edit. The content version is in the Draft status and becomes publicly available only after you Publish this new version.
Content types define the content model
The content model documents all content your organization produces and describes the structure and relationships between individual content types.
Xperience doesn’t come with any predefined content types. It is the job of developers, designers, and solution architects to build your website’s content model and ensure you have all the content types you need to succeed in your digital marketing efforts.
As an editor, you’ll work with types your developers prepare. And if you realize some of the types don’t suffice or identify where you can improve your editing workflow, you can ask your developers to enhance your content types.
To learn more about how you can store and present the data in Xperience applications, see the Content modeling guide in the documentation. (Please note that the linked guide covers the topic from a more technical perspective.)
Xperience is a DX platform with out-of-the-box applications
Xperience by Kentico is a digital experience platform that a single vendor, Kentico, develops. Unlike other solutions on the market, which commonly integrate different platforms into one digital ecosystem, Xperience is one platform that provides a unified but extensible and customizable experience.
Xperience comes with a unified way to store your content. It has a headless layer that allows you to share your content and comes with built-in applications to work with it.
Working with every application built with Xperience by Kentico comes with the same flavor - you’ll have a set of out-of-the-box applications extended with custom applications tailored to your business needs.
Working with your marketing content
The Content hub serves as the central content repository. To manage your website or website’s content, your developers will create a dedicated website application to represent a specific site or microsite within your digital marketing channels.
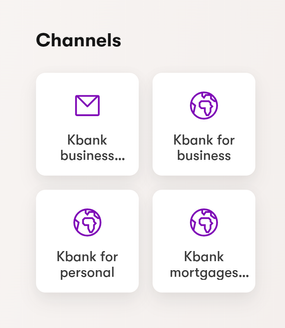
For example, editors in our fictional Kbank’s digital marketing team manage different websites through Xperience by Kentico administration using four dedicated channels.
- For standard websites, the team uses Kbank business and Kbank personal where each channel represents a website targeting a different persona.
- The Kbank mortgages is a consumer-oriented microsite.
- Through Kbank business emails, the team runs email marketing activities for their business users.
If you find the application names or concepts confusing, don’t worry; you’ll learn much more about them in this tutorial.
Working with content in Xperience
You can classify marketing content from different perspectives. Let’s simplify this topic for this tutorial and say that in Xperience, you’ll work with two types of content: structured and unstructured.
See the Content modeling guide for additional content classification.
Prefer structured content to support content reusability
When you create a new content item, you’ll input your content in a form-like editing interface. You don’t need to pay attention to what the content will look like on the website and what you need to adjust and tweak to adhere to your brand design guidelines. You can focus on the quality of information your content conveys.
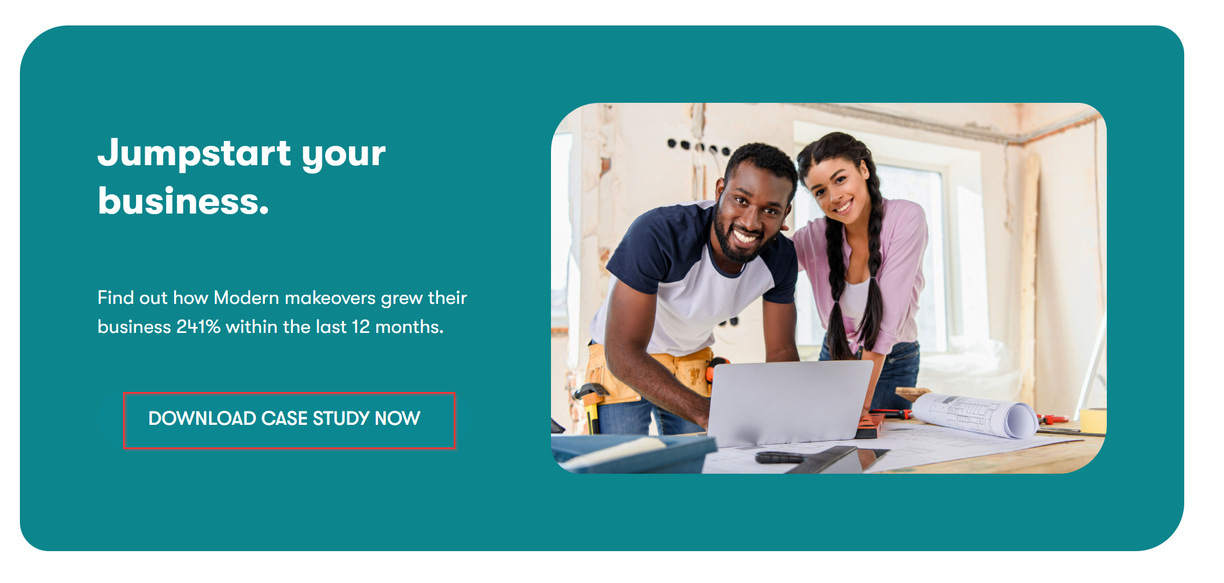
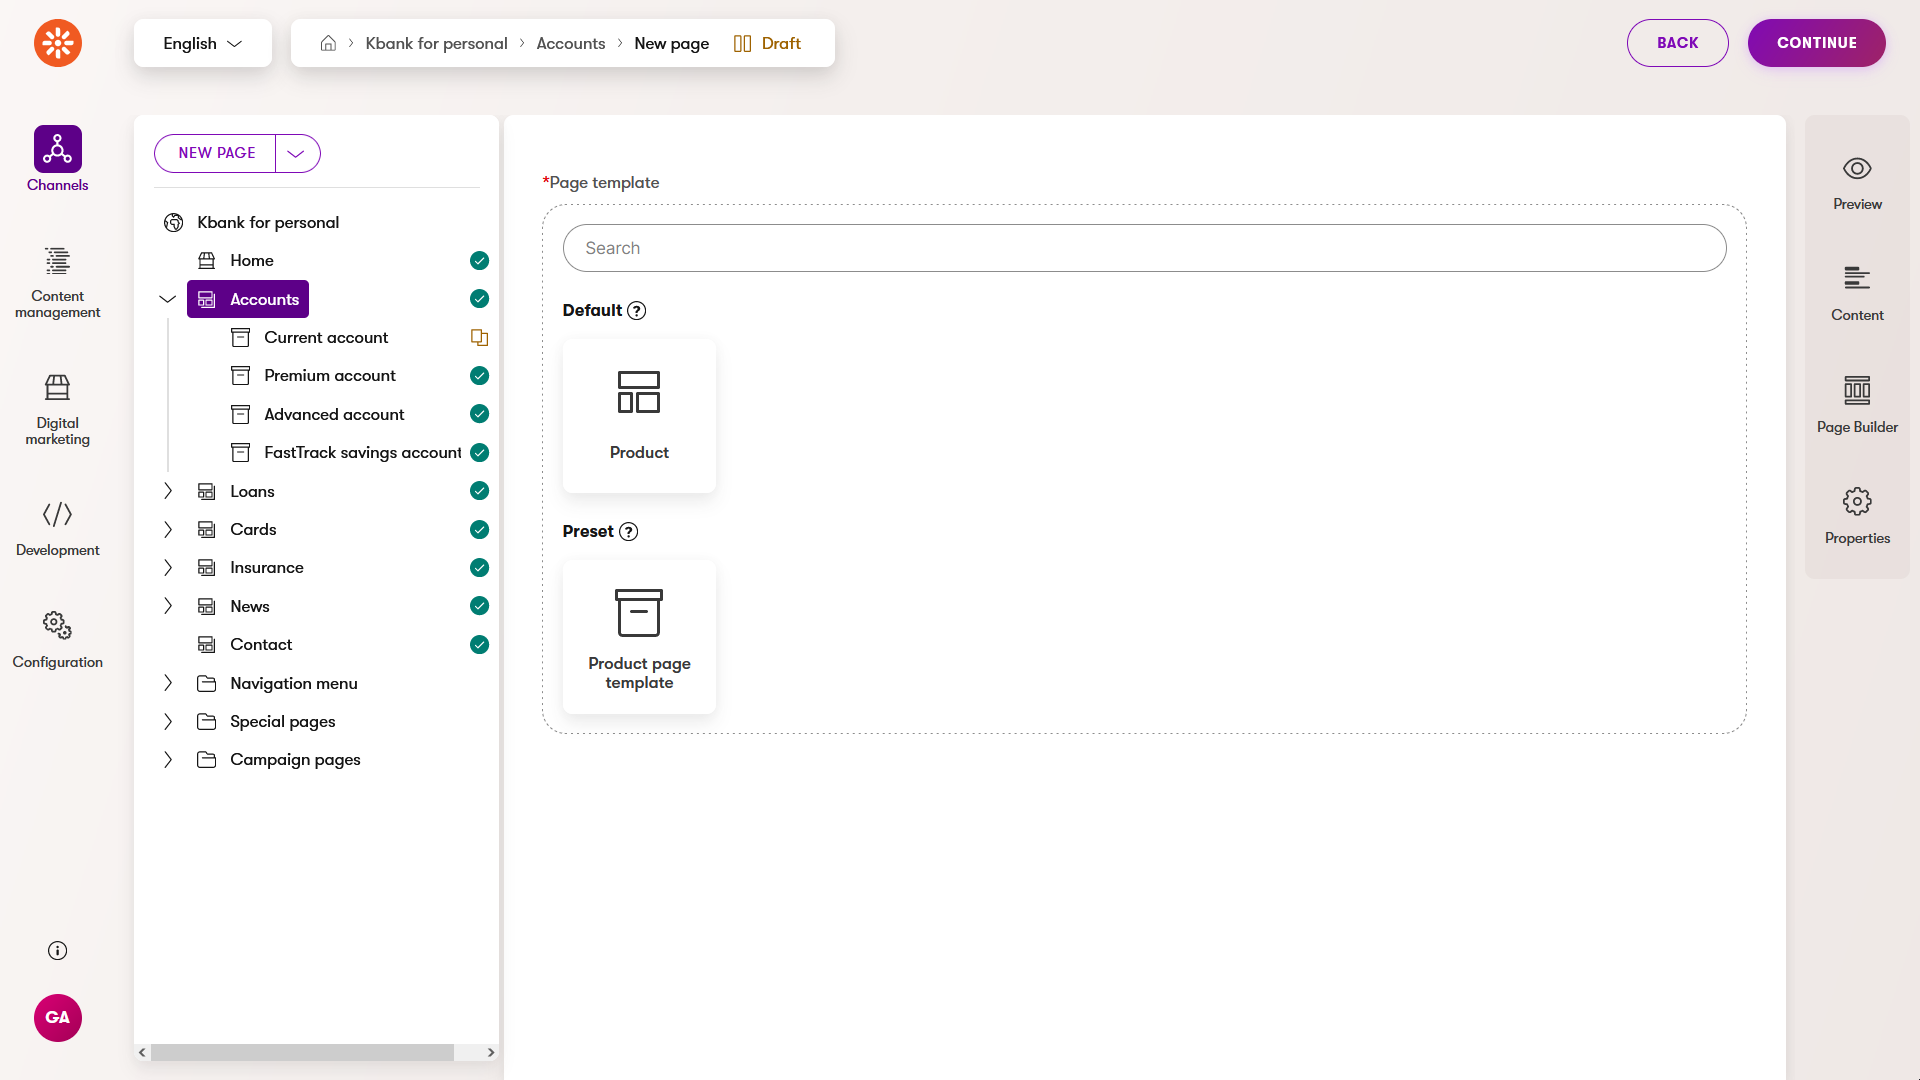
It is the job of your developers to ensure your application correctly presents content across different marketing channels. The following image shows how the structured Featured content mentioned above looks like displayed on the website.

Storing content without presentation information creates an unparalleled opportunity: it makes your content reusable across different channels.
Why use structured content?
Modern marketing teams do not need to recreate or copy-paste the content on their websites.
They strategically design their content model, allowing content reusability and resurfacing based on its context or marketer’s needs. When you store your data in a structured format, you can easily reassemble it into a different content type, present it through a different design, or repurpose it in other marketing channels.
Content hub
Reusable content in Xperience is stored in an application called the Content hub.
Content hub keeps the data in a structured format, which significantly helps with content reuse and governance. When you want to display the same information, for example, in different places on your website, you don’t need to create new copies - you can use one item from the hub and display it as required. Similarly, when you update the content in the Content hub, your change is promoted everywhere the content is reused.
From a technical perspective, reusing your content doesn’t create a copy of the content on the backend. Xperience refers to the original item in the Content hub, and developers ensure the referenced data is displayed correctly. That’s why keeping your content in sync across multiple instances is easy when you store your content in Content hub.
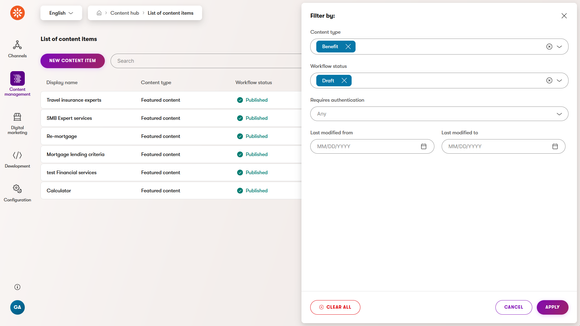
Content hub also comes with filters that help you quickly find the item you are looking for.
Unstructured content
Opposite to structured content, the unstructured content stores both your data and what the data should look like when it is displayed.
What does it mean?
When you look at the website page, you see its content displayed in a visual hierarchy. In unstructured content, the data and the instructions on what the content should look like are stored within the content. For example, from the data perspective, this call to action button on a website home page:
It is rendered through this front-end code on the live site:

And this is the information stored in the Xperience database in JSON format:
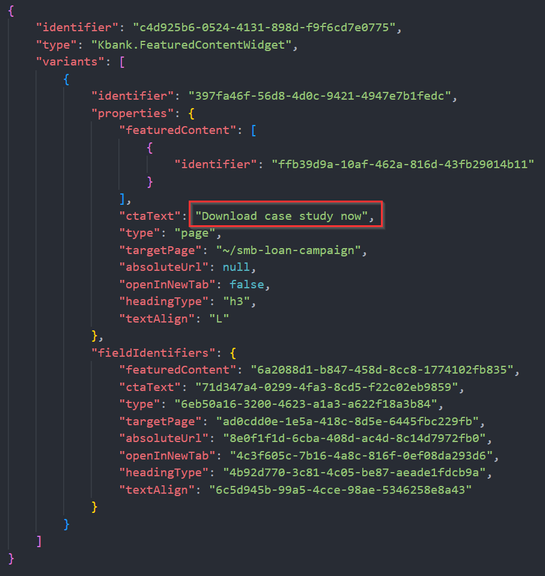
If you want to reuse this message - the button with the label and the target URL - you’ll need to copy and paste the configuration and then hope the channel, such as another website page or email, will understand what each item should look like. What if you need to change this configuration? For example, you want to change the hyperlink to another page. In that case, you’ll need to revisit all the places where you used the widget and update the link.
The ultimate example of unstructured content is the Rich text editor, supporting WYSIWYG editing. Rich text allows you to create your content quickly, combining different types of content and styling in one editing field. At the same time, the rich text content is hard to maintain and almost impossible to reuse.
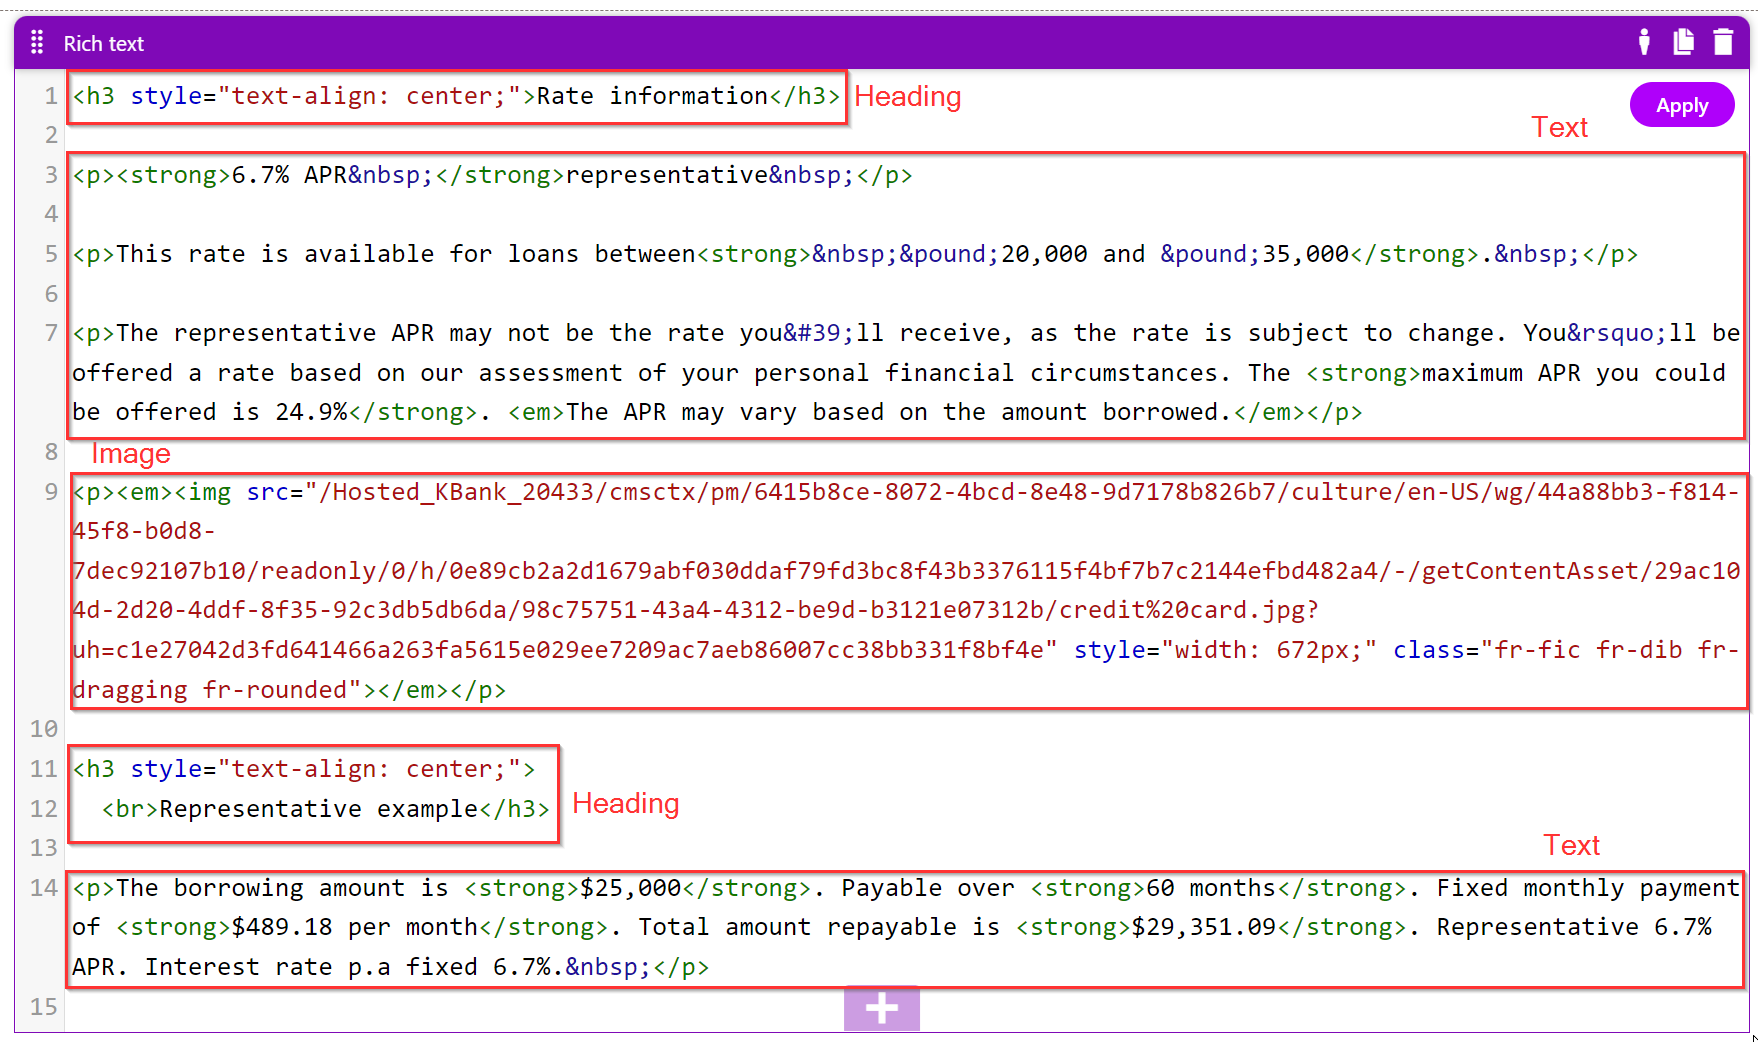
In Xperience, you’ll work with unstructured content primarily using the Page Builder that you can usually find in many website channels.
Why use unstructured content?
Only some of your content needs to be reused in other marketing channels. Unstructured content is easy to author. If your team isn’t used to content modeling, they will find it a natural way of working with unstructured content. Unstructured content saves time in the initial content production and system development phase. You can quickly create content items ad hoc with a single or few components and determine their design simultaneously. Identifying potentially reusable content also requires additional planning in advance.
Exercise 1 - Adding structured content
You’ll need a demo Kbank website to follow up on the exercises. If you already haven’t, visit the Xperience Hosted Trial page and request the demo site. Our team will get back to you and help you set the website up.
Download tutorial resources
You can also download all the resources you’ll need for the tutorial: Kbank Business Tutorial materials.
In this exercise, you’ll see how easy it is to work with items in the Content hub by adjusting an existing page and creating a new segment.
Task:
Your copywriter asked you to improve the Loans page in the Kbank Personal channel by adding a FAQ widget.
- Go to the Kbank personal application.
- Select the Loans page in the content tree and switch to the Page Builder.
- Select the Edit page and Create new version.
- Use the plus button on the left side to add a new section below the Kbank loans overview. In the Sections drop-down, pick the Multi column section type.
- Use the plus button in the middle of the new section to add the Faq widget.
- On the widget banner, open the Configure widget properties.
- Use the Select existing button to add your FAQs. Select the following items and confirm with the Select button:
- Personal loan DON’Ts.
- Consolidation loan DON’Ts.
- Consolidated loan applicants.
- Fill in the Title: FAQ.
- Apply to save the changes.
- Use the Select existing button to add your FAQs. Select the following items and confirm with the Select button:
- Save the changes on the Loans page.
- Publish the page to see the FAQ element on the live site.
Manage website content
Xperience by Kentico considers a website as one of the communication channels marketing teams use today to reach their target audience.
Channel can encompass various platforms, including the main website, regional sites, various brand-specific sites, campaign microsites or landing pages, social media platforms, emails, and distributed content like content snippets presented on third-party partner websites.
Miroslav Jirku, Director of Product Marketing, Kentico: What is a channel from the context of a digital experience platform?
Editors use dedicated website channels to manage what they want to display online. Depending on the size of your business, your Xperience application might contain only one website channel. Or your team might oversee the main company website and a collection of campaign-specific microsites.
For example, on the Kbank demo website, the marketers manage four digital marketing channels. Three of them are websites - the Kbank for businesses, Kbank for consumers, and a microsite where Kbank promotes their mortgages. They also work with an email channel we’ll cover later in this tutorial.
In the Xperience by Kentico ecosystem, you don’t need to reach out for another CMS to spin up a campaign microsite quickly, copy your marketing content and launch. Depending on your implementation, you can quickly create a new channel and easily re-use all your assets from the Content hub on your marketing microsite.
Editing website content
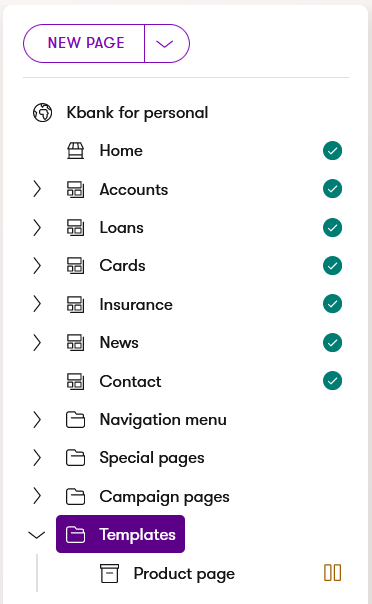
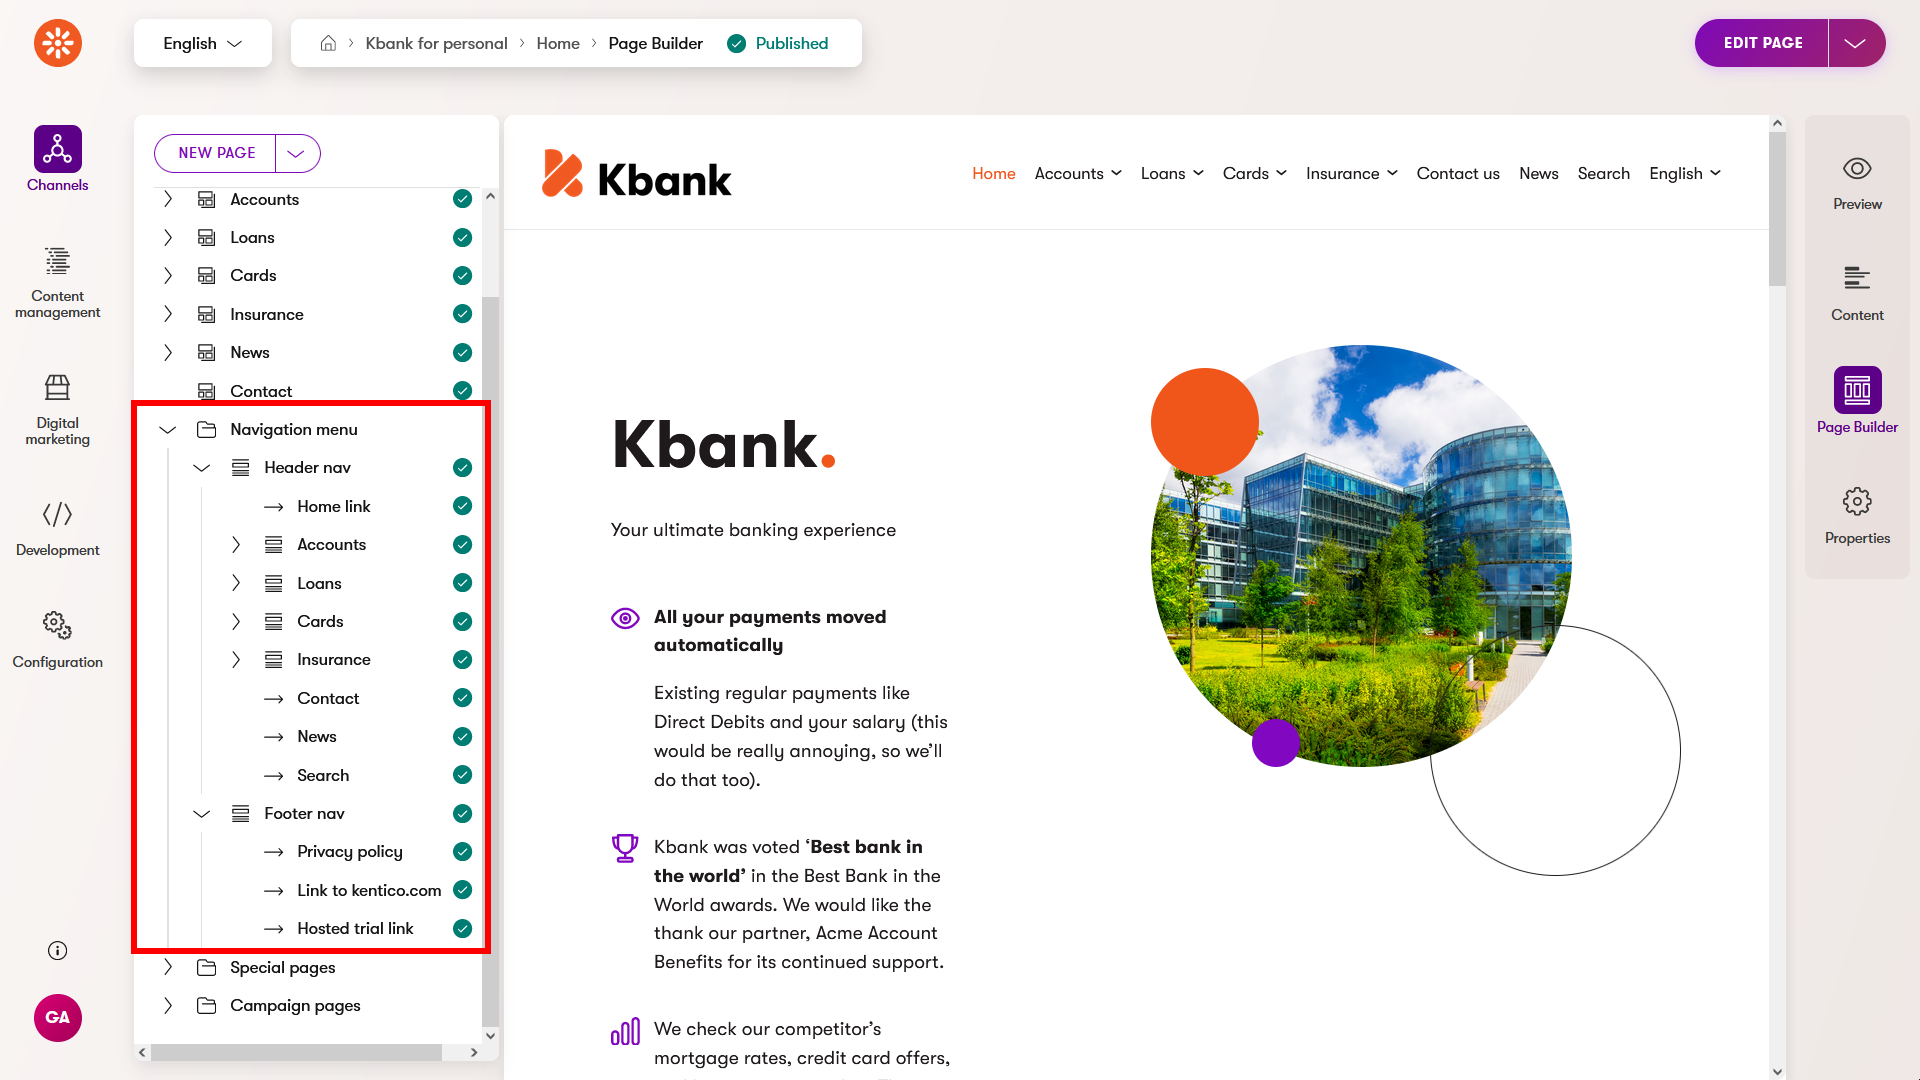
You can create the pages, edit their content, or manage their properties in your website channel. Xperience organizes the pages in a visual hierarchy called the content tree, which you can see in the following screenshot below.
Keep only website pages in the content tree
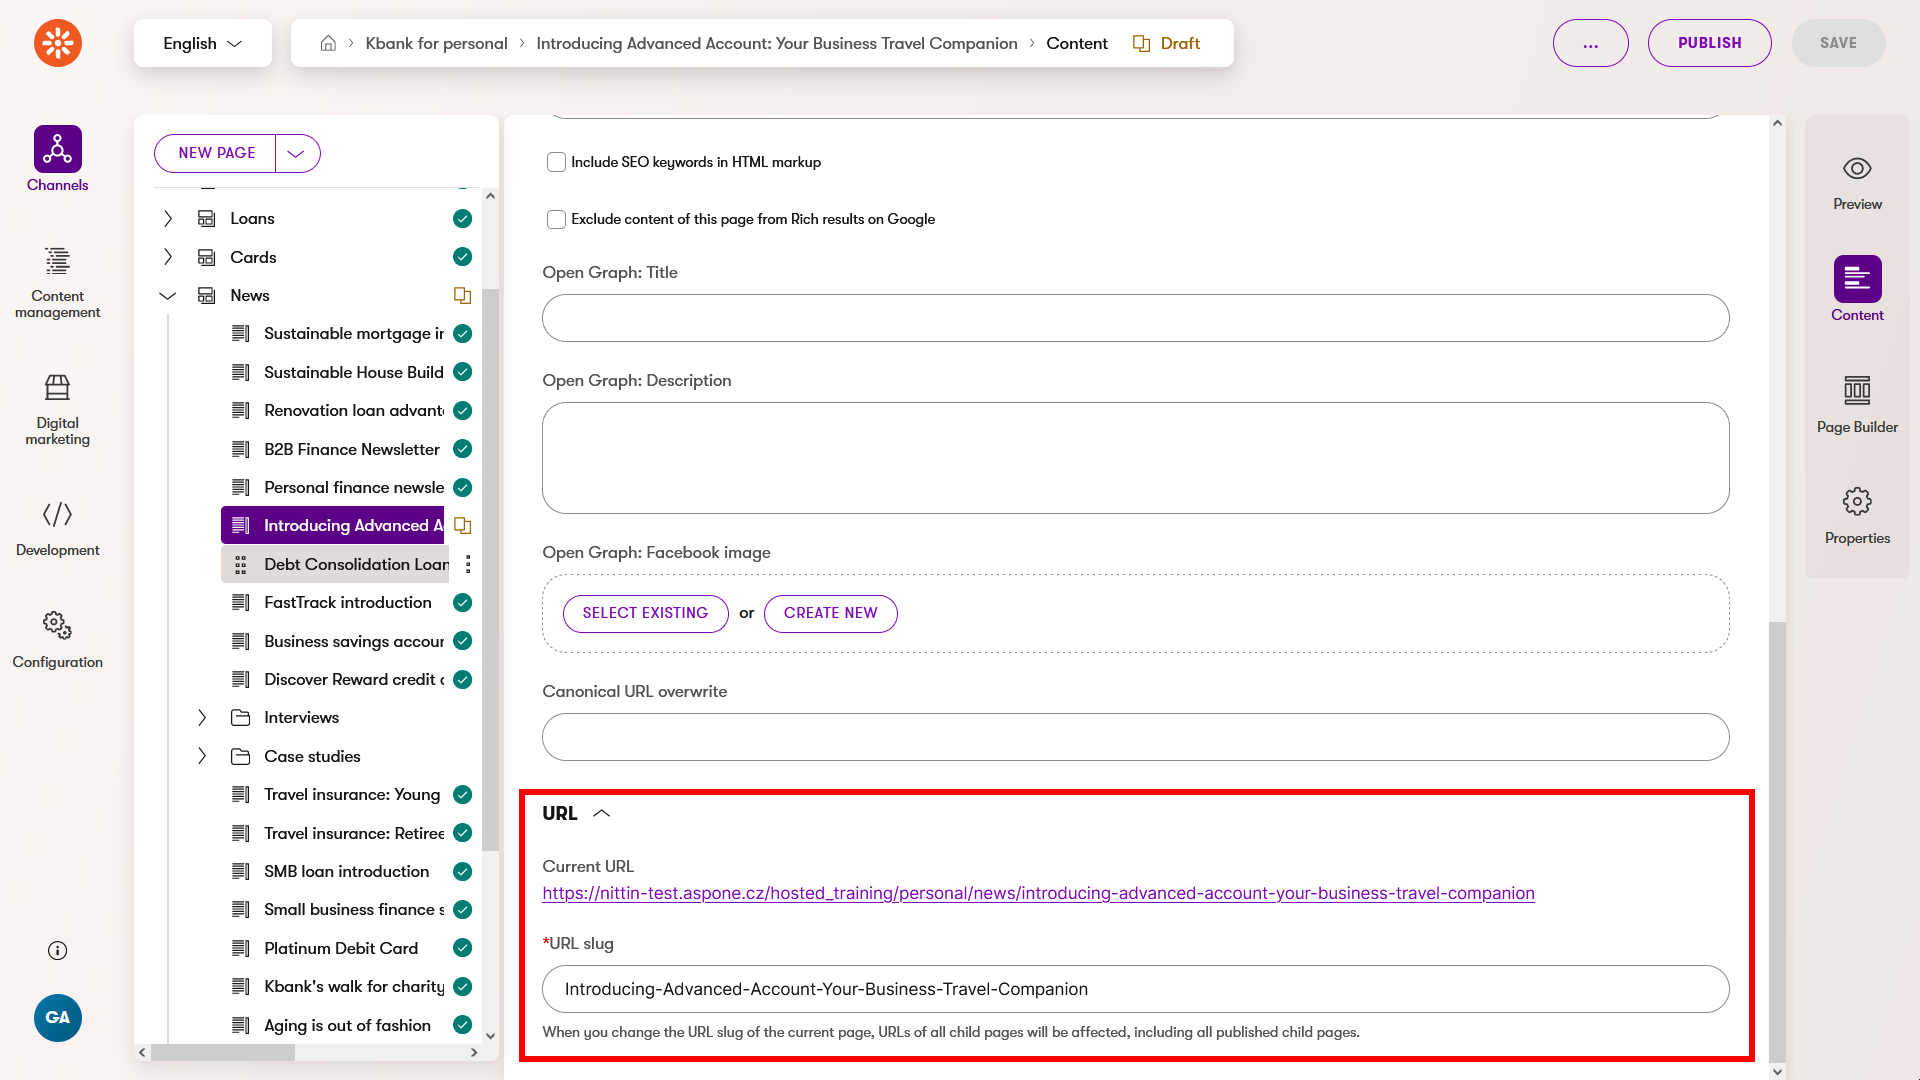
Most items in the content tree represent pages visitors access on a live site. They navigate to the page’s URL addresses, which Xperience has created.
Using the content to organize your website pages conveniently opens an option to dynamically generate a page’s URL based on its position in the tree and create nice-looking URLs. Furthermore, each page also contains a field where you can adjust its URL slug (the last section in the URL). You can find it in the Content mode within your website channel. If you have the Former URLs enabled, Xperience tracks these changes and automatically redirects visitors to new URLs.
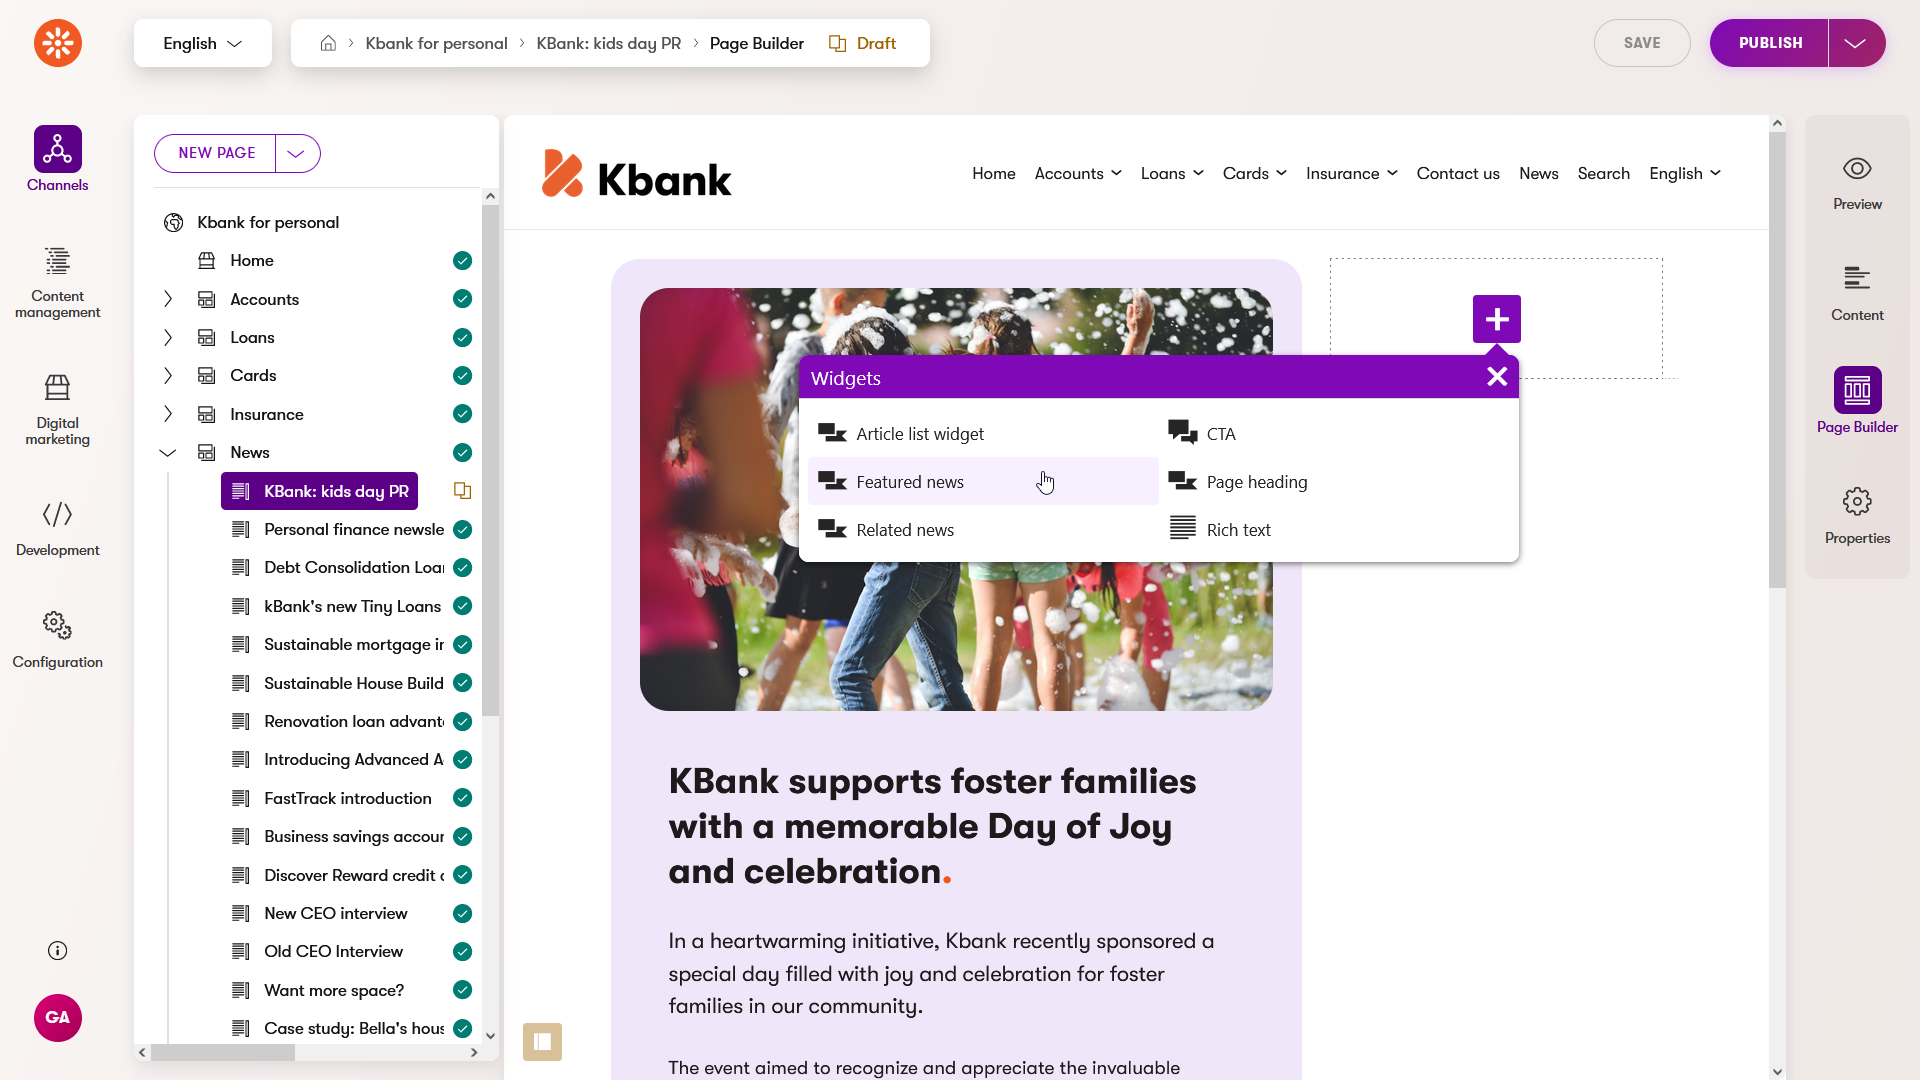
Page Builder
Xperience Page Builder provides a user-friendly interface that helps you create website pages using components in a drag-and-drop way.
The components include page templates, page sections, and widgets.
The following screenshot shows custom widgets that you can see on the Kbank demo site.
Out-of-the-box, Xperience comes with two widgets - Rich text and Form. Based on your project requirements, developers prepare other widgets and define areas on the page where they are available.
Build custom pages with Page Builder
Page Builder allows editors to create good-looking pages and experiment with your page’s layout and design.
Who prepares the Page Builder components?
During your project’s discovery phase, your analysts and designers identify components you’ll need to define your customer journey on your website (and other channels) and achieve your marketing goals. They will prepare widgets and sections that help you add content to your page and design it in almost a free-form manner. At the same time, you’ll use predefined Page Builder’s properties for different types of content, which will help you stay within your brand design guidelines.
In this video, you can see how you can work with page sections.
In general, you might work with three types of widgets.
Widgets that display structured content
- You can directly select the content from the Content hub into the widget properties. Or, the widget displays content referenced in structured content, for example, in the Content mode. See the Benefits widget example on the Xperience KBank demo site.
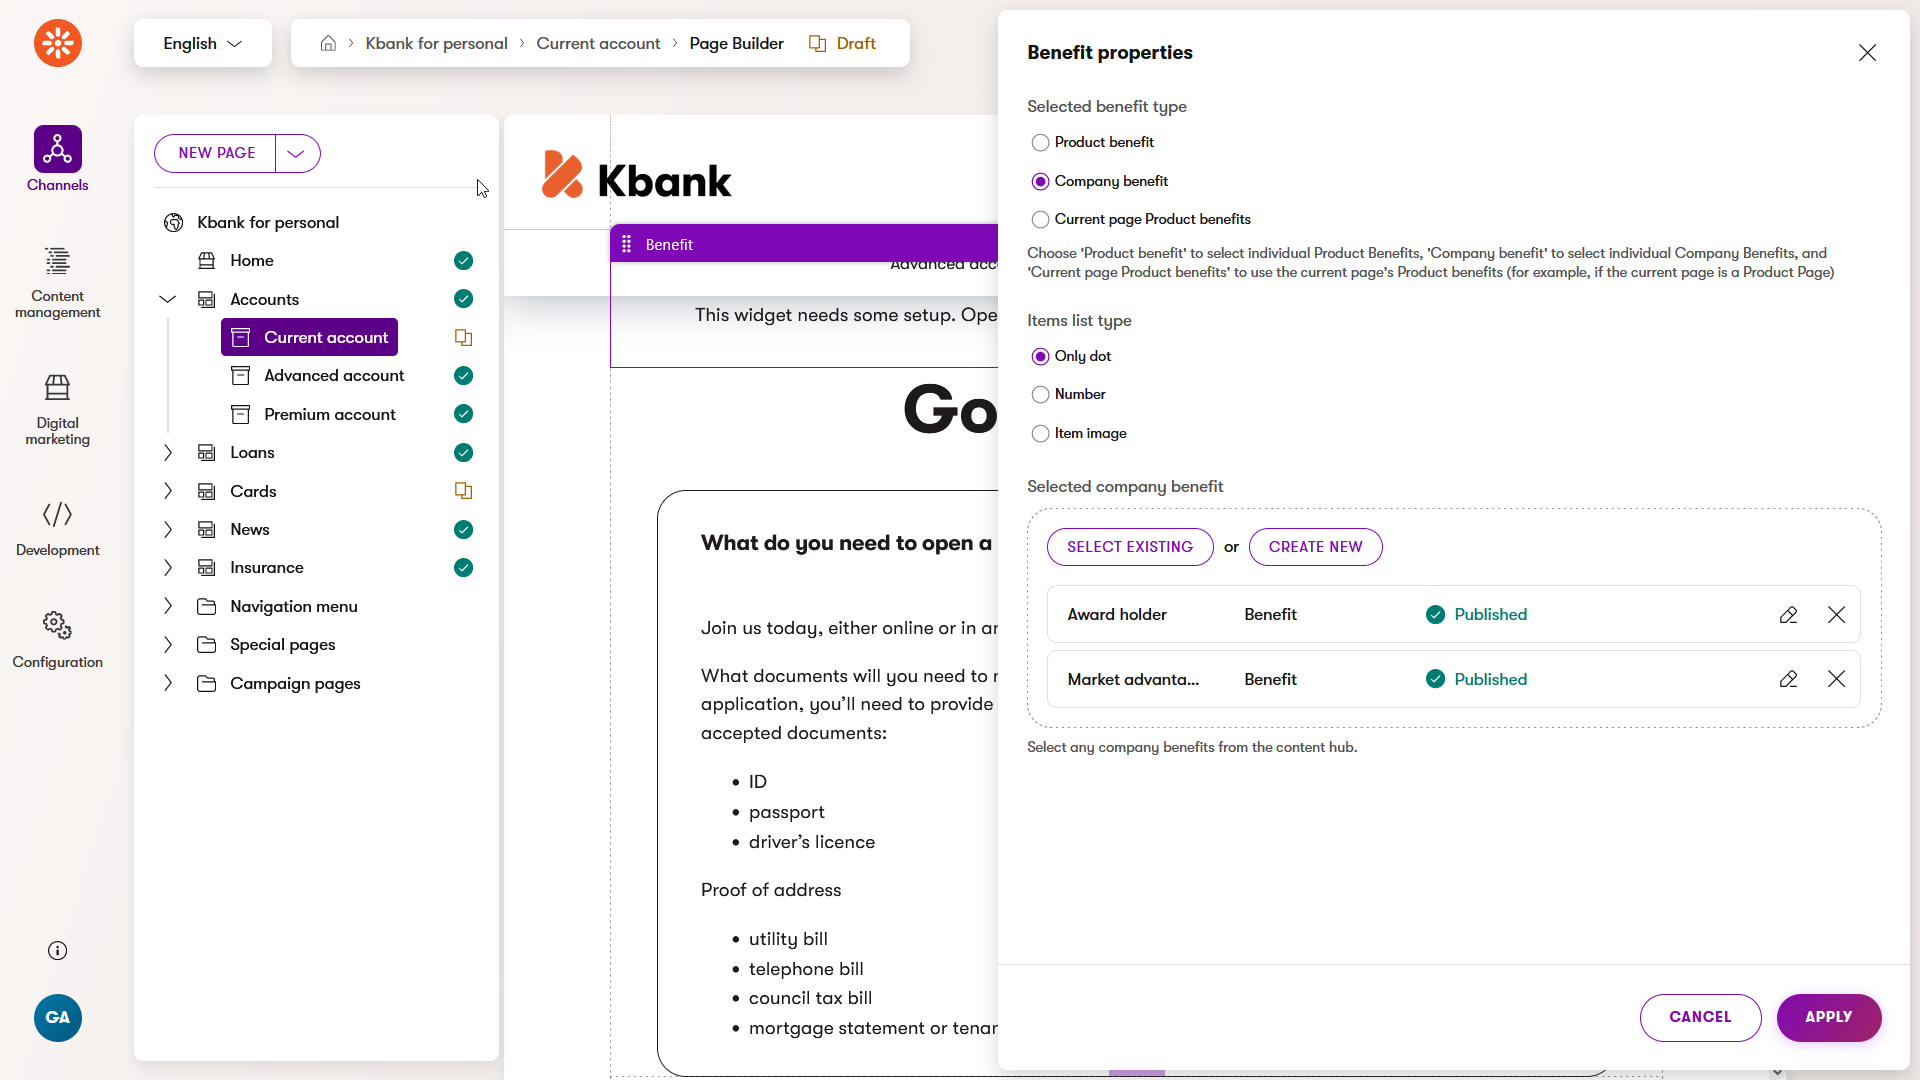
- You can directly select the content from the Content hub into the widget properties. Or, the widget displays content referenced in structured content, for example, in the Content mode. See the Benefits widget example on the Xperience KBank demo site.
“Inline” widgets
- As an editor, you create your content per widget instance, meaning the content of this specific widget exists only on the page where you make it. See the example of the CTA Button widget from the Dancing Goat website discussed above.
“Mixed-content” widgets
- The most common widgets allow you to reuse structured content from the Content hub. At the same time, these widgets can contain editable properties to create the widget’s content entirely from scratch or provide an “in-place” override of the reusable content for content personalization. See the Banner widget on the KBank demo website.
- The most common widgets allow you to reuse structured content from the Content hub. At the same time, these widgets can contain editable properties to create the widget’s content entirely from scratch or provide an “in-place” override of the reusable content for content personalization. See the Banner widget on the KBank demo website.
The widget configuration and the data input through widget properties are stored in JSON format in one database field per page. See the Content item database structure in the documentation.
To improve content governance, we recommend storing content in the structured content format and using Page Builder to compose your pages from these reusable content components.
In this video, you can see how you can work with widgets.
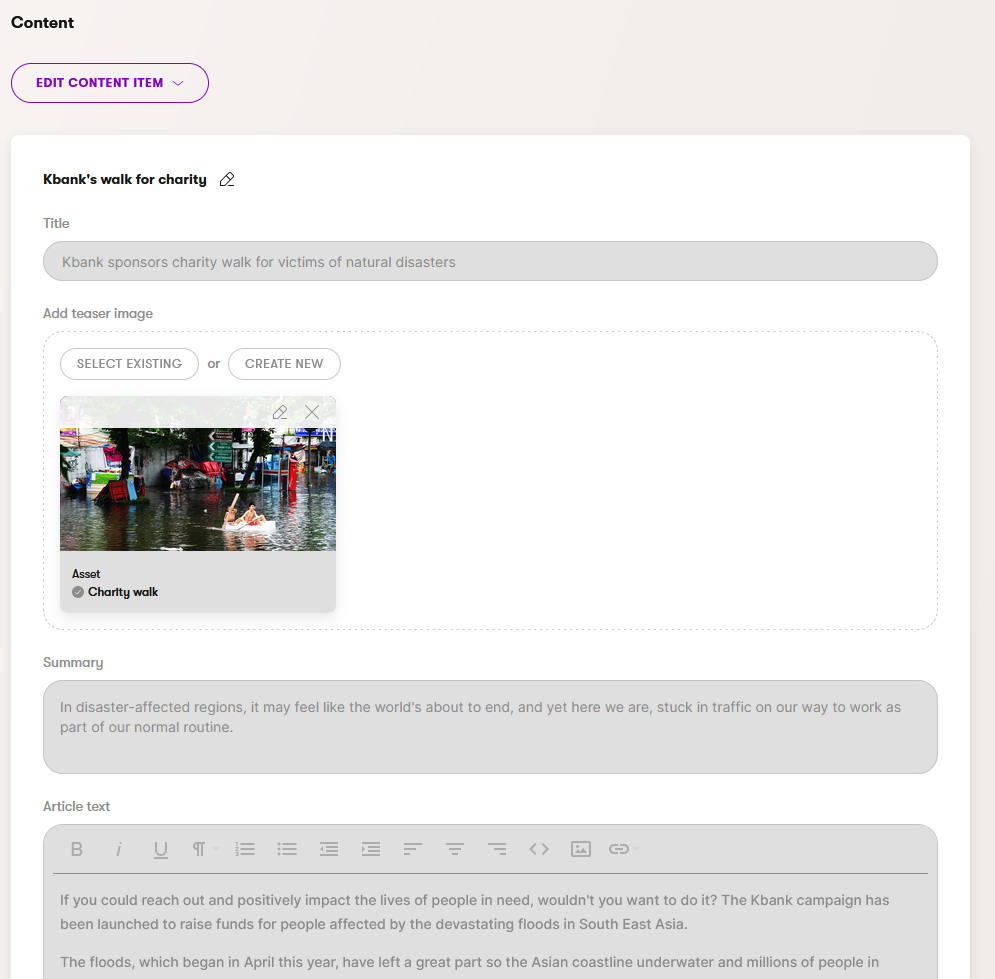
Exercise 2 - Adding a new article
In this exercise, you’ll see what it’s like to work with structured content in the Content mode. You’ll create a new article and add some widgets to the page using the Page Builder mode.
Task:
A Content editor prepared a new article called Travel insurance for family with kids and sent you the resources. You need to publish this article in the News section in the Kbank personal channel. (You can find the article materials in the Adding a new article folder in the tutorial resources.)
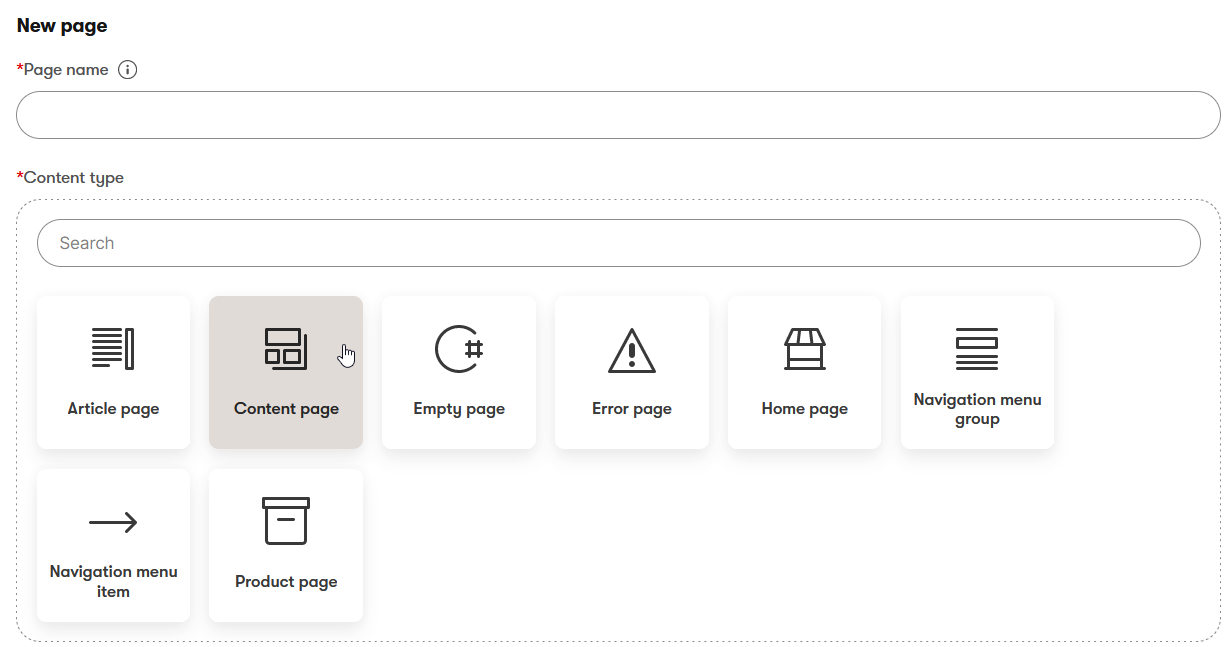
Create a new page
Open the Kbank personal application.
Select the News section in the content tree.
Use the New page button.
- Fill in the Page name: Travel insurance for family with kids.
- Select the Article page content item.
- Confirm your choice with the Continue button.
Choose the Article detail - left template.
Confirm with the Continue button.
Add content to your new page
In the following steps, use the Travel-insurance-for-family-with-kids.docx (or TravelInsuranceForFamilyWithKids.txt) from the Adding a new page folder.
- Select article to display: Create new.
- Fill in the Content item name: Travel insurance family - article.
- Content type would be Article.
- Confirm by selecting the Continue button.
- Add the Title: Travel insurance for family with kids.
- Add teaser image:
- Select Create new, and the Create new item dialog opens.
- Fill in the Content item name: Family on vacation.
- Keep the Asset content type and select Continue.
- Add the Alt text: A family with two kids is standing on the beach before a sunset.
- Upload the File named family-on-vacation.jpg.
- Publish the image so you can see it on the live site.
- Paste the Summary from the Travel-insurance-for-family-with-kids.docx or TravelInsuranceForFamilyWithKids.txt file.
- Paste the main News Text of the article, use the Rich text field editor, and style your text.
- Add an image to the article:
- Find the place in the News Text where you should add the image (in our case, before the insurance benefits).
- Insert image via the button that you find in the Rich text editor.
- In the Content hub, search for the Family premium account image.
- Insert the image.
- Use the built-in image editor in the Rich text and Change size to 100%. The image will adjust to 100% of the width of the article column.
- Select article type: Select existing: News article.
- Select related articles:
- Use Select existing.
- Pick Platinum Debit Card, Travel insurance: Young adventurers, and Travel insurance: Retirees articles.
- Confirm with the Select button.
- Publish the article.
- Add SEO title: Travel safely as a family with kids with Kbank family travel insurance.
- SEO description: Learn how the travel insurance for family with kids can help you in the time of need. Whether you need to buy new clothes because of lost luggage, or need to cover unexpected health expenses.
- Publish the News page.
Update the News page to show the newest articles
If you visit the News page on the live website, you’ll see that your article is still not visible.
- In Xperience, open the News page and select Edit page → Create a new version.
- Go to the Page Builder tab.
- Adjust the settings in the Article list widget:
- Change Number of articles to display to 100.
- Apply the change and Publish the page.
Your new article should now be the first on the News page. If you don’t see the Teaser image, go to the Content hub and publish the image.
Page preset templates
Page templates can be a game-changer when you anticipate creating multiple pages with identical layouts. They become invaluable when editors collaborate on various pages. When editors create their pages, they can build them off of page templates that contain a preset configuration of where and how the data is displayed. And your editors can focus on adding engaging content.
This guide will show you two ways how you can create page templates to speed up creating pages, let’s look at both.
The following examples are from Kentico’s Kbank demo website. The available widgets, page types, and visuals will depend on your company’s implementation of Xperience by Kentico.
Save an existing page as a preset
The first option is to find a page you already have, no matter if it’s on the live site or in a draft stage, and save it as a template.
Saving a page as a template doesn’t influence the original page configuration. However, if you want to make adjustments to the template layout, first save the original page as a template and then work with the new template itself:
- Create a new page using the template,
- Update the page’s configuration (add or remove widgets, change the number of columns in sections, etc.),
- Save this new configuration into a new template.
Xperience will not change the pages you already created using the old page template.
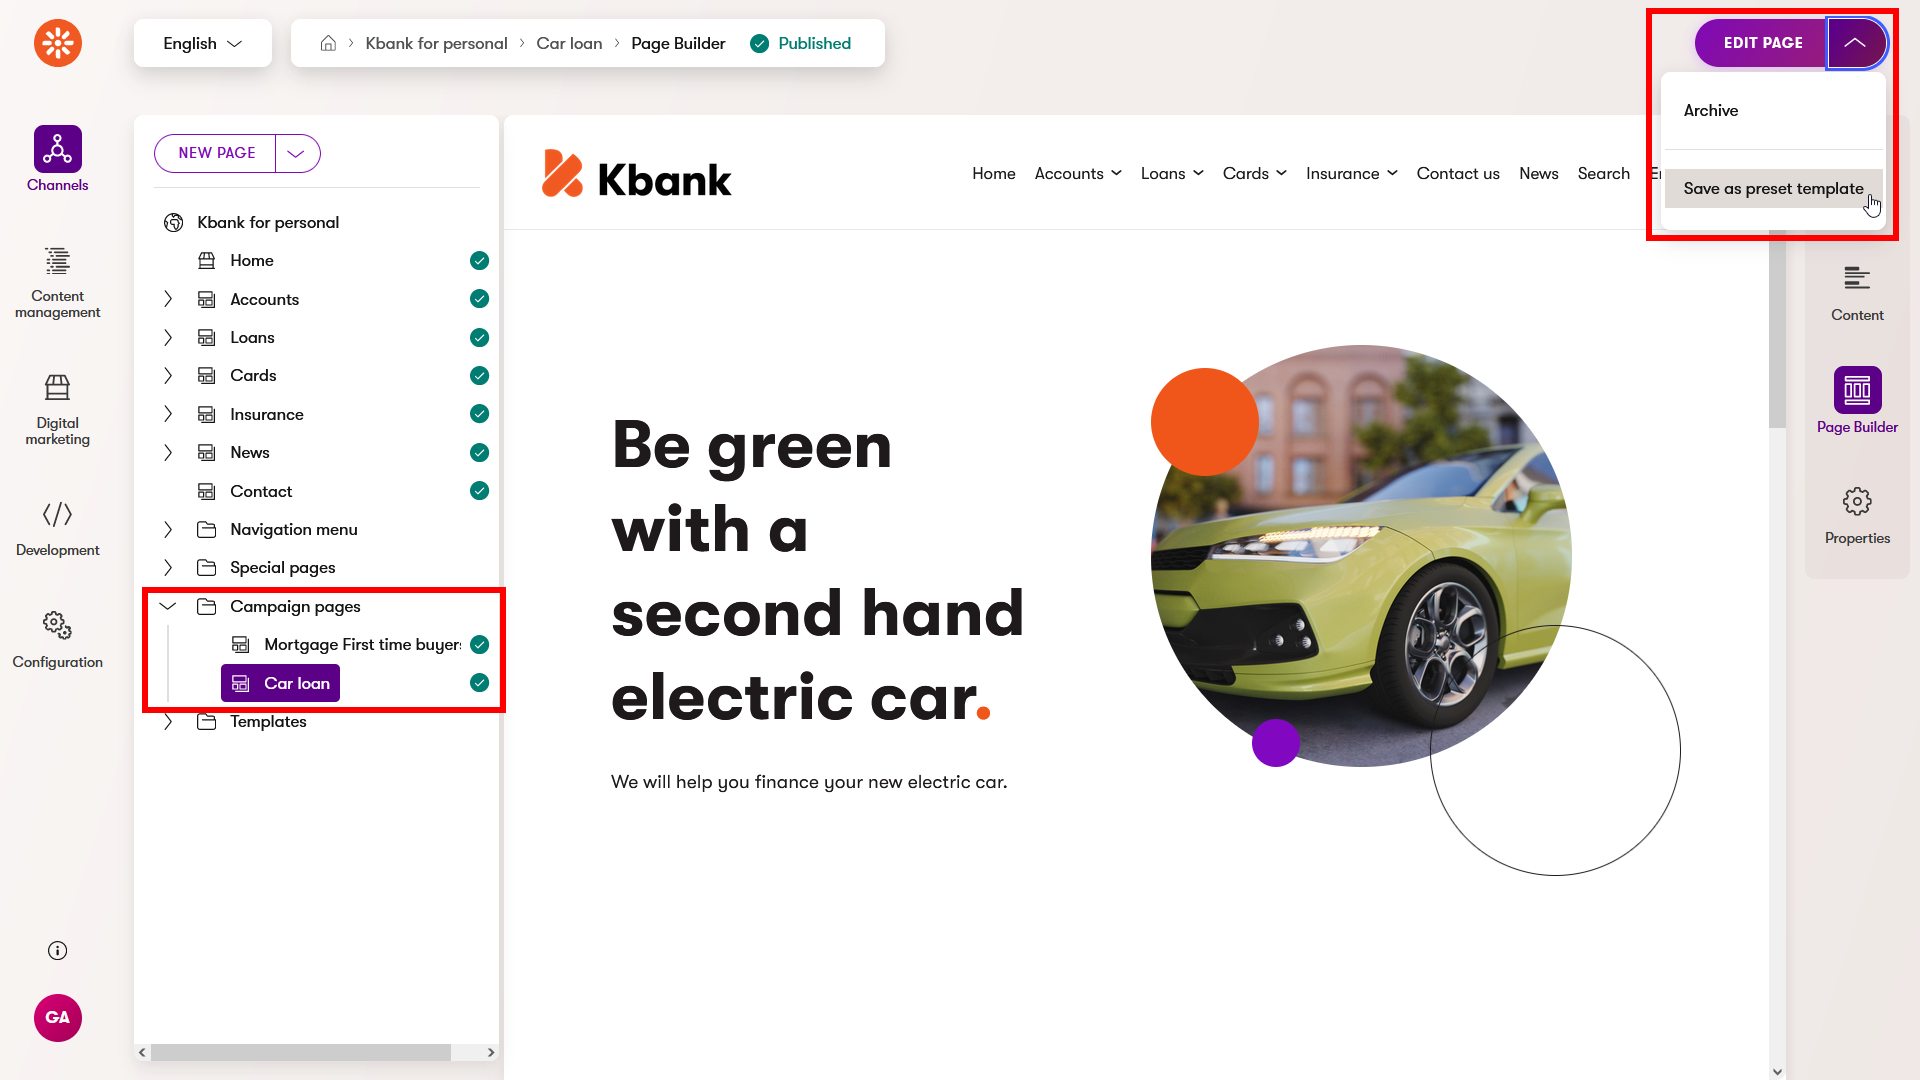
Let’s say you created a successful campaign page and want to save it as a template for similar future campaigns.
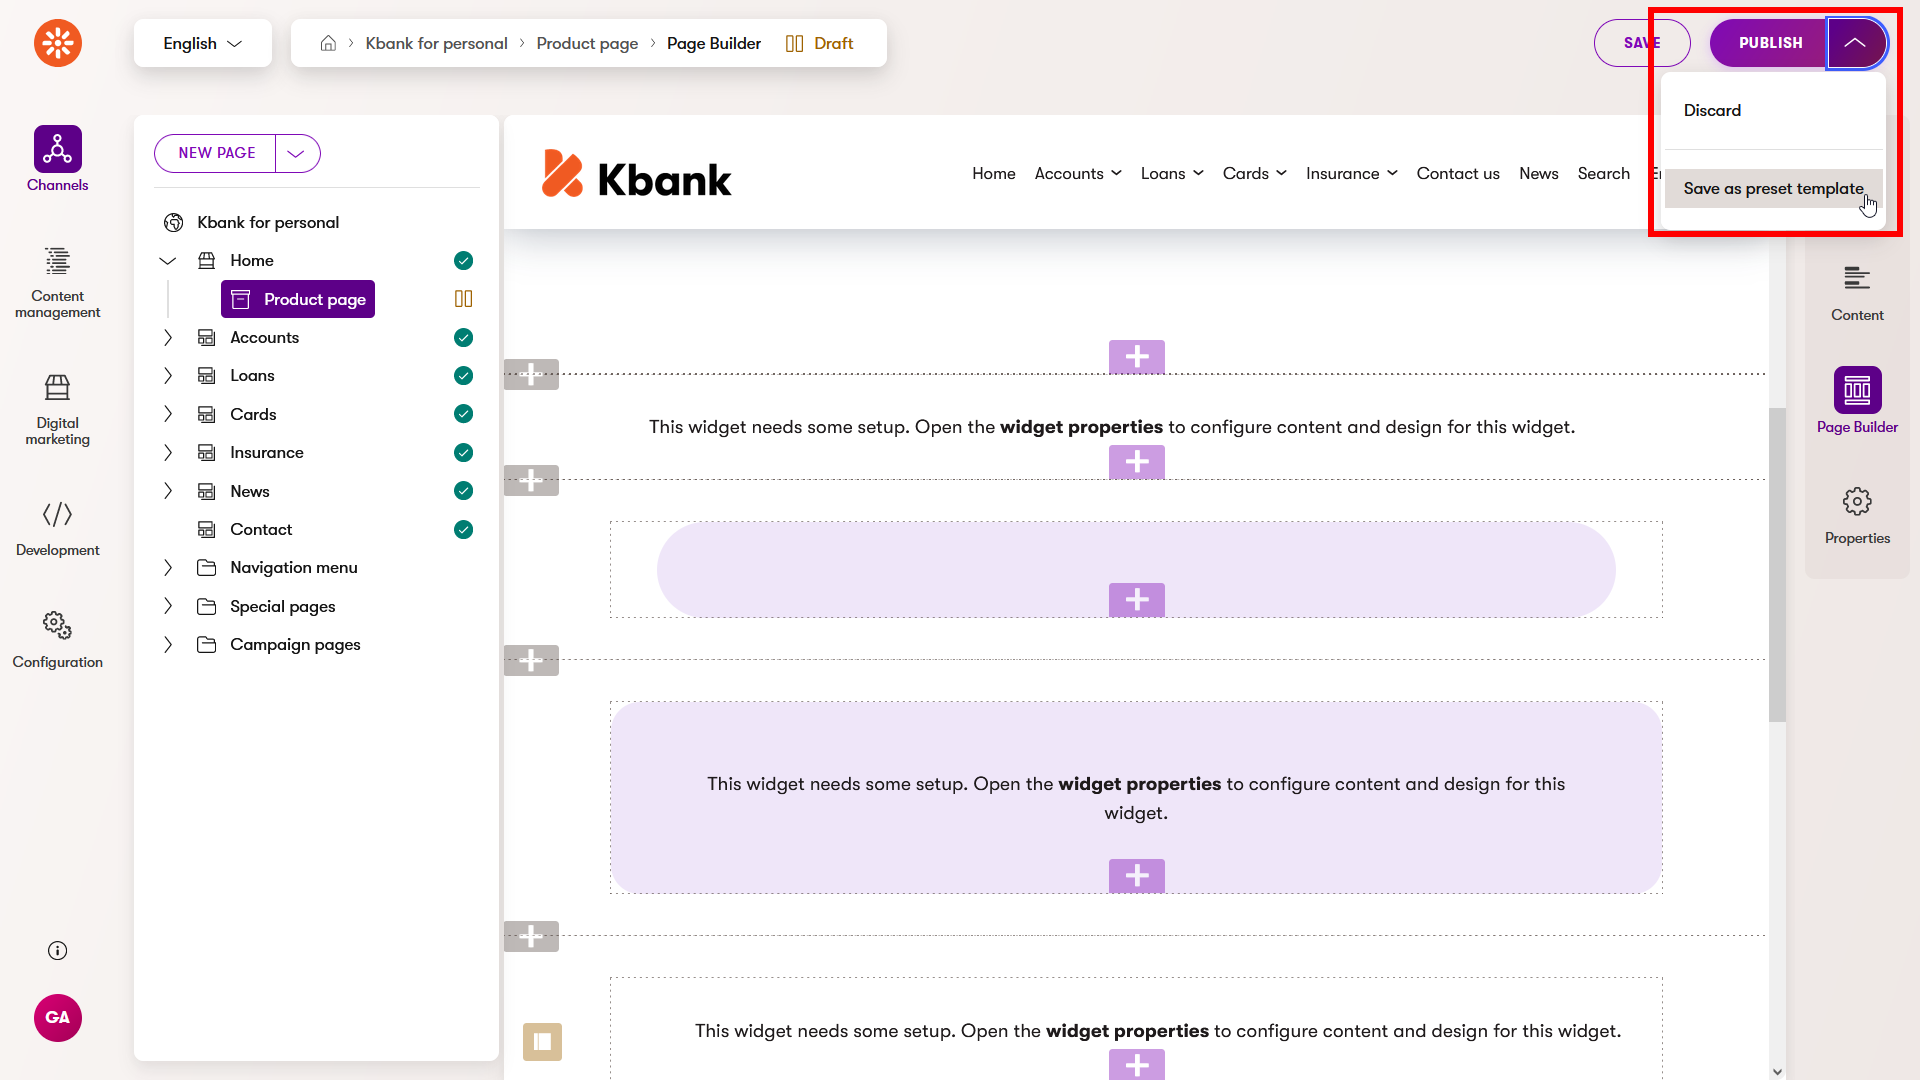
- Select the page in the content tree, switch to the Page Builder mode if necessary, open the additional page actions and save your page as a preset template.
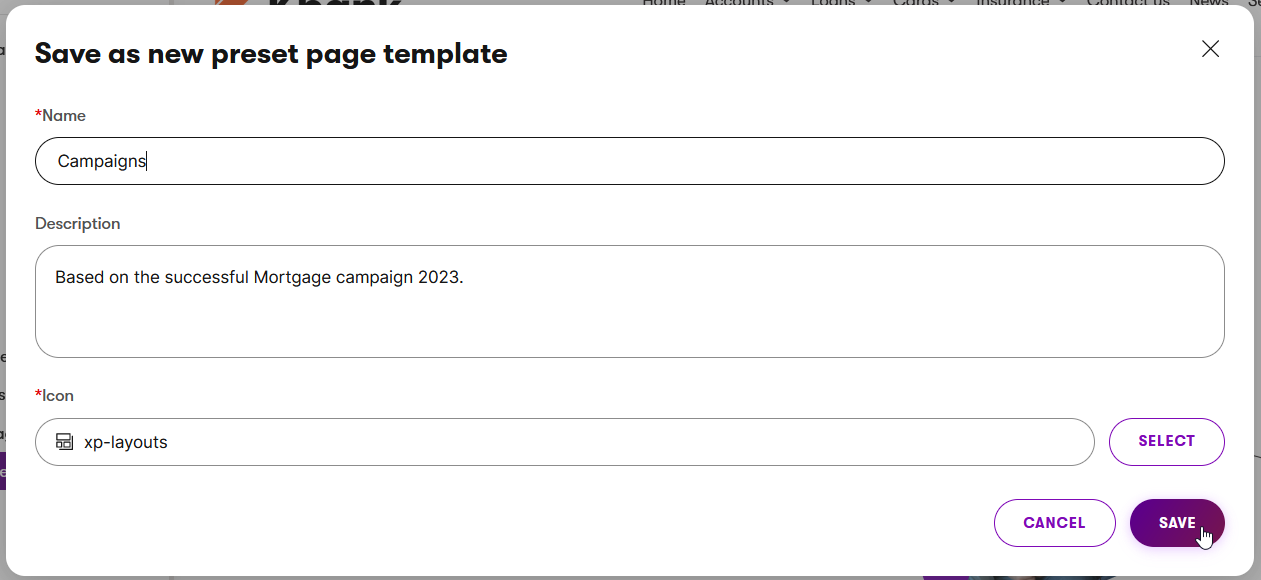
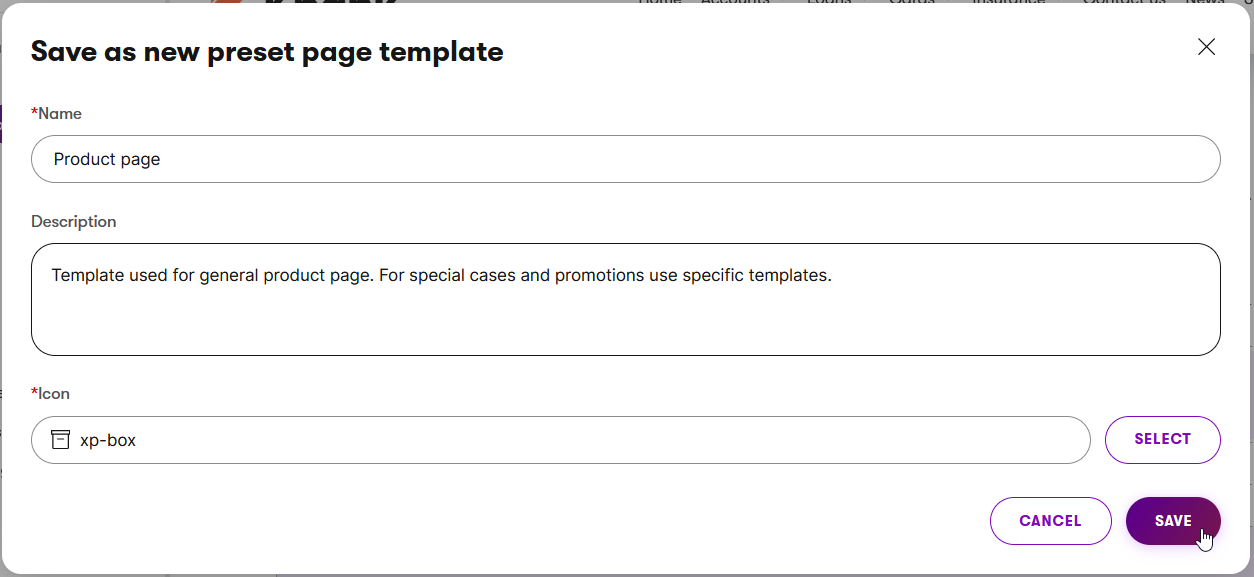
- Fill in the preset Name, add Description, and adjust the Icon.
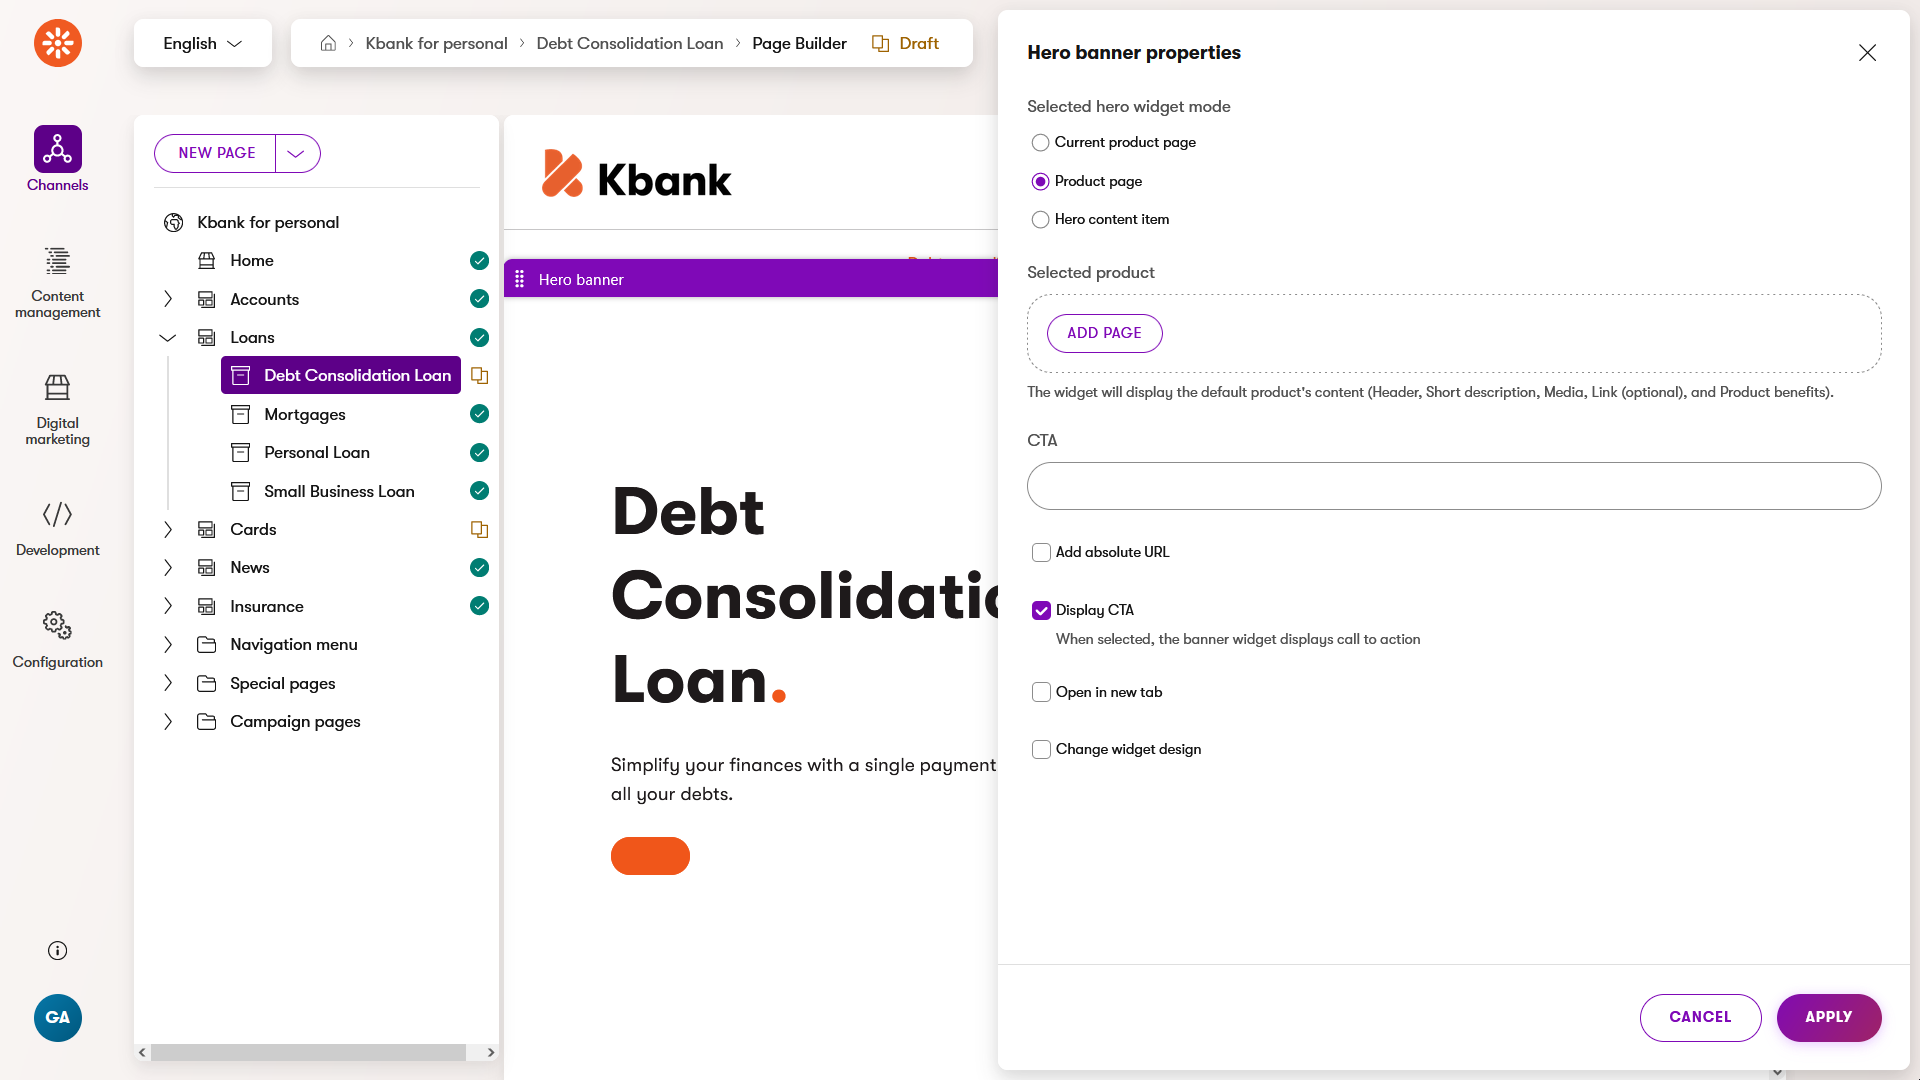
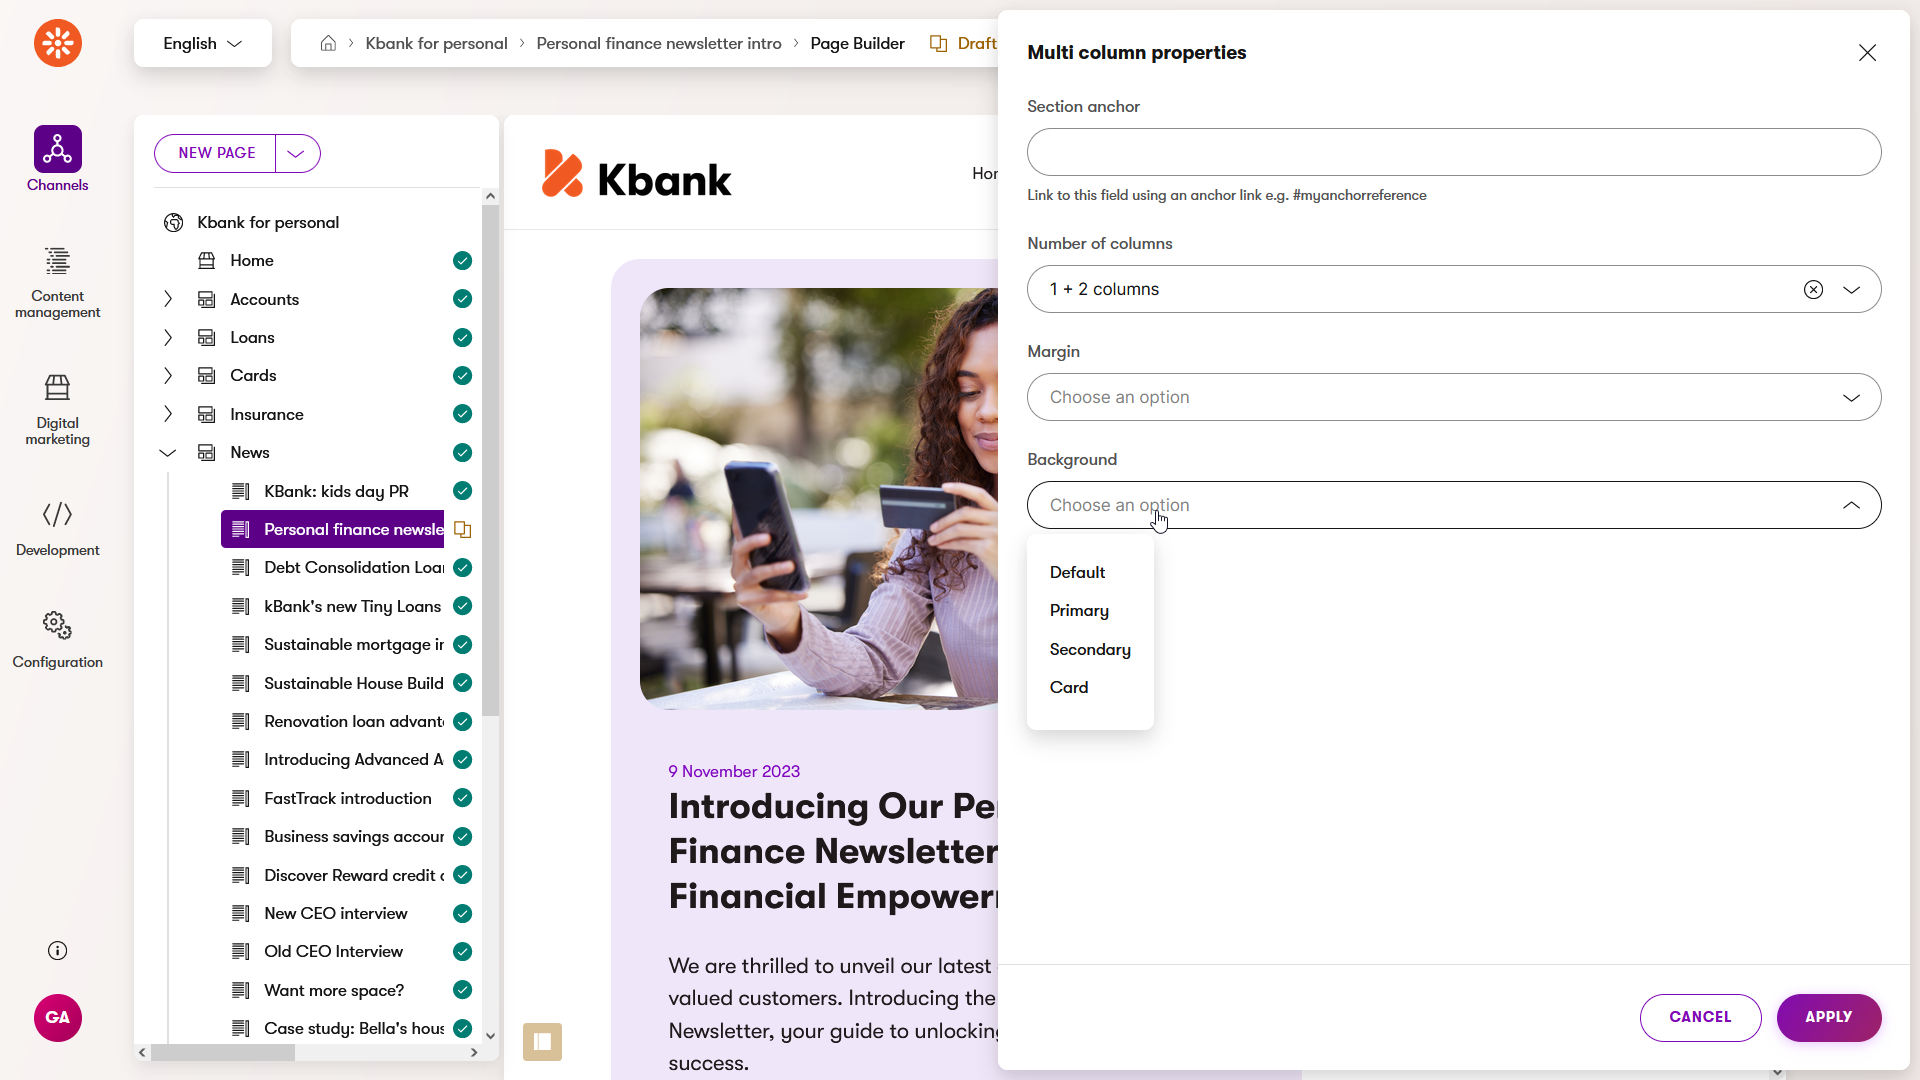
Depending on the widget configuration, the page template will contain different data. For example, the Hero banner on the Kbank website:
- Current product page: the widget will be empty. Why? The reference to the reusable product item that contains the data is removed when you save the configuration as a page template.
- Select product page: links content from another product page.
- Select hero content item: uses the custom hero content item and shows it in the widget.
This previous text only sums up how complex widgets, such as the hero banner, influence what data is saved into the page template. You can run into different options depending on the widget’s properties you use. For example, if the hero banner displays data from the Current product page and contains a CTA label with a link, Xperience will save both the CTA label and the link to the template.
Once you learn how to create page templates in Xperience, experiment with the Kbank demo site to learn about the configuration options. And you can also find out more about reusing content through the Hero widget.
Where to find the template
The template will be of the same page type you created the template from. In our example, the Car loan page is a Content page type, so the template shows under the Content page.
Create a template from scratch
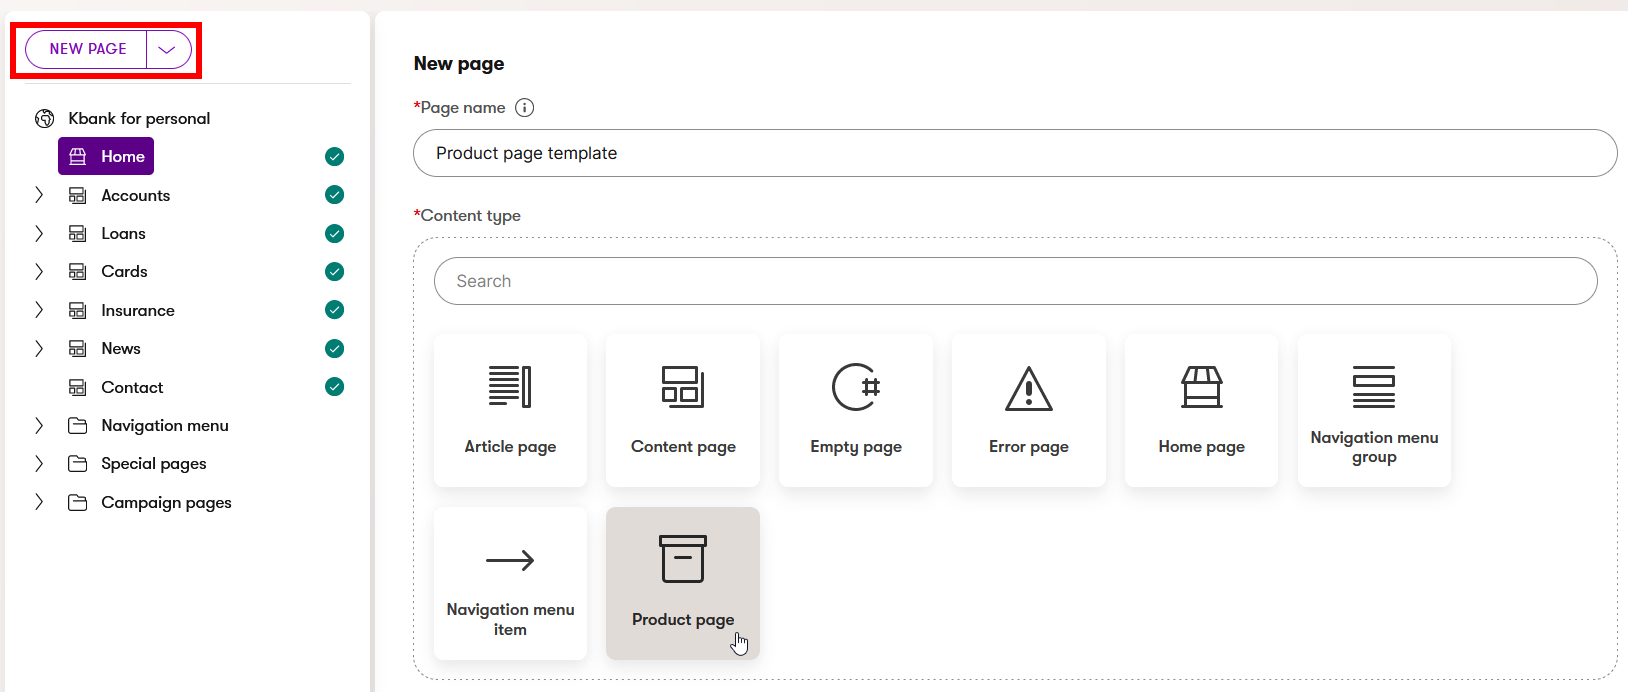
The second option is to start with a blank canvas and save the template for future use with a clear configuration. This means the template will keep all the widgets you added, but the widgets will be empty content-wise. The following example will teach you how to create a template for product pages on Kbank personal website.
- Create a New page, fill in a name, and select the page type you want to use for this template, in this case, a Product page.
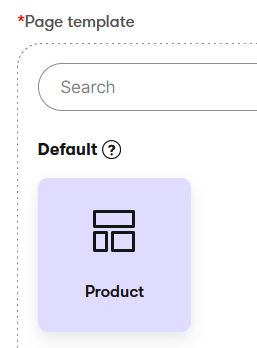
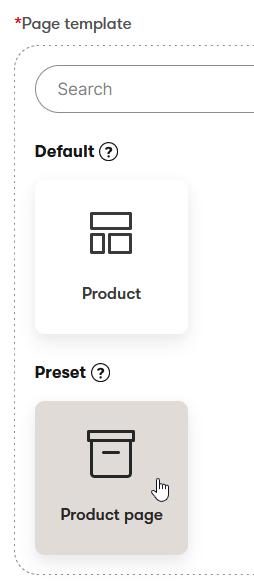
- Select the Default page template. If this is your first product page template, you will see only the default options. In Kbank, developers prepared the Product page template.
- Save your new page and go to the Page Builder tab where you’ll prepare the layout using the widgets you see fit for the page.
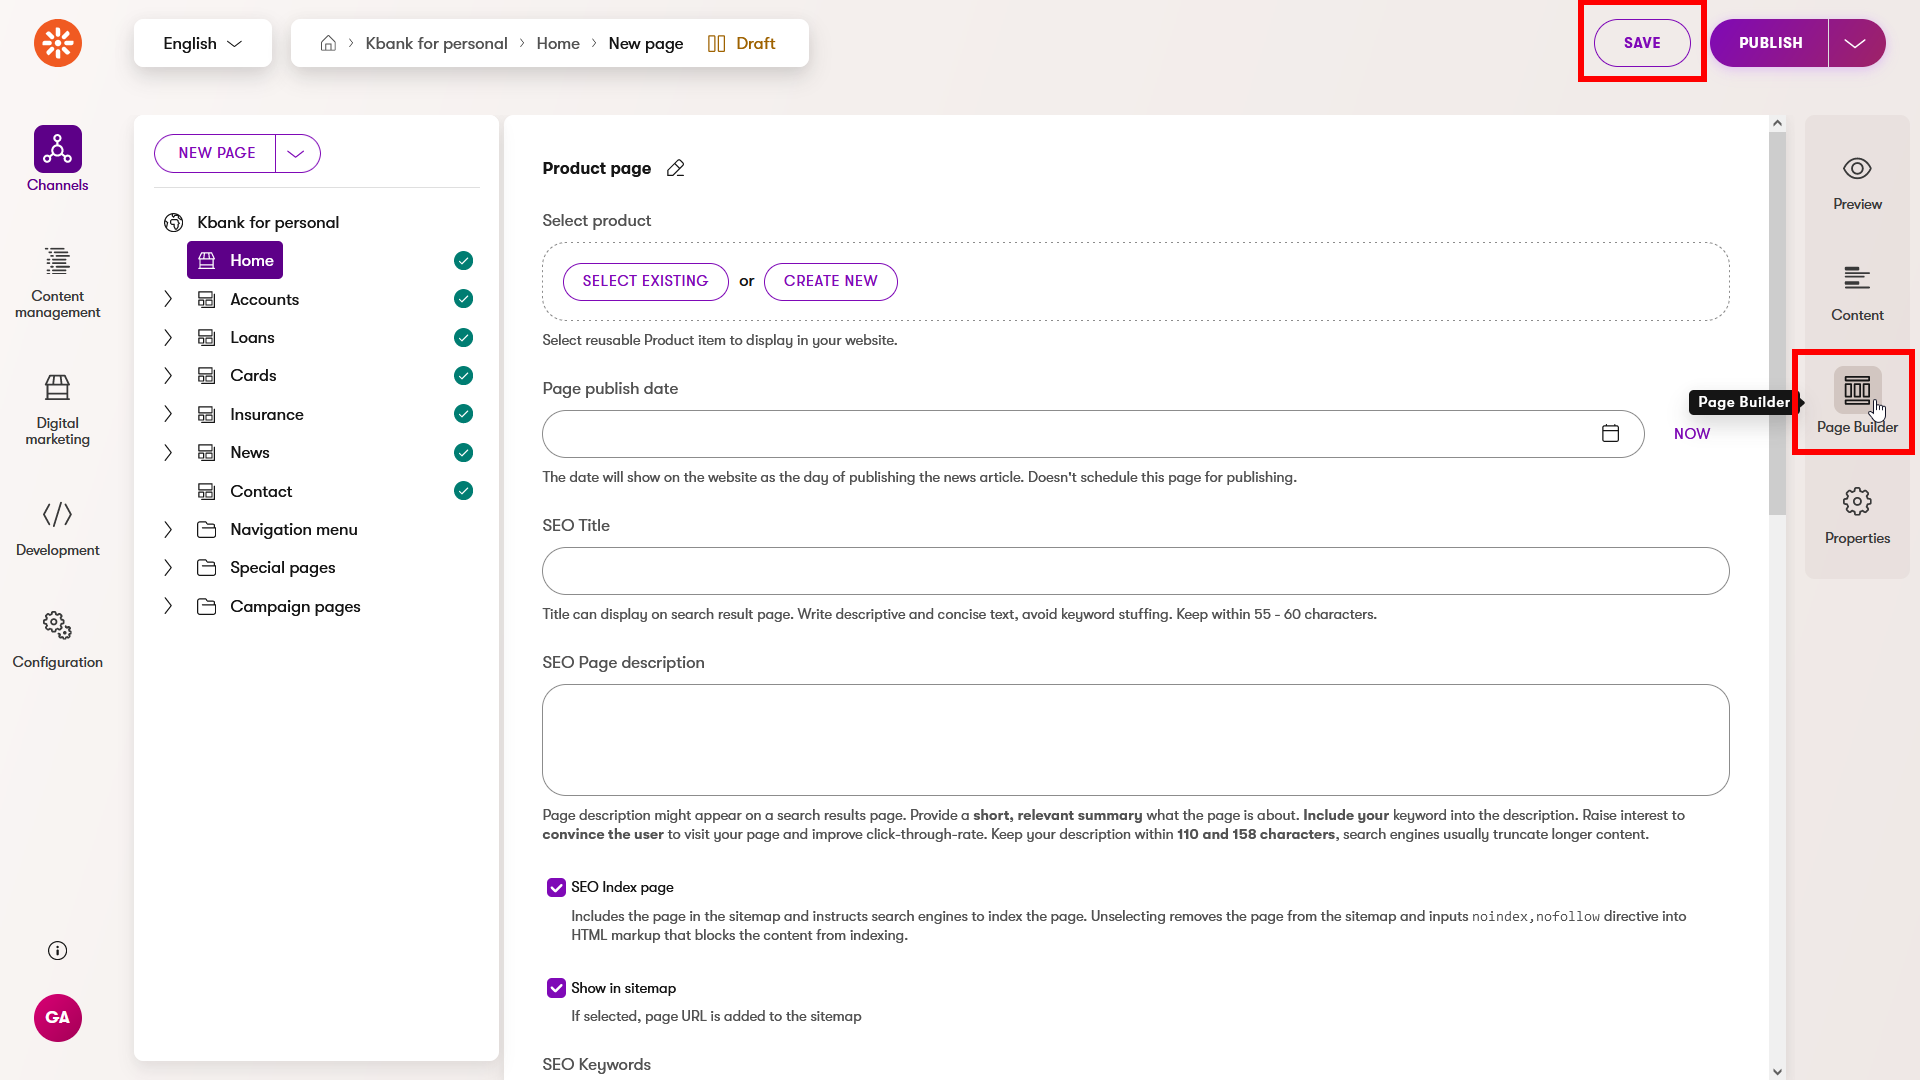
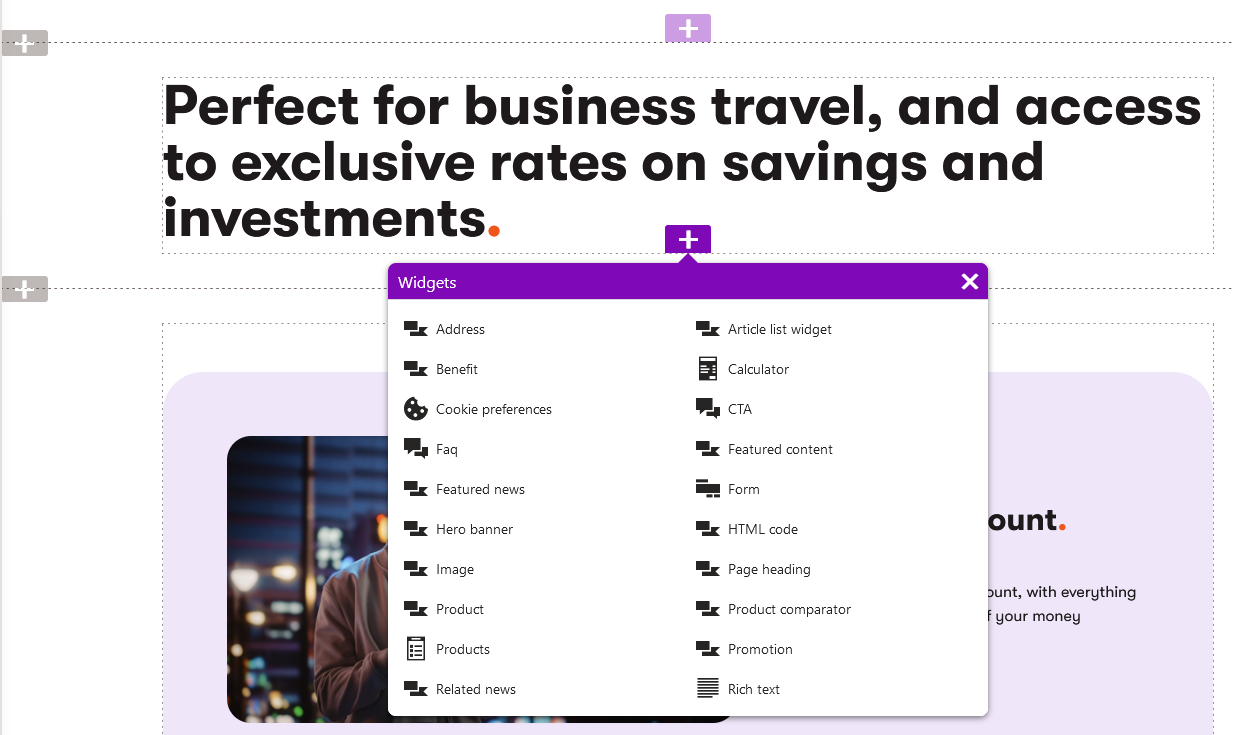
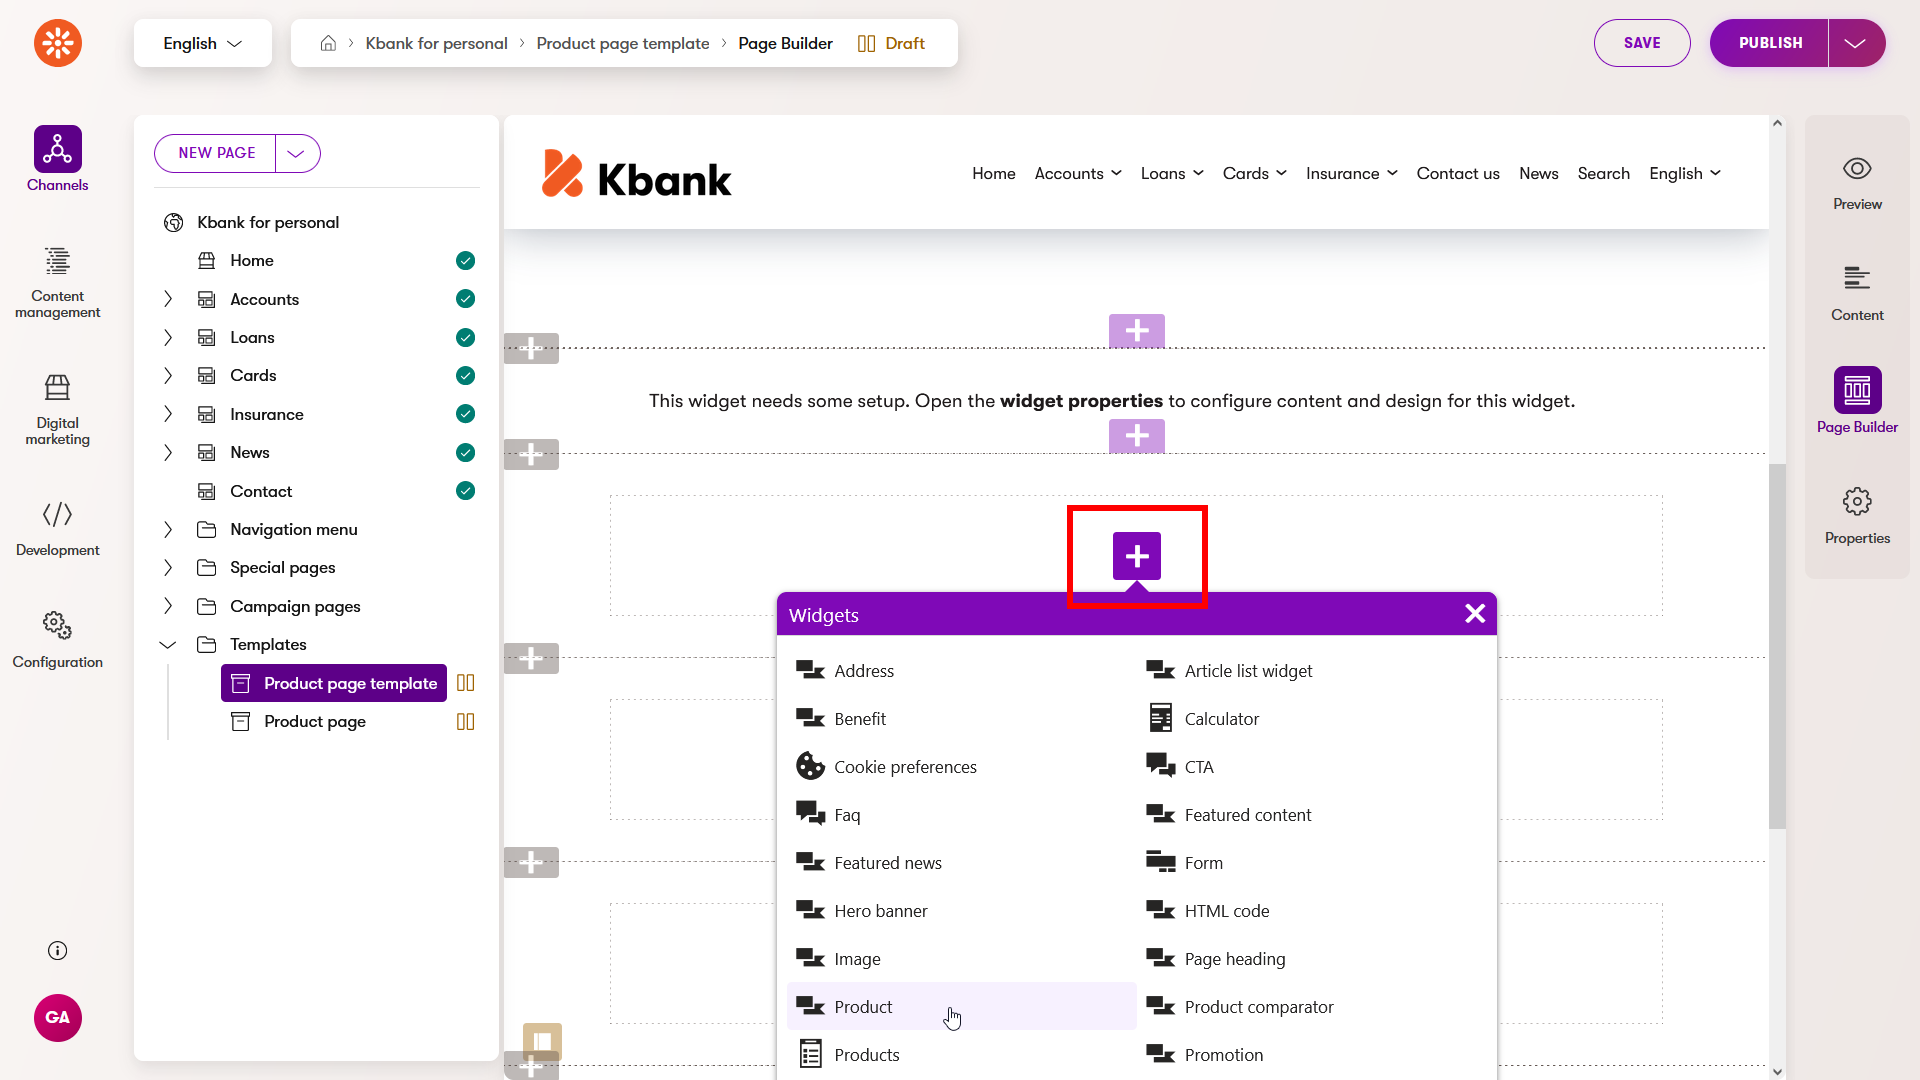
- Let’s add some widgets to our Kbank example page, like a hero banner, product, or benefits widget. To add a widget, select the plus button in the middle of the section and choose the desired widget.
- Once the widgets are set up, save the changes made to the layout and save it as a preset template.
- Name the template, add a Description to help content creators pick the right template, and select an Icon to distinguish between templates visually.
- The new template will be available immediately.
TIP: When creating a template from scratch, Xperience will save the page you used as a draft. You can create a Template folder to store these drafts. It will be easier to find these sample pages in case you want to work with them later; for example, adjust them and create a different template.
It’s good to keep your template list up to date and remove any templates that are not useful anymore so the content editors don’t end up confused.
Tips for seamless content creation
Consider your content requirements in advance
We’ve covered two types of content based on how the content is stored. You can also think of content and what role it’s going to play in your marketing communication. The following table (courtesy of Sean Wright, Kentico Lead Product Evangelist) identifies the pros and cons of content intended to be reused, meaning it requires storing in a structured way.
Reusable content | Single-use content |
Benefits
| Benefits
|
Challenges
| Challenges
|
Leverage page templates to speed up content creation
When you create a new page and choose the content type, this type will usually come associated with one or more page templates. The page template defines your content’s layout and what page composing capabilities you’ll have available.
Use structured data for quick content display
In some cases, typically, when the page’s content is stored in a structured format, the default page template designs the content automatically from the content type fields into the presentation layer. See the Event content in the Dancing Goat demo site, where an editor inputs the data.
The associated template ensures that the content renders properly on the live site. As an editor, you don’t have a way to influence the page’s design; Xperience renders your content as is.
Combine hard-coded page layouts with the Page Builder
Even if your designers decide that some pages will use default views (templates) defined in the code, it doesn’t limit your content capabilities.
Sections in page templates commonly contain editable properties you can use to adjust a page’s layout or design.
It’s also very common that aggregated pages like the article or product listing pages, or even individual articles, contain editable areas with Page Builder where you can display, for example, featured articles or run digital marketing campaigns using content personalization. See how the KBank demo site’s news pages allow you to display relevant related pages.
Limit the use of URL-less items in the tree
Only rarely some content tree items can also serve as chunks of content. Editors use the visual representation of the content tree, for example, when they need to build an ordered hierarchy of items, such as the website navigation menu, as you can see in the Xperience Dancing Goat demo website.
Note on email content
As mentioned above (and similarly to Page Builder content), Xperience stores email in an unstructured format. You will learn more about email marketing options in the next part of this tutorial. Or, you can learn about Emails in the documentation.
Exercise 3 - Adjusting an existing landing page
In this exercise, you’ll add a new element to a landing page.
Task:
Your marketers want to make the Rewards and Premiere credit cards more visible to potential customers. They asked you to add a card comparison.
- Go to the Kbank business application.
- Open the Campaign pages and select the SMB loan promotion page.
- Switch to the Page Builder tab.
- Open the Edit page drop-down and Create a new version.
- Add a New section using the plus button on the side below the Featured content widget and select Multi column.
- Add Widget with the plus button in the new section you just created and choose Product comparator.
- Open the widget’s properties using the Configure widget button in the widget ribbon:
- Use Add page to choose products.
- In the content tree, select Accounts.
- From the available pages, select both Cooperative account and Business saving account.
- Confirm with the Select button.
- Fill in the Comparator heading: Level up your business with our business accounts.
- Choose H2 as a Heading type.
- Fill in the CTA: Get the account.
- Apply to save the changes.
- Use Add page to choose products.
- Save the changes on the page.
- You can check the result using the Preview. If you are satisfied with the page, Publish it.
Work with files
Content hub assets
We recommend storing your files in the Content hub using a custom content type, for example, Asset or Media. You can then reuse your asset as any other content item.
Your developers have complete control over the type. They can define required fields per your project requirements and implement the required behavior.
Xperience also provides an out-of-the-box way to secure and control who will consume your assets. You can secure the file, meaning only logged-in visitors can view or access it.
If you store an image as an asset, developers ensure that Xperience correctly displays it on the page. If you put a file into an asset and add it to a call to action button, clicking the website button opens the file. Opening a file can also log file opened custom activity for that visitor. You can use this information in your digital marketing activities.
You will learn more about Xperience’s digital marketing capabilities on another page of this tutorial. And see how developers define the content type assets and retrieve their content to the website.
Media library files
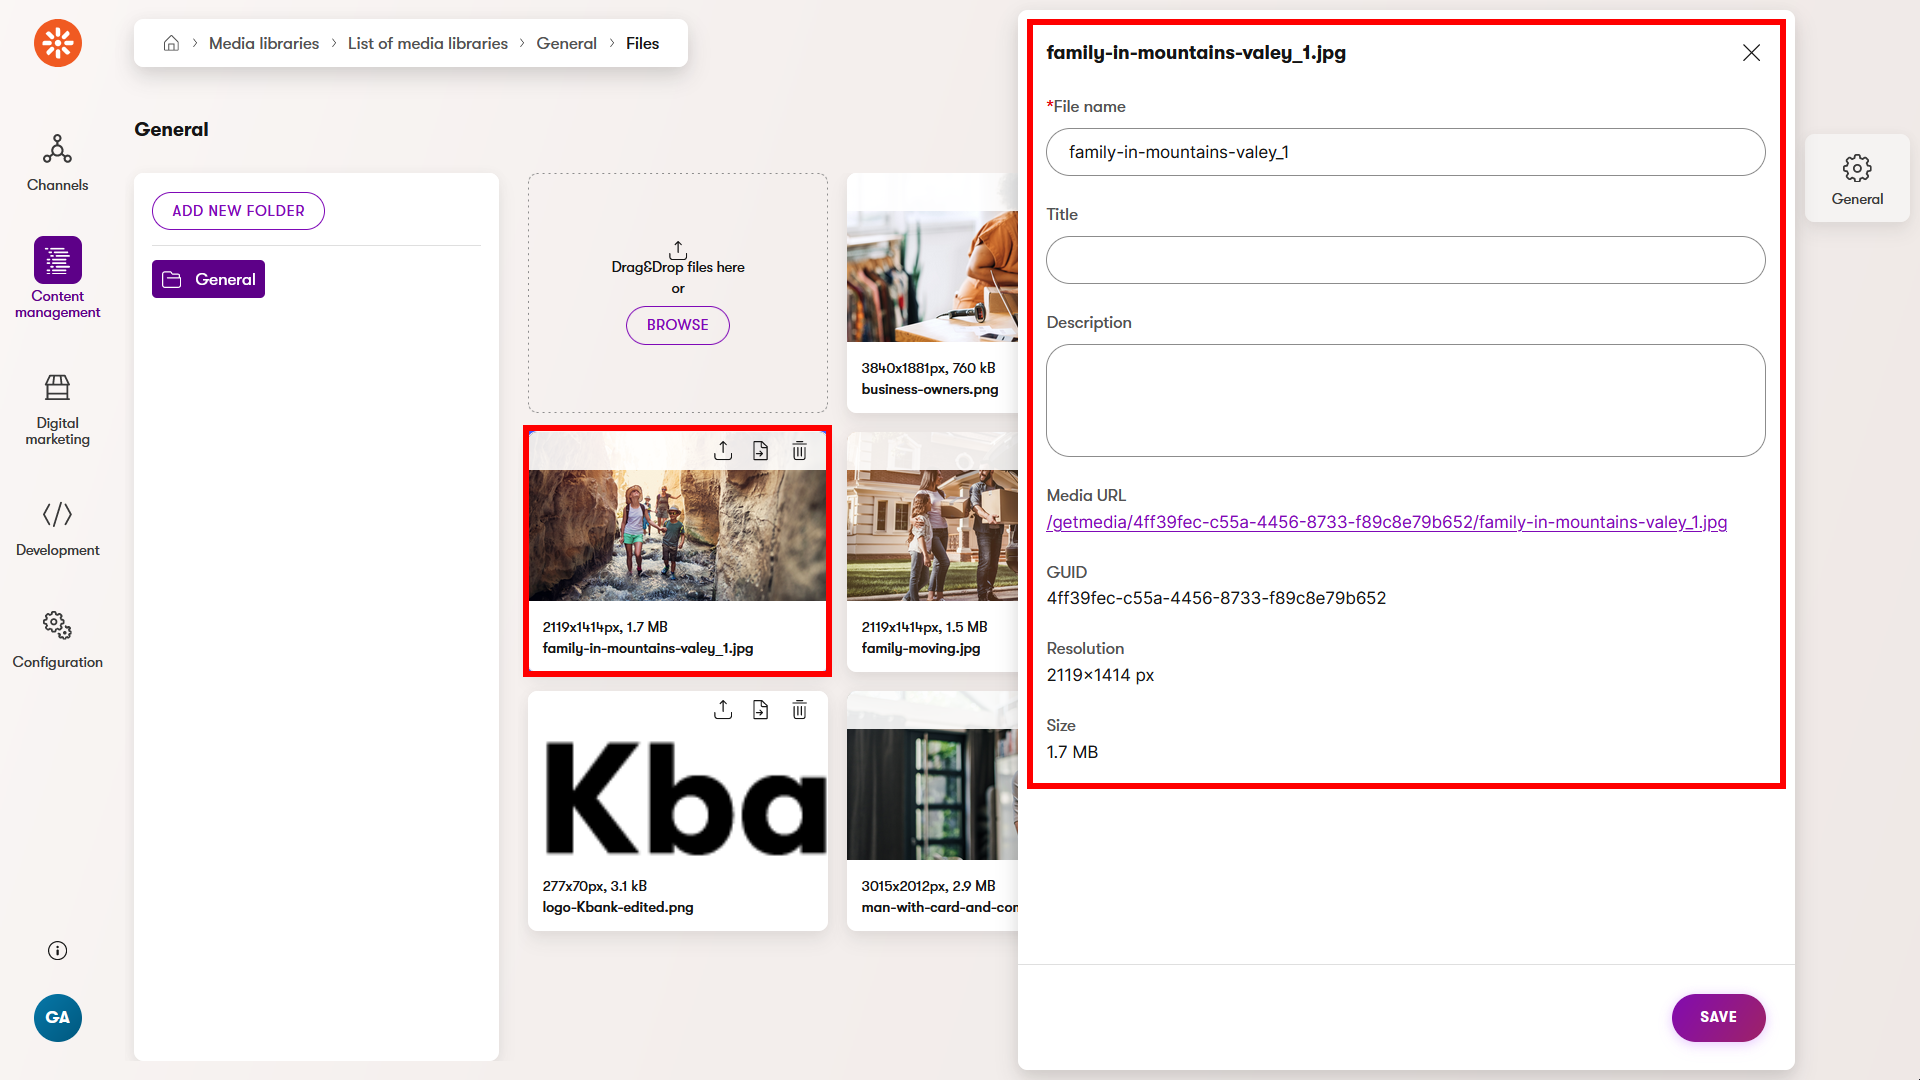
Second, a less convenient way of storing files in Xperience is to keep them as media library files.
Media libraries application helps you store different file types such as images, sound files, videos, or package files. Imagine a media library as a file folder on your file drive. As on your disk, you can create any number of media libraries. In each library, you can create a different structure of subfolders.
Similarly to assets, you can use files stored in a media library on your website pages. For example, you can create a Campaign assets library, keep all the campaign-related content within, and reuse it on campaign landing pages or personalized widgets.
Unlike assets, media library files have only a predefined set of fields, and customizing them will require substantial developer resources. Also, unlike assets, you cannot secure access to media library files. These files will always be accessible at their direct URL by their GUID (e.g., example.com/getmedia/4ff39fec-c55a-4456-8733-f89c8e79b652/family-in-mountains-valey_1.jpg)
See how you can create media libraries, add different files, and use them on the website in the documentation.
Use Content hub when you need to | Use media libraries when you need to |
|
|
Previous page: Business tutorial overview — Next page: Manage users and roles