
Run digital marketing activities
Xperience by Kentico is a digital experience platform, a DXP for short. It lets you capture and store data about your website visitors. You can turn this data into actionable insights, and create tailored visitors’ experiences across different marketing channels.
AustralianSuper (formerly LUCRF Super, Australia’s first industry super fund), improved customer interactions through personalization and SMS marketing. LUCRF’s form completion rate grew by 193% after streamlining customer communication processes.
This page introduces general digital marketing concepts. You’ll learn about several Xperience applications you can use to shape your visitors’ experiences.
You’ll learn about:
- Visitor data management
- Collecting visitor data
- Segmenting contacts into contact groups
- Personalizing website content
- Email marketing
You’ll be working on:
Online marketing exercises
You’ll need a demo Kbank website to follow up on the exercises. If you don’t have your demo site, request it through the form at Xperience Hosted Trial. Our team will get back to you and help you set the website up.
Manage visitor data
Knowing how exactly your visitors navigate and what content they consume through your digital content brings you invaluable insights for defining and optimizing your customer journeys.
Xperience’s Contact activity tracking feature allows you to track and analyze how contacts engage with your website, including browsing patterns, content consumption, form submissions, downloads, and other activities.
Xperience tracks contacts based on a cookie. Once the contact agrees with the tracking, Xperience will always try to match and log all activities done by a specific contact, even when the contact performs the activity on a different device (such as visiting the website on their desktop and mobile phone).
Depending on a cookie that represents a current contact Xperience doesn’t require any further unique identification, such as a contact’s email. As a result, the system can log the activities of “anonymous” visitors and identify them later, for example, when they share their email addresses with you via a form.
You can view the collected contact data in the Contact management application. Xperience displays all activities on the website in the Activities. Opening individual contacts, you can see this contact’s activities.
With the Xperience Cross-site tracking feature, you generate an Xperience tracking script, insert it into your 3rd-party website - and you can start collecting your website’s visitor data, even on websites that haven’t been built with Xperience. Creating an overall picture of your customer’s interactions in one system opens new opportunities to personalize your marketing experience.
Find out more about Contact management and tracking Contact activities in the documentation.
Data protection and GDPR
The Data protection functionality helps you stay within the legal boundaries of different data protection regulations in marketing-related actions. Developers can prepare data protection on your website in different ways. Usually, Xperience will use the contact’s email address as a unique identifier.
Find out more about data protection and cookies in the documentation.
Exercise 1 - Tracking a contact in Xperience
In this exercise, you’ll get hands-on experience with the contact tracking feature. You’ll impersonate a website visitor using an incognito window, private window, or another browser and see how Xperience by Kentico collects visitor data in the Contact management application.
Task:
Open the Contact management application in the Xperience administration in one window and your live site in a second, incognito window. (You can copy the whole application URL, open a new incognito window tab, paste in the URL, and remove everything starting from /admin/ to the end. Your adjusted URL with only a website homepage URL will look like this, for example, https://us-03.kenticolab.com/Hosted_KBank_12345 .)
In the incognito window, consent to tracking using the Accept all button in the consent banner.
Switch to the Xperience administration and go to the Contacts tab to refresh your contact list in the Contact management application.
Select the Created column header in the contacts list to reorder your existing contacts from newest to oldest.
Select the newest contact. This new contact’s name is Anonymous - (timestamp); for example, Anonymous - 2022-08-23 04:45:06.775.
Use the Activities button below the contact’s Overview to see the list of activities the contact has done on the website.
Perform some activities in the incognito window for your contact. Here are some examples: Visit the News listing page, the Want more space? article, and Loans page, and submit a form on the Contact page.
- While performing these activities, switch between the live site in the incognito window and the administration. See the Overview in your contact’s profile. Then, go back to the Activities tab to view the collected data. Watch how Xperience tracks activities in real-time.
When you finish browsing your website in the incognito window, switch to the contact’s Overview tab. If you have submitted the form on the Contact page, your demo contact will no longer be anonymous.
Collect visitor data
Xperience’s built-in Forms application takes your contact management to the next level. The online forms you build in the application help you collect valuable visitor information. And since the application is a part of Xperience, you can convert collected data into actionable insights and use it to segment your contacts or trigger personalized customer journey.
See how you can work with forms in Xperience by Kentico.
Here are a few ideas for website forms to collect valuable customer data:
- Request additional information through a contact form.
- Provide visitors access to gated content after form submission.
- Give users a way to set up preferences.
- And many more.
Find out more about Xperience forms in the documentation.
Exercise 2 - Collecting visitor data
In the following exercise, you’ll learn how you can create and display a form on the website and use it to collect contact data.
You will need to generate sample data for this exercise to be able to add consent to the form. You can find out how to generate the data at the start of the exercises section.
Task:
Your content manager found out there is a page that’s missing a form. They asked you to create a form and add it to the Loans page.
Create your form
In Xperience by Kentico, navigate to the Forms application and create a New form.
Use the Add field button in the middle of the Form builder and add the following fields to your form:
- First name.
- Last name.
- Email.
- Business phone.
- Leave a message.
You want to adjust the Business phone label to just Phone since the promoted loans are for personal usage, and you want to avoid potential confusion.
- Select the Configure button for the Business phone field and change the Label to Phone.
- Apply the change.
Adjust the Leave a message as well:
- Select the Configure button for the message field and change the Label: Let us know about your financial needs.
- Add Explanation text: Share any specifications or ideas with us so we can tailor the loan offer to your needs.
- Apply to save the changes.
Make the Email field and any other fields required. Select the field’s Configure button, select the Required checkbox field, and hit Apply.
To complete the form, add the Consent agreement field and:
- Select the Configure button and, for this tutorial, select Form1 consent.
- Apply to save the change.
Switch to the General tab and:
- Rename the form to Loans general form.
- Change the Code name to LoansGeneralForm.
- Save the changes.
Go to the After form submission tab:
- Adjust the Display a message text: Thank you! Our Loan specialist will contact you during the next two business days.
- Save your changes.
Display your form on the live site
Switch to the Kbank personal application and go to the Loans page. Select Edit page to Create a new version of the published Loans page.
Add section below the Featured content widget with the plus button on the left and add the Form column section.
Add widget using the plus button in the middle of a new section and insert the Page heading widget.
Open the Page heading properties with the Configure widget and:
- Choose Heading type: H3
- Add the Title: Let us prepare a personalized loan offer that suits your needs the best.
- Hit Apply to save the changes.
With the plus button, add a Form widget.
Open the Form properties with the Configure widget and:
- Select the Loans general form.
- For After form submission, keep Display a message.
- Adjust the text: Thank you! Our Loan specialist will contact you during the next two business days.
- Apply the change.
Finally, Save and Publish your page.
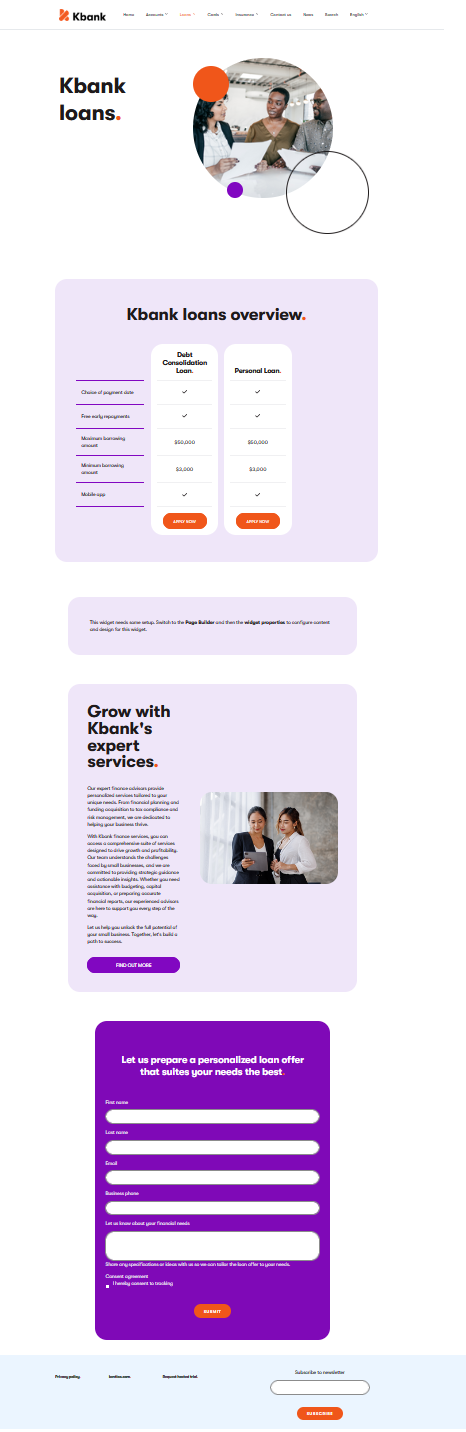
Your page with a new form may look like the following:
Segment your website audience
You can further use the contact’s demographic data, content preferences, or different website activities to shape their digital experience.
Xperience comes with the Contact groups application, where you build specific segments for which you can create targeted content and improve their customer experience. The Contact groups application organizes existing contacts. Any individual contact can belong to any number of contact groups.
You can create your contact groups manually or use built-in conditions to populate your groups dynamically. In the latter case, Xperience evaluates contacts on the website and in the database and automatically adds contacts to groups based on the contact group’s conditions.
Here are a few examples of groups in which you can organize your contacts:
- Contacts that are interested in specific content.
- Contacts that submitted a specific form on your website.
- Contacts to target in seasonal campaigns.
- Contacts who came to a particular landing page.
- Contacts with the same characteristics, e.g., those of the same age group.
- And many more.
Find out more about contact groups in the documentation.
Exercise 3 - Segmenting website audience
In this exercise, you’ll collect all contacts with similar characteristics into a contact group. You will test how Xperience dynamically adds contacts to a group and removes contacts once they don’t match the group’s conditions.
Task:
You want to work with your website visitors more effectively, so you’ve decided to segment them into categories to better target your marketing efforts.
Switch to the Contact groups application. Create a New contact group and call it Prospective Account Clients.
Fill in the Description: Visitors who read any of the Accounts subpages but haven’t filled in the Request account form.
Use the Add condition button to open the condition designer:
Add a new condition group:
- Select Contact has agreed with consent condition and select Marketing consent.
Add another condition:
- Choose Contact has submitted a form condition.
- Change it to has not and select the request account (single) form.
Add condition group to filter all contacts who have visited any of your Accounts pages.
- Use Contact has visited a page in the last X days condition.
- Add page and choose Accounts in the content tree and Current account from the available pages.
- Confirm with the Select button.
Add another condition, and again, choose Contact has visited a page in the last X days condition.
- Add page and, this time, select the Accounts → Advanced account.
- Confirm with the Select button.
Add another condition again and choose Contact has visited a page in the last X days condition.
- Add page and, this time, select the Accounts → Premium account.
- Confirm with the Select button.
Lastly, Add another condition again and choose Contact has visited a page in the last X days condition.
- Add page and select the last page - Accounts → FastTrack savings account.
- Confirm with the Select button.
Change the logical operator between the second group of conditions - page visits. Change Applies if: to Any of the following conditions are fulfilled. This way, your visitor needs to see just one page to be added to the contact group, not all of them.
Apply the changes.
Save your new contact group.
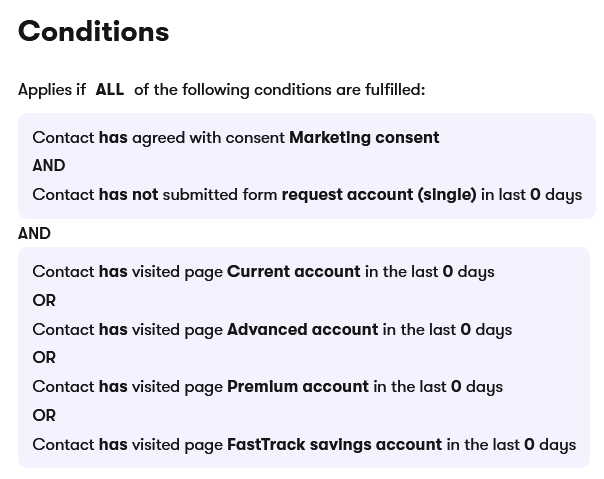
The conditions in the new Contact group should look like this:
You can Recalculate your contact group. Xperience will filter the contact database and add every contact that passes the conditions to the group.
Test how Xperience dynamically segments your contacts:
Open your website in an incognito window, agree with the tracking, and visit some pages, including one or more Accounts subpages. To recognize your new contact in the Contact management application, submit a form, for example, on the Contact page, but NOT on the Accounts pages. Then check your Prospective Account Clients contact group – you will see Xperience added your test contact.
Once you can see your contact in the group, you can further test how Xperience works with a contact once it doesn’t fulfill the condition anymore. Go to one of the Accounts subpages and fill in the form. Go back to the Xperience administration and reload the contact group. After a few moments, you should be able to see your contact was removed.
Personalize website content
Marketing communication should never be a “one-size-fits-all” interaction. With the correct content served at the right time, you can turn your visitors into loyal followers of your brands.
Personalization allows you to custom-tailor the content for your website visitors. Xperience can dynamically recommend content visitors might find interesting based on their previous behavior.
You can personalize website content using page builder widgets because you know what your audience segment is looking for. Once your developers prepare the widgets for personalization, you can start building contact groups and ensure that your website content automatically changes based on who’s interacting with your website.
Here are a few ideas on how to use the widget personalization:
- Change the content of the homepage based on a previous visitor’s activity.
- Recommend related content based on customer preference.
- Show/Hide content on the website based on the current time of the day or season.
- And many more.
Find out more about the widget personalization in the documentation.
Exercise 4 - Personalizing website content
In this exercise, you’ll learn how to point potential partners to content they might find interesting using content personalization. You’ll create and then use a contact group and personalize the website’s content.
Task:
Your marketing manager wants you to personalize the hero banner on your website home page to catch more attention from those visitors who have read the kBank’s new Tiny Loans are cheapest in the Galaxy article, but haven’t applied for a loan.
Create a contact group
- Go to the Contact groups application.
- Create a New contact group and fill in:
- Name: Personal loan Hero banner.
- Description: Show a Personal loan hero banner on the Home page to visitors who read the “kBank’s new Tiny Loans are cheapest in the Galaxy” article but haven’t visited the Personal loan page and haven’t submitted any loan application form.
- Add condition:
- Add condition group.
- Select the Contact has visited a page in last X days condition.
- Add page and select News → kBank’s new Tiny Loans are cheapest in the Galaxy.
- Add another condition:
- Again, select the Contact has visited a page in last X days condition.
- Change it to has not.
- Add page and select Loans → Personal loan.
- Add another condition:
- Select the Contact has submitted a form in the last X days condition.
- Change it to has not.
- Pick the Request account (2-column) form.
- And lastly, Add another condition:
- Select the Contact agreed with consent condition.
- Choose Marketing consent.
- Apply the new conditions set.
- Save the contact group.
Create a personalized variant of a widget
- In the Kbank personal application, navigate to the Home page.
- Edit page and Create new version of the page.
- Select the Personalize button in the header of the Hero banner widget.
- Select the Is in contact group condition type.
- Enter a Variant name: kBank’s new Tiny Loans are cheapest in the Galaxy, not Personal loan.
- Select the Personal loan Hero banner group from the list of contact groups.
- Apply to create the personalized variant.
Adjust the content of the personalized widget
- Use the Configure widget button to personalize the widget’s content.
- To Select hero banner, choose Select existing.
- Select the Personal loan, and remove the Kbank default banner.
- Choose Select to confirm your choice.
- Add a CTA: Learn more.
- Apply your adjustments to the new banner.
- Save and Publish the new version of the Home page.
Test content personalization
Test how your new personalization works for a website visitor using the incognito window in your browser:
- Visit the Home page of your website.
- Agree with tracking on the website.
- Visit some pages on the website and try browsing for at least half a minute. (This is a limitation of the training site. On your own website, activities will be logged immediately.) Visit the kBank’s new Tiny Loans are cheapest in the Galaxy article and, for example, the Accounts page and some of the pages with Kbank cards. Do NOT visit the Personal loan page, and do NOT submit any form on the loans pages.
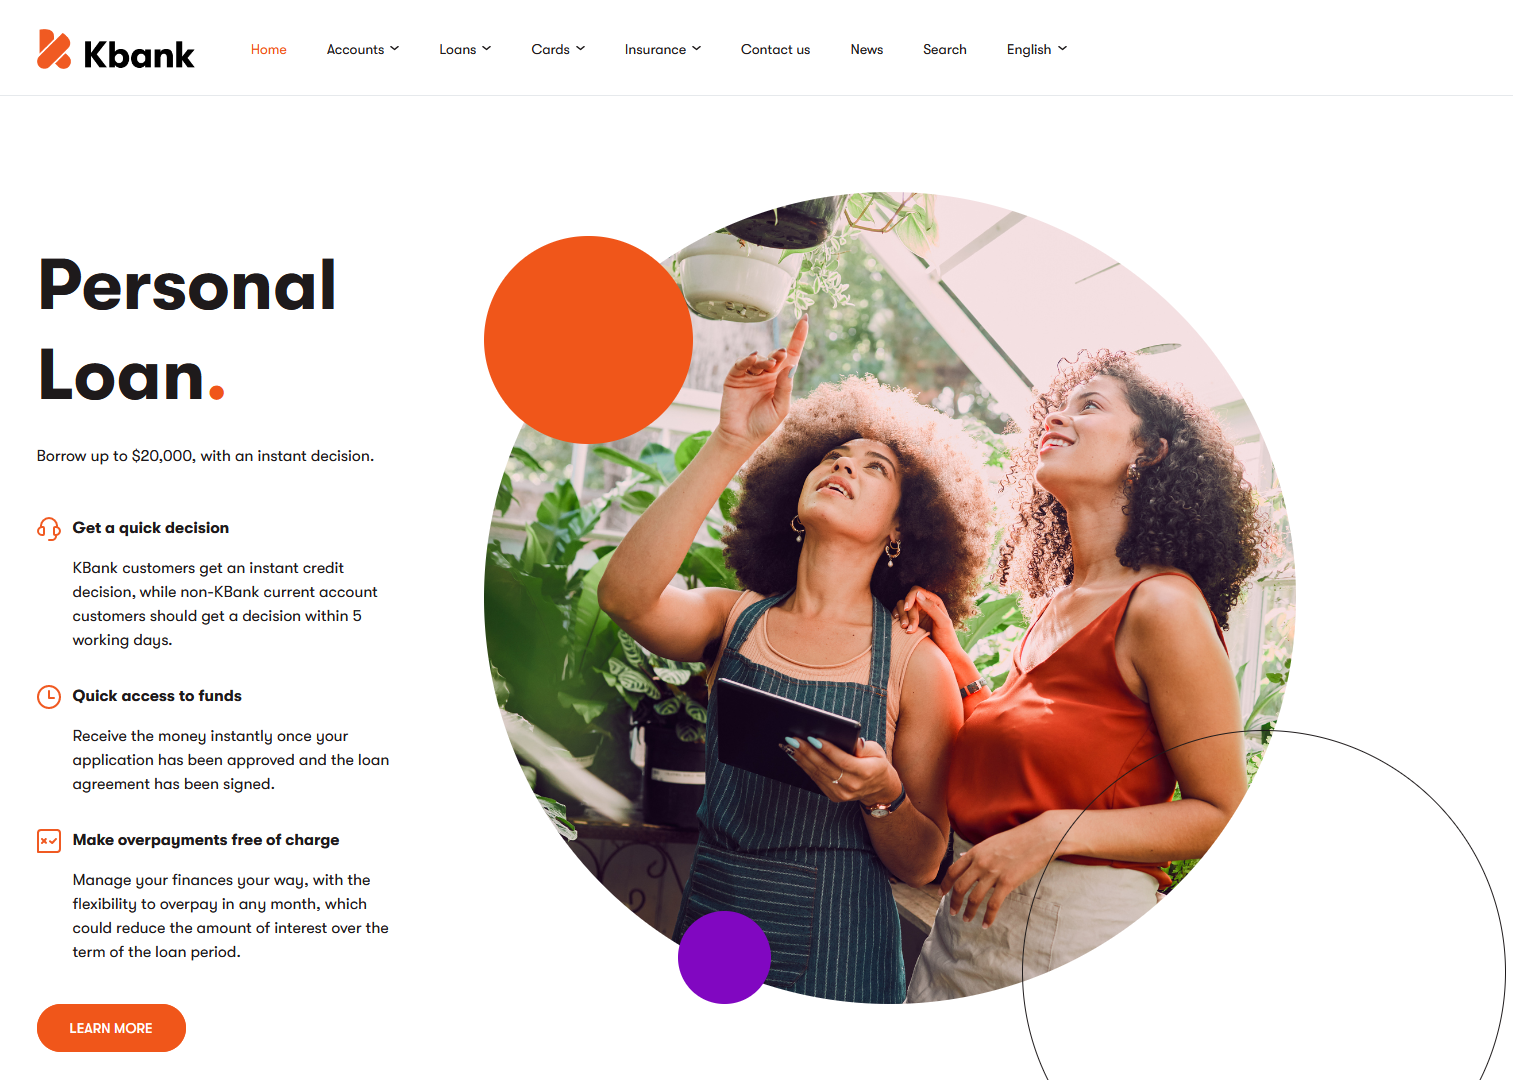
- Return to the Home page. Your personalized Home page should look like the following:
Email marketing
Email marketing can promote your services or products and help you stay in touch with your customers. Xperience allows you to create the following types of emails:
- Regular emails for subscribed recipients.
- Form autoresponders are sent automatically after a visitor submits a form.
- Confirmation emails that notify recipients when they successfully subscribe or unsubscribe from email marketing.
Find out more about emails, sending emails to subscribers, and tracking email statistics in the documentation.
See how you can set up a newsletter in Xperience by Kentico.
Exercise 5 - Sending a newsletter to a recipient list
In this exercise, you’ll see how you can prepare a newsletter email and send it to a newsletter recipient list.
Task:
You want to advertise your financing solutions for small businesses to your newsletter subscribers. Create an email informing your recipients about the advantages of a loan for small businesses.
- Go to the Kbank business emails application.
- Create a New email.
- Fill in:
- Email name: SMB loan newsletter.
- Email purpose: Regular.
- Content type: Simple email.
- Select Continue.
- Choose Email template: Simple regular template.
- Create the email.
- Add a Subject: Financing Solutions for Small Business.
- Fill in the Preview text: Empower your small business with tailored financial solutions from Kbank.
- Create the Email content:
- Copy the following text and paste it into the email:
Hello,
At Kbank, we believe in empowering you to create the business of your dreams. That’s why we’re excited to share with you our latest loan offer for small businesses.With Kbank finance services, you gain access to a comprehensive suite of services designed to drive growth and profitability. We understand the challenges small businesses face. Whether you need assistance with budgeting, capital acquisition, or preparing accurate financial reports, our experienced advisors are here to support you every step. Download a Modern Makeovers case study and get inspired by the successes of others.
Find out more.
Let us help you unlock the full potential of your small business. Together, let’s build a path to success.
Best regards,
Mike Tracy
Senior Loan Officer, Kbank - Insert dynamic text after Hello to personalize the newsletter. You may need to add a space between Hello and the dynamic text field. Choose the First name as a Recipient attribute and Insert the field.
- Highlight the Find out more, Insert link, and choose the Page option.
- Select the Campaign pages in the content tree and SMB loan promotion from the available pages. If you cannot find the page, switch to Kbank business in the drop-down menu above the content tree.
- Insert the chosen page.
- Save the email.
- Copy the following text and paste it into the email:
- Switch to the Properties tab on the right and fill in:
- Code name: SMBLoanNewsletter.
- Sender: Mike.
- Send to: Newsletter recipient list.
- Save the changes.
Once the newsletter is ready, you can see what it looks like in the Preview tab.
Sending your email
If you are happy with the email, you can Review and send the email. You can schedule the sending time or send it immediately.
The Kbank demo website is not connected to any SMTP server, so your test email will be marked as being sent, but the hosted training environment will not send your email to any real-life email address.
Previous page: Manage users and roles — Next page: Next steps