
Display structured content with page templates
This guide demonstrates how to create a page and display data in Xperience by Kentico, utilizing a reusable content type and a page template.
First steps series - prerequisites
This guide is part of a series about the first steps toward creating a site in Xperience. It assumes you followed the previous guide of this series and have done the following:
- installed your desired version of Xperience by Kentico (version 28.0.0 or higher)
- created a reusable content type called Landing content in your administration interface
- generated partial class for this content type in your .NET solution
If you wish to follow along with this exercise but have not created the reusable content type or generated classes in your solution, start with the Create a reusable content type guide. If you don’t have the desired version of Xperience by Kentico, follow this guidance on how to install a specific version.
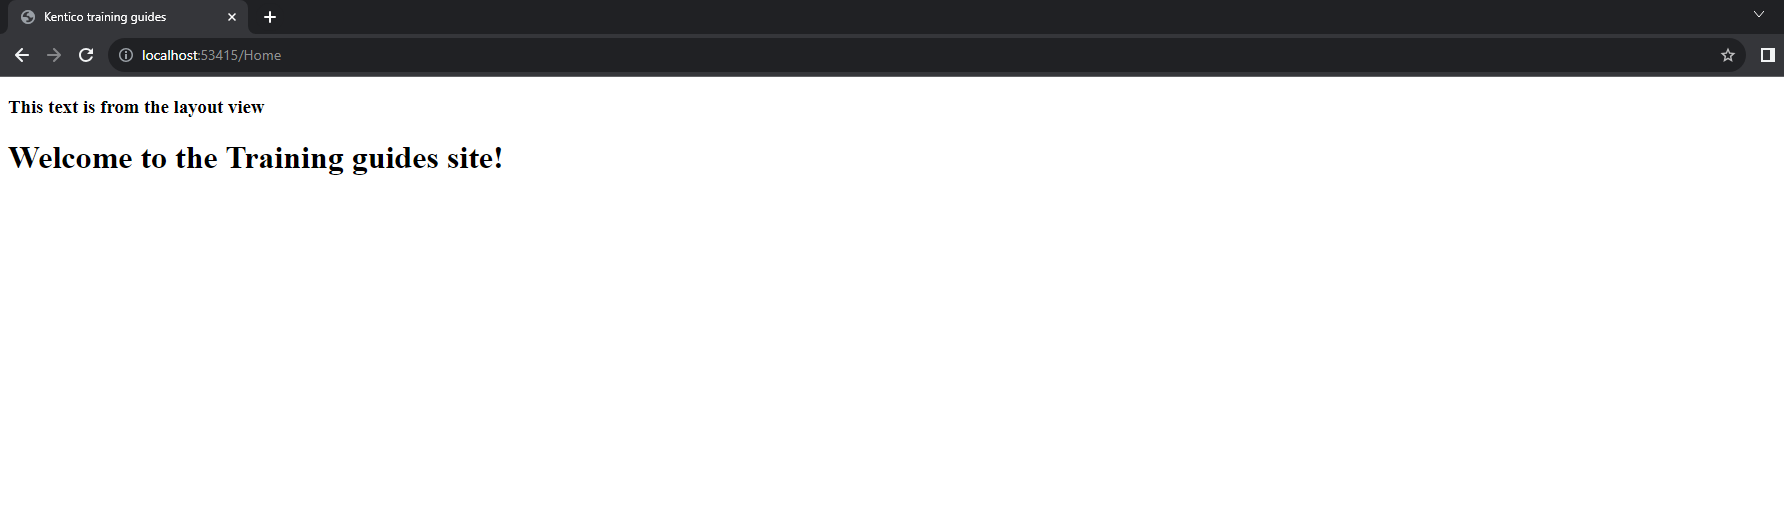
When you run your TrainingGuides.Web project now, you see a blank page with the following message:
After completing this guide, you will be able to display a home page with a title, as defined by the reusable Landing content content type. Note that this is just a very simplified example, and styling is out of the scope of this guide.
Add a website channel
The first step towards displaying content on a page is creating a website channel. One website channel corresponds to one site and stores your pages and linked content.
Channels and reusable content
Xperience by Kentico supports multiple channels in one Xperience instance. Reusable content, stored in the Content hub, from the previous guide, exists independently of channels and can be referenced by multiple channels at once. You will experience this first-hand later in this guide.
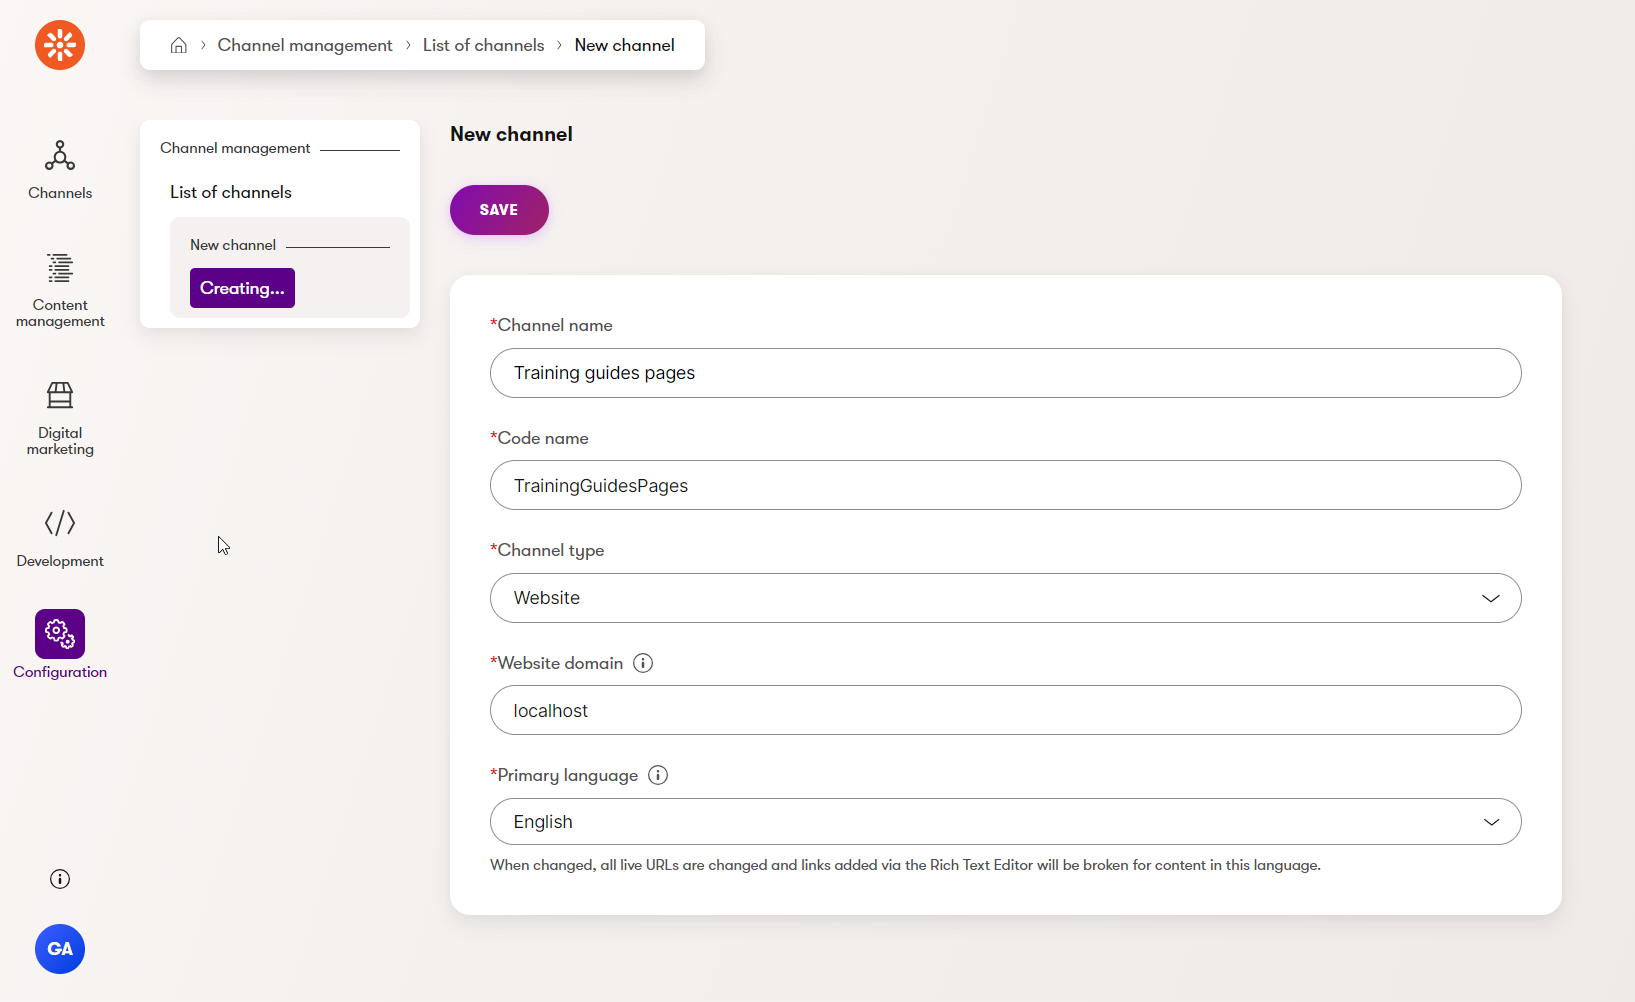
- Log into your Xperience administration and navigate to Configuration → Channel Management.
- Create a new channel with the following properties and click Save:
- Channel name: Training guides pages
- Code name: TrainingGuidesPages
- Channel type: Website
- Website domain: localhost
- Primary language: English
Website domain configuration
Learn more about how to configure your channel domains in our Website channel management documentation page.
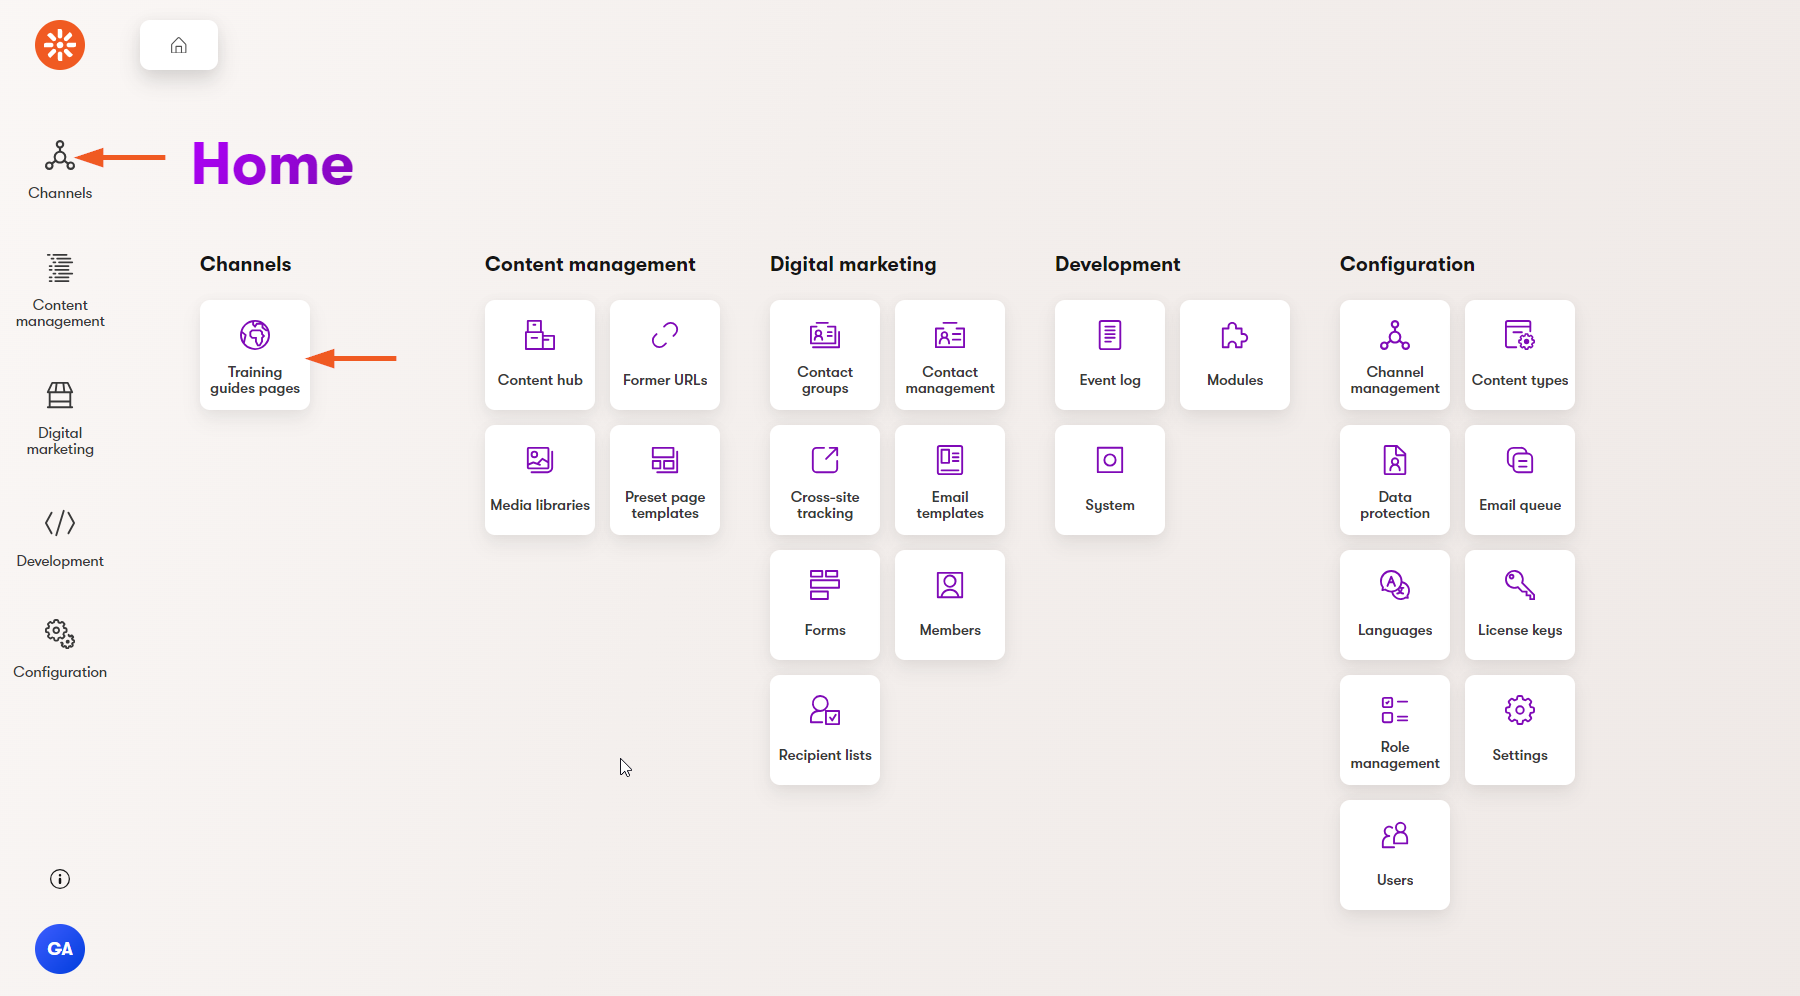
Now, when you navigate to the dashboard, you will see your Training guides pages channel is now visible under the Channels category in the dashboard. Additionally, a new Channels item appears on top of the left menu.
Create a page content type
To display an item of a reusable content type on a website channel, you need to create a page content type that references it.
As mentioned above, this guide works with the Landing content content type created in the previous guide.
Define a page content type in the administration interface
Navigate to Configuration → Content types → New content type.
Populate the following properties and save:
- Display Name: Landing page
- Namespace: TrainingGuides
- Name: LandingPage
- Icon: xp-market (type ‘text’ in the select list search bar)
- Use for: select Pages from the dropdown
- Include in routing: True (checked)
Define a new field, LandingPageContent, that will display Landing content reusable content type item:
Field name: LandingPageContent (we recommend using the <content type name><field name> naming convention as explained here)
Data Type: select Content items from the dropdown
Display in editing form: True (checked)
Field caption: Landing page content
Form component: Content item selector
Form component configuration → Allowed content type: select Landing content from the dropdown
This links your reusable content type with the page and ensures only content of type Landing content will be allowed on any web page of type Landing page. Your content type should now look like this.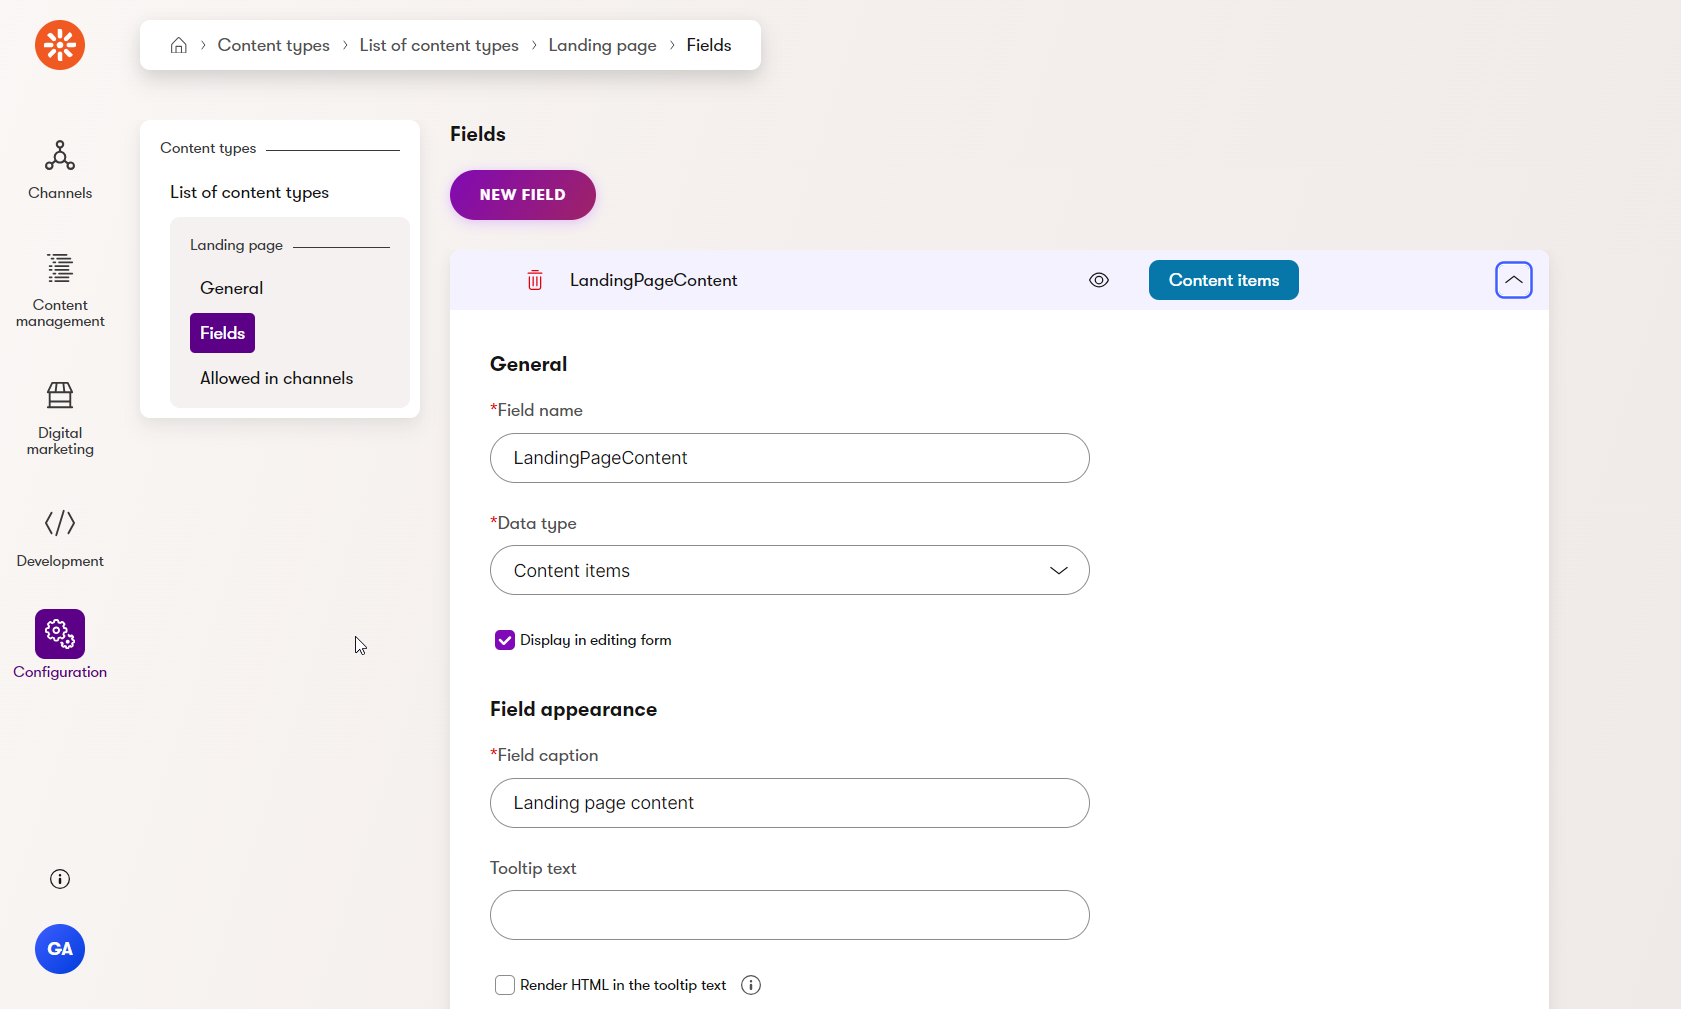
In production scenarios, the web page content type should also include fields to represent structured data needed only for the web channel, such as those related to SEO, OpenGraph, and other web-specific metadata.
Allow the Landing page content type in the Training guides pages channel, to address the friendly warning message:
Navigate to Allowed in channels → Select channels.
Select Training guides pages by checking its checkbox, and save.
The Training guides pages channel now shows up as an item in the list. Additionally, if you navigate to Configuration → Channel management → Training guides pages → Allowed content types, you will see the Landing page content type listed.
Pages and page templates
At this point, you are technically able to create a page of type Landing page in your Training guides pages channel. However, if you plan to follow along with this guide, do NOT create a new page of this type yet.
The goal of this guide is to show how to work with page templates, which you will define in Page template section of this guide. Pages that are not assigned a page template at the time of creation cannot be assigned one at a later time.
Generate a class for the Landing page content type
Just like with the Landing content content type, you need to generate a class to access the Landing page content type in your .NET solution. If you’ve completed the guide on automating recurring tasks , you can run the GenerateCodeFiles.ps1 script. Otherwise, go to your project (in this guide TrainingGuides.Web) and run the following command:
dotnet run --no-build -- --kxp-codegen --type "PageContentTypes" --location "../TrainingGuides.Entities/{type}/{name}" --include "TrainingGuides.LandingPage"
Find more information about code generation on this documentation page or this video.
Set up the project to use a page template
Page templates let your editors swap between multiple options for a page’s display. Compared to standard views, page templates introduce greater design flexibility for your editors, even if they don’t contain page builder zones. This is because standard views allow only a single view per content type, while page templates allow you to set up multiple options for your editors to choose from. Additionally, page templates allow for design and layout changes, even within a single template through page template properties.
Enable Content tree-based routing and Page builder
This example uses page templates to display content. Page templates require the following features to be enabled:
- Page builder
- A feature that allows editors to design web pages through the use of drag-and-drop widgets, templates, and other configurations.
- Content tree-based routing
- A feature that creates URLs for web pages based on their position in the content tree and handles requests to those URLs automatically.
When you run your TrainingGuides.Web project, you see a default message rendered on the screen:
This message displays for any requests to the application to prevent errors. You need to first remove the code that renders this message, or else no pages will be accessible. Then you will enable the Page builder and Content tree-based routing.
Open the TrainingGuides.sln file in the src folder of the repository.
Remove the default message from the Program.cs file in the TrainingGuides.Web project.
Program.csapp.MapGet("/", () => "The TrainingGuides.Web site has not been configured yet.");Enable the Page builder and Web page routing in your middleware pipeline.
Add using directives for
Kentico.PageBuilder.Web.MvcandKentico.Content.Web.Mvc.Routingto Program.cs.Un-comment the lines calling
UsePageBuilderandUseWebPageRoutingfrom thefeaturescollection passed tobuilder.Services.AddKenticoin the Program.cs file.Add the Landing page content type name into
PageBuilderOptions.ContentTypeNames. You can use theCONTENT_TYPE_NAMEconstant from the generated class to access the content type identifier.Program.cs... builder.Services.AddKentico(features => { features.UsePageBuilder(new PageBuilderOptions { ContentTypeNames = new[] { LandingPage.CONTENT_TYPE_NAME, } }); features.UseWebPageRouting(); ... }); ...
Create a page template
Your new page template will display the content of a Landing page item, including fields from the re-usable Landing content type created in the previous guide.
In the TrainingGuides.Web project, create a directory Features , with a subfolder LandingPages for code files relating to landing pages.
Add a view model class
- Add a new class named LandingPageViewModel to the LandingPages folder.
- Include a property for each of the Landing content content type’s fields and a method to get a view model from an object of the generated
LandingPagetype.
namespace TrainingGuides.Web.Features.LandingPages;

public class LandingPageViewModel
{
    public string Message { get; set; }

    public static LandingPageViewModel GetViewModel(LandingPage landingPage)
    {
        if (landingPage == null)
        {
            return new LandingPageViewModel();
        }
        return new LandingPageViewModel
        {
            Message = landingPage.LandingPageContent.FirstOrDefault()?.LandingContentMessage
        };
    }
}
Define a page template controller
This quickstart guide shows an approach to querying content item data that is valid for Xperience by Kentico 28.3.1 and older versions. We will update the guides to reflect improvements in content API released in 28.4.0.
In the meantime, you can read about the changes in the Xperience changelog or dive into retrieving content to see how the new mapping works.
Page templates automatically use a ComponentViewModel object as a model. This is useful for accessing any page template properties you may have set up, but adds an extra step to accessing content item data.
In this section, you will create a controller that allows you to pass your own view model to the page template, and retrieve that view model from the template’s view.
Create a new class called
LandingPageControllerin the Features/LandingPages folder.Define an asynchronous
Indexaction for the controller, which returns aTemplateResultobject.LandingPageController.csTrainingGuides.Web.Features.LandingPages; public class LandingPageController : Controller { public async Task<IActionResult> Index() { return new TemplateResult(model); } }Retrieve the current LandingPage content item using Content item query. To retrieve a web page content item, use its asynchronous method,
GetWebPageResultwhich requires two parameters (you will define them in the next steps):- A query builder object that defines the query parameters.
- A result selector function that maps the results into a collection of pages.
Pass a
LandingPageViewModelobject to theTemplateResultconstructor, using theGetViewModelmethod defined in the view model above.LandingPageController.cs... public async Task<IActionResult> Index() { IEnumerable<LandingPage> pages = await contentQueryExecutor.GetWebPageResult(builder, container => webPageQueryResultMapper.Map<LandingPage>(container)); var model = LandingPageViewModel.GetViewModel(pages.FirstOrDefault()); return new TemplateResult(model); } ...Define
contentQueryExecutorandwebPageQueryResultMapper, as private variables and populate them using constructor injection.LandingPageController.cs... private readonly IContentQueryExecutor contentQueryExecutor; private readonly IWebPageQueryResultMapper webPageQueryResultMapper; public LandingPageController( IContentQueryExecutor contentQueryExecutor, IWebPageQueryResultMapper webPageQueryResultMapper) { this.contentQueryExecutor = contentQueryExecutor; this.webPageQueryResultMapper = webPageQueryResultMapper; } ...Create the
ContentItemQueryBuilderobject as the last piece of the puzzle:LandingPageController.cs... public async Task<IActionResult> Index() { var context = webPageDataContextRetriever.Retrieve(); var builder = new ContentItemQueryBuilder() .ForContentType( LandingPage.CONTENT_TYPE_NAME, config => config .Where(where => where.WhereEquals(nameof(WebPageFields.WebPageItemID), context.WebPage.WebPageItemID)) .WithLinkedItems(1) .ForWebsite(webSiteChannelContext.WebsiteChannelName) ) .InLanguage(preferredLanguageRetriever.Get()); IEnumerable<LandingPage> pages = await contentQueryExecutor.GetWebPageResult(builder, container => webPageQueryResultMapper.Map<LandingPage>(container)); var model = LandingPageViewModel.GetViewModel(pages.FirstOrDefault()); return new TemplateResult(model); } ...Content query API
Learn more about content query API and best practices for retrieving content items in Xperience by Kentico on our Retrieve content items documentation page.
Define the missing private properties
webPageDataContextRetriever,webSiteChannelContextandpreferredLanguageRetriever. Populate them through the constructor injection.LandingPageController.cs... private readonly IContentQueryExecutor contentQueryExecutor; private readonly IWebPageQueryResultMapper webPageQueryResultMapper; private readonly IWebPageDataContextRetriever webPageDataContextRetriever; private readonly IWebsiteChannelContext webSiteChannelContext; private readonly IPreferredLanguageRetriever preferredLanguageRetriever; public LandingPageController( IContentQueryExecutor contentQueryExecutor, IWebPageQueryResultMapper webPageQueryResultMapper, IWebPageDataContextRetriever webPageDataContextRetriever, IWebsiteChannelContext webSiteChannelContext, IPreferredLanguageRetriever preferredLanguageRetriever) { this.contentQueryExecutor = contentQueryExecutor; this.webPageQueryResultMapper = webPageQueryResultMapper; this.webPageDataContextRetriever = webPageDataContextRetriever; this.webSiteChannelContext = webSiteChannelContext; this.preferredLanguageRetriever = preferredLanguageRetriever; } ...Add the
RegisterWebPageRouteassembly attribute so that Xperience uses this controller for any Landing page requests.LandingPageController.cs[assembly: RegisterWebPageRoute( contentTypeName: LandingPage.CONTENT_TYPE_NAME, controllerType: typeof(TrainingGuides.Web.Features.LandingPages.LandingPageController))]Below is the completed LandingPageController.cs, including all necessary using directives for your reference:
LandingPageController.csusing CMS.ContentEngine; using CMS.Websites.Routing; using Kentico.Content.Web.Mvc; using Kentico.Content.Web.Mvc.Routing; using Kentico.PageBuilder.Web.Mvc.PageTemplates; using Microsoft.AspNetCore.Mvc; using TrainingGuides; [assembly: RegisterWebPageRoute( contentTypeName: LandingPage.CONTENT_TYPE_NAME, controllerType: typeof(TrainingGuides.Web.Features.LandingPages.LandingPageController))] namespace TrainingGuides.Web.Features.LandingPages; public class LandingPageController : Controller { private readonly IContentQueryExecutor contentQueryExecutor; private readonly IWebPageQueryResultMapper webPageQueryResultMapper; private readonly IWebPageDataContextRetriever webPageDataContextRetriever; private readonly IWebsiteChannelContext webSiteChannelContext; private readonly IPreferredLanguageRetriever preferredLanguageRetriever; public LandingPageController( IContentQueryExecutor contentQueryExecutor, IWebPageQueryResultMapper webPageQueryResultMapper, IWebPageDataContextRetriever webPageDataContextRetriever, IWebsiteChannelContext webSiteChannelContext, IPreferredLanguageRetriever preferredLanguageRetriever) { this.contentQueryExecutor = contentQueryExecutor; this.webPageQueryResultMapper = webPageQueryResultMapper; this.webPageDataContextRetriever = webPageDataContextRetriever; this.webSiteChannelContext = webSiteChannelContext; this.preferredLanguageRetriever = preferredLanguageRetriever; } public async Task<IActionResult> Index() { var context = webPageDataContextRetriever.Retrieve(); var builder = new ContentItemQueryBuilder() .ForContentType( LandingPage.CONTENT_TYPE_NAME, config => config .Where(where => where.WhereEquals(nameof(WebPageFields.WebPageItemID), context.WebPage.WebPageItemID)) .WithLinkedItems(1) .ForWebsite(webSiteChannelContext.WebsiteChannelName) ) .InLanguage(preferredLanguageRetriever.Get()); IEnumerable<LandingPage> pages = await contentQueryExecutor.GetWebPageResult(builder, container => webPageQueryResultMapper.Map<LandingPage>(container)); var model = LandingPageViewModel.GetViewModel(pages.FirstOrDefault()); return new TemplateResult(model); } }Refactoring
Likely, you will need to retrieve various content items frequently in your project. We recommend extracting the functionality into a separate service to make your code more modular and readable.
If you’d like to see an example, visit our quickstart guides repository. All the logic for retrieving content items is kept inside the
ContentItemRetrieverService(TrainingGuides.Web → Services → Content). Then the service is accessed where needed using dependency injection (e.g., in LandingPageController.cs).Abstraction
In large enterprise-level projects, it is usually beneficial to create a layer of abstraction between the APIs that retrieve data and your application’s business logic that uses that data.
This limits the amount of code that need to be fixed when breaking changes come to the APIs, leaving the majority of your application unaffected.
This is outside the scope of this training, and will be covered in the future. In the meantime we recommend looking into methods of abstraction when dealing with data from Xperience by Kentico, for example, the repository pattern.
Create a ViewImports file
ViewImports files allow you to define directives and share them across all views in the application, or in a particular subdirectory. (Typically @using directives and tag helpers.)
Many templates and components will need to use the same resources. Let’s make things easier and use a _ViewImports file to centrally manage imports for all templates.
- Add a new empty Razor view named _ViewImports.cshtml into the root of the TrainingGuides.Web project.
- Add
@usingdirectives for Xperience’s MVC and page builder libraries. - Include the
Microsoft.AspNetCore.Mvc.TagHelpersand theKentico.Content.Web.Mvctag helpers.
@using CMS.Helpers
@using Kentico.Web.Mvc
@using Kentico.PageBuilder.Web.Mvc
@using Kentico.Content.Web.Mvc.PageBuilder

@addTagHelper *, Microsoft.AspNetCore.Mvc.TagHelpers
@addTagHelper *, Kentico.Content.Web.Mvc
@addTagHelper *, Kentico.Web.Mvc
This will allow any page template views you add to use common features without explicit @using directives.
Add the page template view
With the view model and controller in place, you can create the page template view that utilizes both.
In the Features/LandingPages folder, create an empty Razor view called LandingPagePageTemplate.cshtml.
Designate the view’s model as
TemplateViewModel.Create a new variable to hold the view model, and populate it by calling the
Model.GetTemplateModel, passingLandingPageViewModelas the type.Display the value of the view model’s message as a top-level heading.
As styling and design is beyond the scope of this guide, the example is rather simple. Feel free to use CSS and more advanced HTML to improve the appearance of this template.
@using TrainingGuides.Web.Features.LandingPages

@model TemplateViewModel

@{
    var templateModel = Model.GetTemplateModel<LandingPageViewModel>();
}

<h1>@templateModel.Message</h1>
Register the page template
Now the LandingPage template exists in code, but Xperience cannot use it unless it is registered.
Create a new file to represent the template itself.
Add a new file to the TrainingGuides.Web/Features/LandingPages folder named LandingPagePageTemplate.cs.
Define a public constant that serves as the page template identifier.
LandingPagePageTemplate.cs... public const string IDENTIFIER = "TrainingGuides.LandingPagePageTemplate"; ...Now use this constant to register the page template with the Xperience API. Use the
RegisterPageTemplateattribute to provide the system win an identifier, name, view, list of supported content types , and icon for the page template.If no list of allowed types is provided, template is allowed for all web page content types by default.
LandingPagePageTemplate.csusing Kentico.PageBuilder.Web.Mvc.PageTemplates; using TrainingGuides; using TrainingGuides.Web.Features.LandingPages; [assembly: RegisterPageTemplate( identifier: LandingPagePageTemplate.IDENTIFIER, name: "Landing page content type template", customViewName: "~/Features/LandingPages/LandingPagePageTemplate.cshtml", ContentTypeNames = [LandingPage.CONTENT_TYPE_NAME], IconClass = "xp-market")] namespace TrainingGuides.Web.Features.LandingPages; public static class LandingPagePageTemplate { public const string IDENTIFIER = "TrainingGuides.LandingPagePageTemplate"; }
With this assembly attribute in place, the system knows that the view from the previous section is a page template, available to any pages of content type LandingPage that are allowed to use page templates.
Learn more about the RegisterPageTemplate attribute on this page of our documentation.
Use the new page template
Now that the page template is in place, go back to the Xperience administration interface and use it.
At this point, you have not yet designated a home page, so you will get an error when you visit the root of the site. However, the /admin URL is still accessible to log into the administration interface.
From the dashboard, navigate to the Training guides pages channel and create a new page with the following parameters:
Page name: Home
Content type: select Landing page. (It may be your only option if you are following this guide step-by-step.)
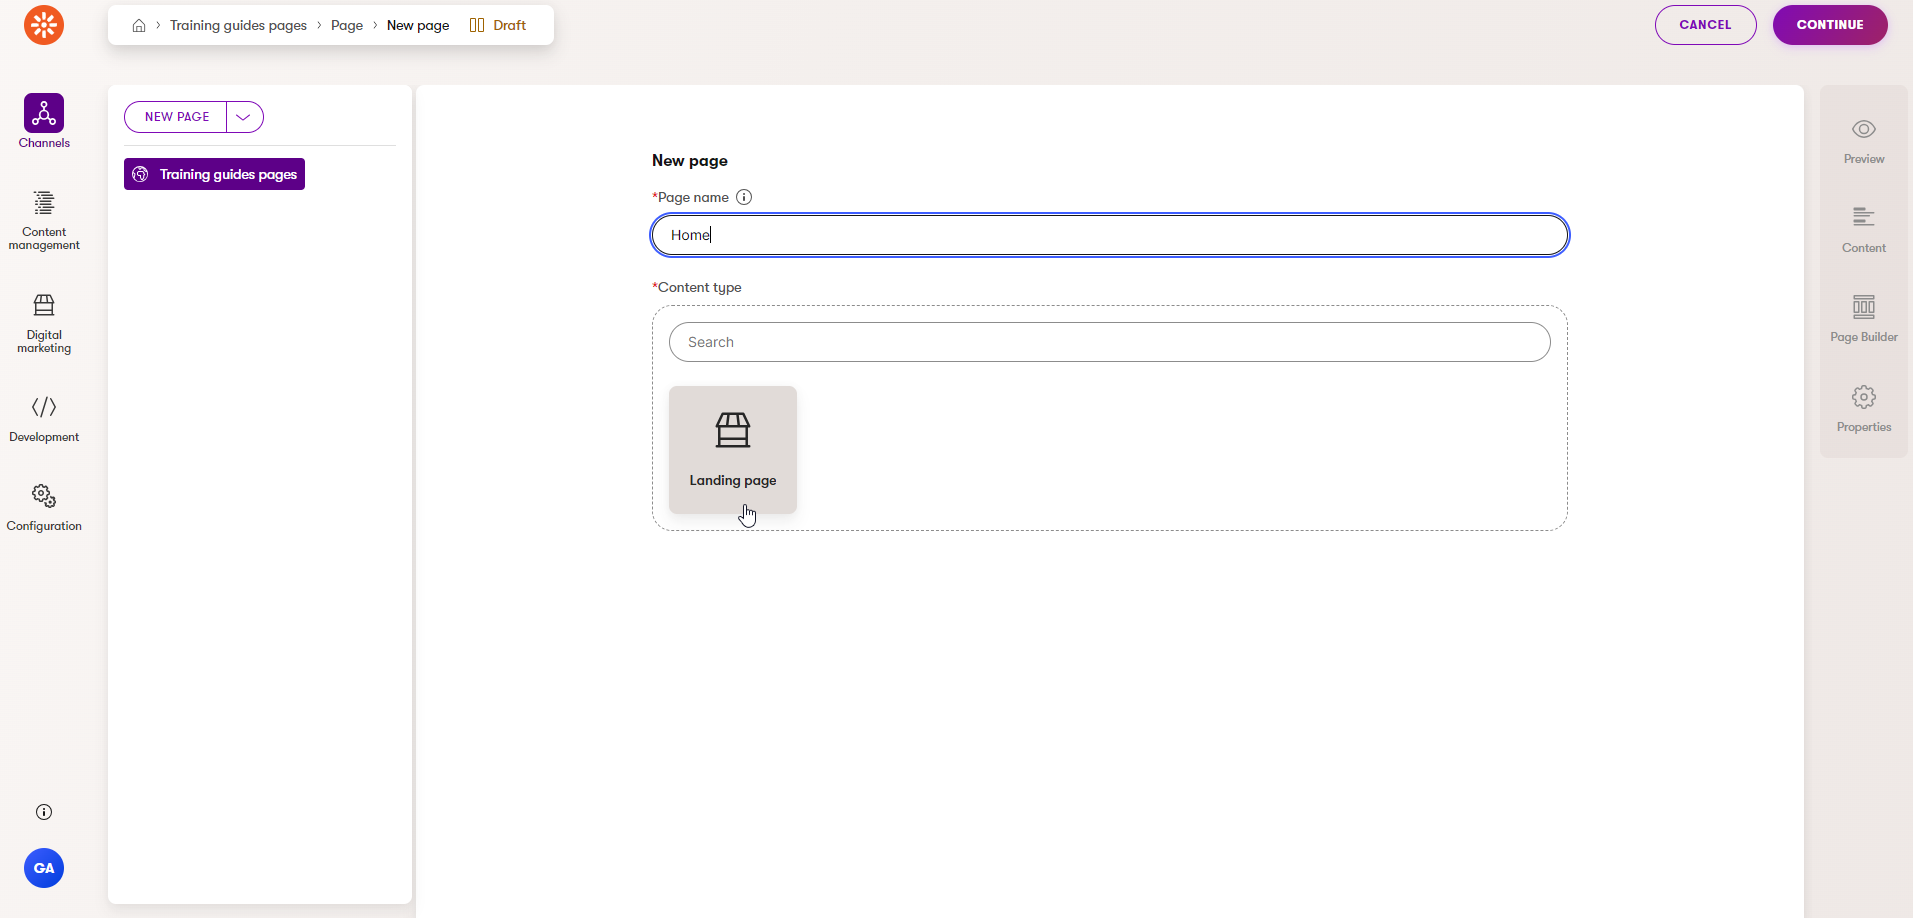
Click Continue. Because you have only defined one template for the Landing page content type, the system will automatically use this one. If there were more templates allowed, Xperience would prompt you to choose one in an additional step.
Multiple templates for a page content type
Feel free to experiment with defining and registering more templates. If you would like to see an already-made example, take a look at this repository. Instructions to run the project are included in the README file. Otherwise, proceed with step 3 to define your home page.
Now you need to provide the Home page with a Landing content content item to display. The Xperience offers two options: Select existing (reusable content time from the Content hub) or Create new. Proceed with Create new:
- Content item name: Home
- Content type: select Landing content
Click Continue.
Create a new content item in the Content hub and reference it in your Home page. Fill out the following, and click Save and close:
- Message: Welcome to the Training guides site!
Make sure the URL slug is set to Home, as shown above, and save.
Notice, that the Home content item is assigned to the Landing page content now, but showing as a draft because the reusable Home content item has not been published yet.
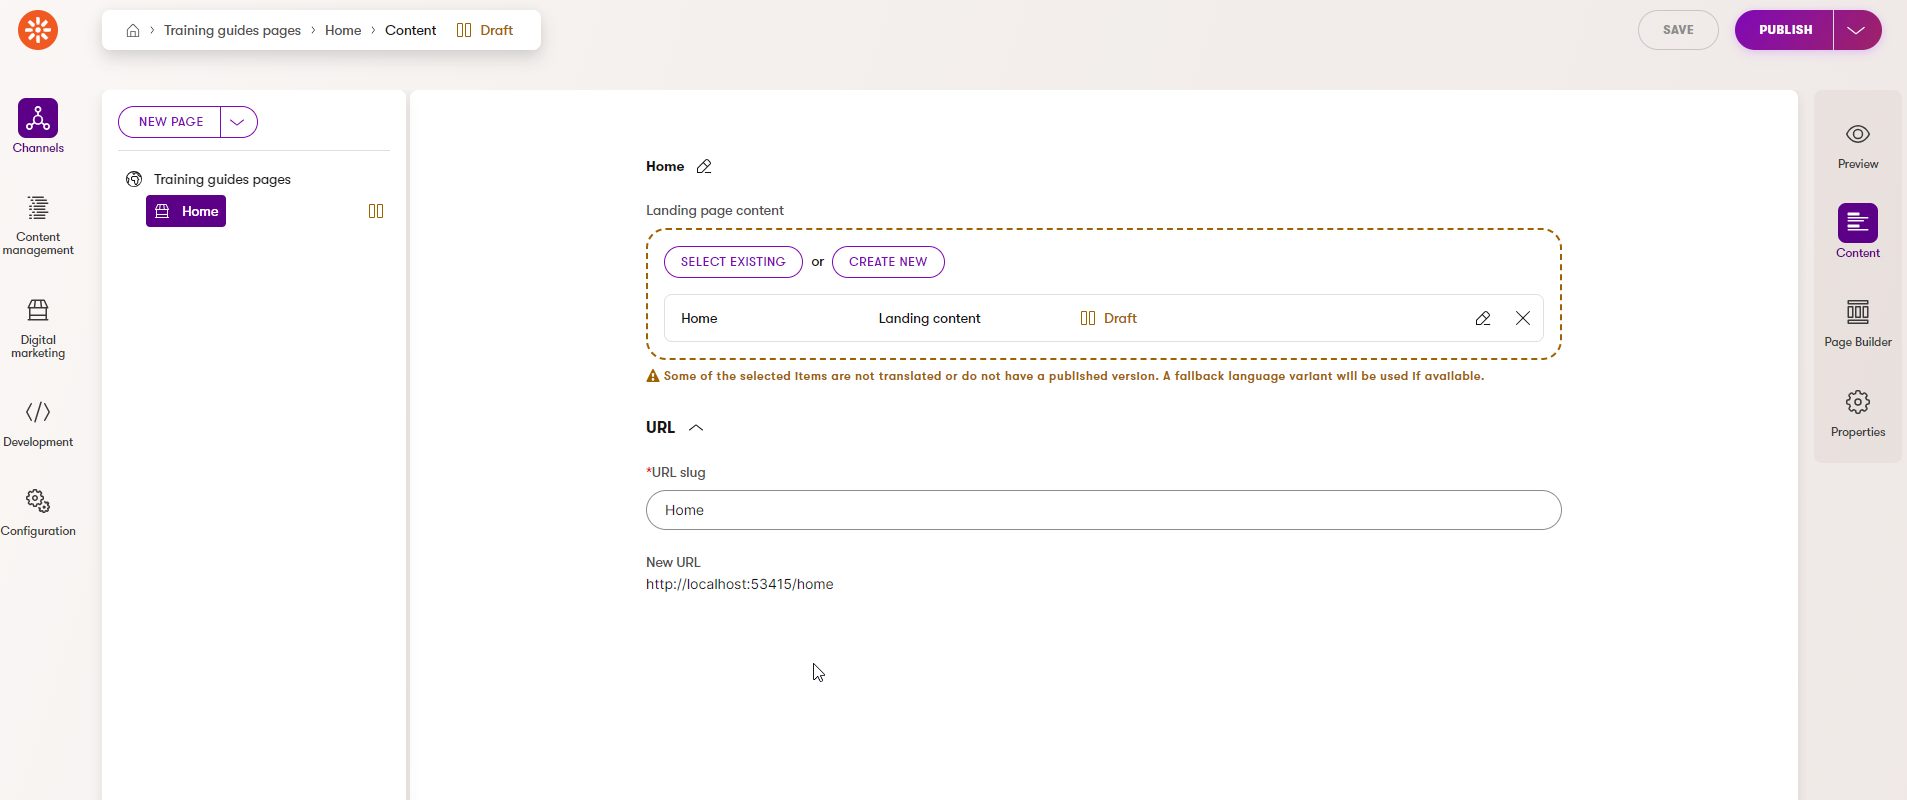
Now click the pencil icon at the far right of the Home item in the Landing page content field, and Publish the item. This will allow the web page Home to render the content of its corresponding re-usable item.
Click the Publish button in the top right of the screen and confirm your choice in the modal dialog that opens afterward. You have just published the Home page.
Reusable content items
The Home content item you just created and published can be reused in other pages or different channels.
For example, if you now create another Landing page, you can reference the Home content item as the Landing page content by using the Select existing option. If you later decide to change the Message of the Home item, the change will show on both pages because they are both pointing at the same item in the Content hub.
However, the Home web page content item that you see in the Training guides pages channel can be referenced only by other web page items, not by reusable items or items in other channels.
Your page and content are successfully published.
When you navigate to your new Home page in the Training guides pages channel again and switch to the Preview or Page builder tabs, you should be able to see the new item’s message displayed on the page.
However, you may notice that you are unable to save, publish, or unpublish the page from the Page builder tab. This is because this tab relies on page builder scripts, which are currently missing.
Create a layout view
While not strictly necessary, it is a standard practice to use layout views in MVC. Layout views wrap the content of specialized views and frequently include shared features like navigation and frequently used styles and scripts.
In this case, the layout will render the missing page builder scripts and styles from the sections included in the template.
Add a new folder to the TrainingGuides.Web/Views directory called Shared, with a new empty view called _Layout.cshtml.
Use the
page-builder-stylestag helper to insert styles required for page builder in the header.Add text to make the layout view visually apparent while testing.
Call
@RenderBody()to signify where the Razor Engine should render the content of the views.Use the
page-builder-scriptstag helper to render scripts required for page builder below the page content.Scripts rendered before page content can prevent it from being displayed until after they finish loading, so it is important to place them at the bottom.
<!DOCTYPE html>

<html>
<head id="head">
    <meta name="viewport" content="width=device-width, initial-scale=1" />
    <meta charset="UTF-8" />
    <meta data-hid="mobile-web-app-capable" name="mobile-web-app-capable" content="yes">
    <meta data-hid="author" name="author" content="Kentico software s.r.o.">

    <page-builder-styles/>

    <title>Kentico training guides</title>
</head>
<body>
    <h3>This text is from the layout view</h3>
    <div>
        @RenderBody()
    </div>
    <page-builder-scripts />
</body>
</html>
Set up templates to use the layout
Since the layout view does not live in the same directory as the landing page template, it will not be used automatically. This can be rectified with a ViewStart file.
ViewStart files specify code that needs to run at the start of every razor view’s execution.
Like the ViewImports file, ViewStart files apply only to the folder where they are located and its subfolders. We recommend putting it in the root of the site, and overriding it for specific subdirectories where necessary.
In the root of the TrainingGuides.Web project, and add an empty Razor view called _ViewStart.cshtml
Specify the name of the layout view.
Layout file
Because the layout is in the Views/Shared folder, where MVC automatically looks, you don’t need to provide a full path.
If you store a layout elsewhere, you need to specify its path, using ~ to represent the root of the project. For example,
~/CustomDirectory/CustomViewsFolder/Shared/_Layout.cshtml.
@{
    Layout = "_Layout";
}
This ensures that your project’s views will use the _Layout view specified.
ViewStart files placed in subdirectories will override those from parent directories. You can use this to specify a different layout view for specific subfolders.
Finally, with all these parts in place, you have successfully created a page that uses a page template and renders a reusable content type. Run the site locally and visit the /Home path to see the message from the reusable item rendered to the page.

Set up home page
Make your new page a home page of your website:
- In Channels → Training guides pages → Home, select the Properties tab on the right side and scroll down to locate the Tree path property in the Information section. Copy the value.
- Navigate to Configuration → Channel management → Training guides pages → Channel settings, paste the tree path slug value into the Home page field, and save.
What’s Next?
This example kept things simple for the sake of showing the process, but now you are free to experiment with adding more practical fields to the content type and adding styling to the views.