Displaying the page content
This page is a part of a tutorial, which you should follow sequentially from beginning to end. Go to the first page: Using the Xperience interface.
In the previous step of the tutorial, you have created the basic layout and added styling for your website. In this step, you will finally see what the content stored in Xperience looks like on the live site. You now need to roll up your sleeves and write the code of your MVC application.
You will learn about:
- You will learn about:
- Retrieving the content of pages
- Configuring content tree-based routing
- Displaying the Home page
- Displaying the Medical center page
Retrieving the content of pages
The dynamic content of your website’s pages is created and maintained in the Xperience administration interface, and stored within the database that is shared with your MVC application.
Usually, when retrieving data to display on an MVC 5 site, we need to write code that retrieves the data, prepare controllers that handle the appropriate URL routes, and create views with corresponding models that format the data into the required HTML output.
Xperience’s content tree-based routing feature handles all of this for us. We only need to provide views based on specific conventions and the system automatically ensures a controller with a matching model class to handle the request and display our pages.
Configuring content tree-based routing
Before we can get to displaying the pages we created for our site, there is one last small thing we need to configure.
Currently, accessing the domain root of our website results in a 404 not found error. This makes sense: both pages that we created are located elsewhere. One is available at ~/Home, the other at ~/MedicalCenter.
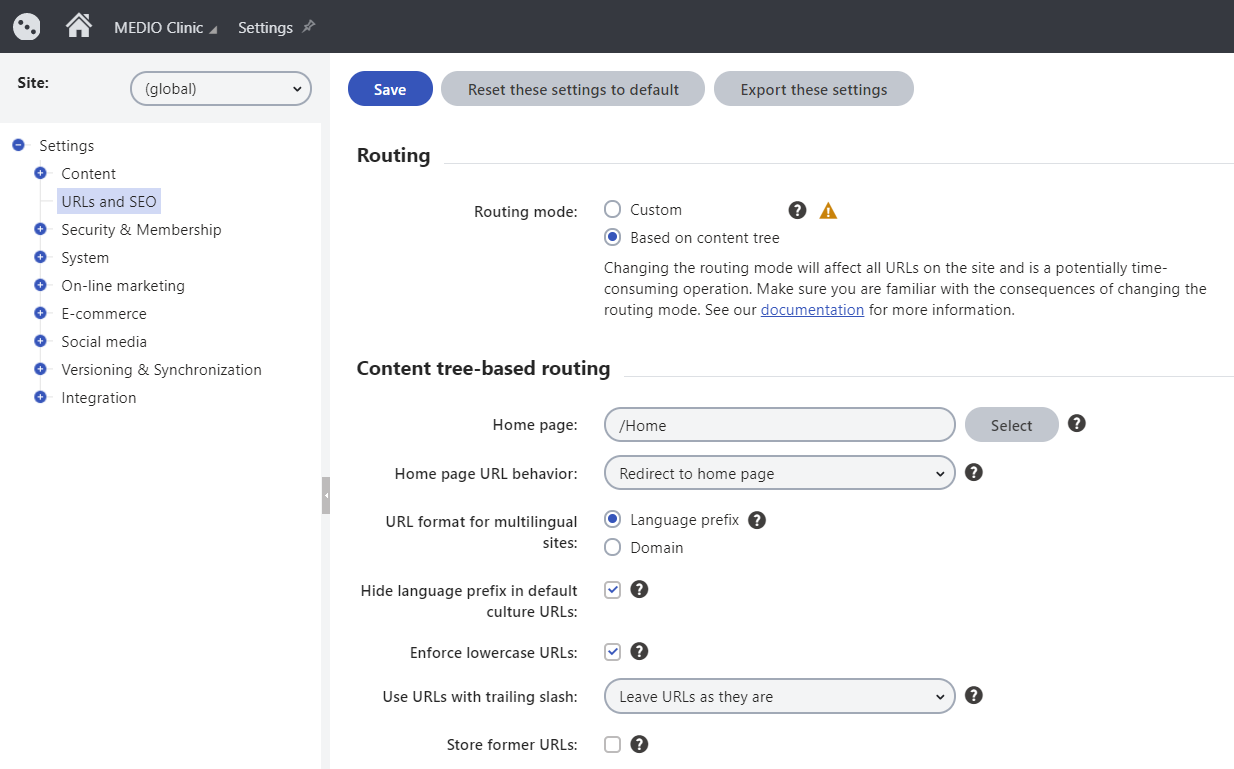
We want all users that access the domain root http://localhost/Xperience13_MEDIOClinic/ redirected to http://localhost/Xperience13_MEDIOClinic/Home. We can do that in the Settings application:
- In the Xperience administration interface, open the Settings application.
- In the left sidebar, navigate to Settings -> URLs & SEO.
- Under Content tree-based routing, set the Home page to: /Home
- Set Home page URL behavior to Redirect to home page.
- Click Save.
Displaying the Home page
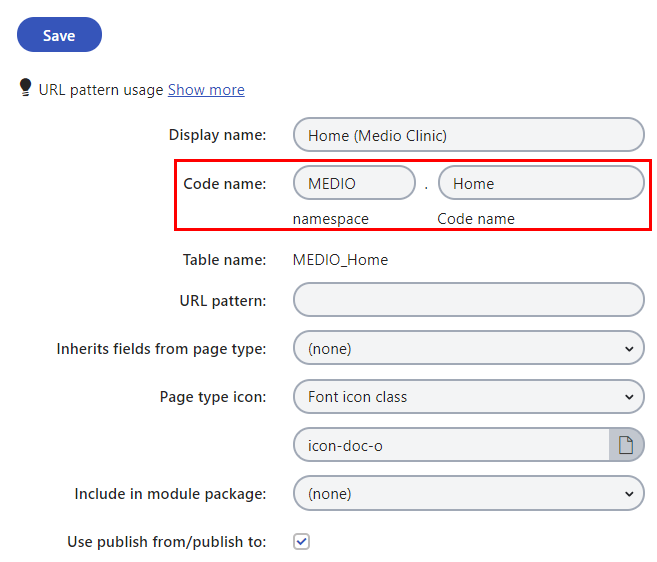
With the content tree-based routing feature enabled and configured, the only thing we need to do to display the Home page is to provide a view (.cshtml) file under ~/Views/Shared/PageTypes/ in the MVC project. The view needs to be named after the code name of the page type on which the page is based – Home (MEDIO Clinic) in our case.
The code name of the page type can be found on its General configuration tab:
- In the Xperience administration interface, open the Page Typesapplication.
- Find the Home (MEDIO Clinic) page type and click Edit (). The General tab opens.
Create the Home view
With the page type code name in hand, we need to create the corresponding view file in the designated location. When creating the view file, replace all dots with underscores (‘_’).
- Right-click on ~/Views/Shared/PageTypes and select Add -> View…
- Set the new view’s properties as follows:
- View name: MEDIO_Home
- Template: Empty
- Model: leave empty for now
- Click Add.
Now we need to provide the formatting and design for pages based on the Home (Medio Clinic) page type.
Open the MEDIO_Home.cshtml view file.
In the view code, specify the following model class:
@model Kentico.Content.Web.Mvc.Routing.IPageViewModel<CMS.DocumentEngine.Types.MEDIO.Home>The system passes all data from a page to this view model during routing. You can see that we set the generated Item wrapper class as the generic parameter. This allows us to access all fields we specified earlier for the page type – HomeText, HomeTextHeading, HomeHeader – in a strongly typed manner. All of our fields can be accessed via the Model.Page.Fields property (without the Home prefix in the property name, which is trimmed by default)..
Set the ViewBag.Title value to the page’s DocumentName property:
 @{
     ViewBag.Title = Model.Page.DocumentName;
 }
Call the Html.Kentico().PageBuilderStyles() and Html.Kentico().PageBuilderScripts within the corresponding Razor sections (as defined in the site’s _Layout). The methods render links to stylesheets and scripts required for the page builder functionality.
 @section styles
 {
     @* Includes stylesheets necessary for page builder functionality *@
     @Html.Kentico().PageBuilderStyles()
 }

 @section scripts
 {
     @* Includes scripts necessary for page builder functionality *@
     @Html.Kentico().PageBuilderScripts()
 }
From the index.html file in the tutorial resources, copy the HTML code of the two <section>elements in the body tag (styled with the teaser and content CSS classes) to the Home view. Replace the existing placeholder message and commented code.
In the teaser section, replace the text of the paragraph element with the Model.Page.Fields.Header property.
In the content section, replace the following values:
- The text of the heading element with the Model.Page.Fields.TextHeading property.
- The text of the paragraph element with the Model.Page.Fields.Text property.
Call the Html.Kentico().EditableArea extension method with “editableArea” as a parameter inside the content section’s first <div> element.
Editable areas serve as containers for page builder widgets. Each editable area must be defined with a string identifier that is unique within the context of the given view (editableArea in this case).
@Html.Kentico().EditableArea("editableArea")Save your changes.
The final code of your Home view should look like this:
@using Kentico.PageBuilder.Web.Mvc
@using Kentico.Web.Mvc

@model Kentico.Content.Web.Mvc.Routing.IPageViewModel<CMS.DocumentEngine.Types.MEDIO.Home>

@{
    ViewBag.Title = Model.Page.DocumentName;
}

@section styles
{
    @* Includes CSS necessary for page builder functionality *@
    @Html.Kentico().PageBuilderStyles()
}
@section scripts
{
    @* Includes scripts necessary for page builder functionality *@
    @Html.Kentico().PageBuilderScripts()
}

<section class="teaser">
    <div class="col-sm-offset-3 col-sm-4">
        <p>@Model.Page.Fields.Header</p>
    </div>
    <div class="clearfix"></div>
</section>
<section class="content">
    <div class="col-sm-offset-3 col-sm-5">
        <h1>@Model.Page.Fields.TextHeading</h1>
        <p>@Model.Page.Fields.Text</p>
        @Html.Kentico().EditableArea("editableArea")
    </div>
    <div class="clearfix"></div>
</section>
Previewing your website’s Home page
Let’s Build your project and see how the page looks!
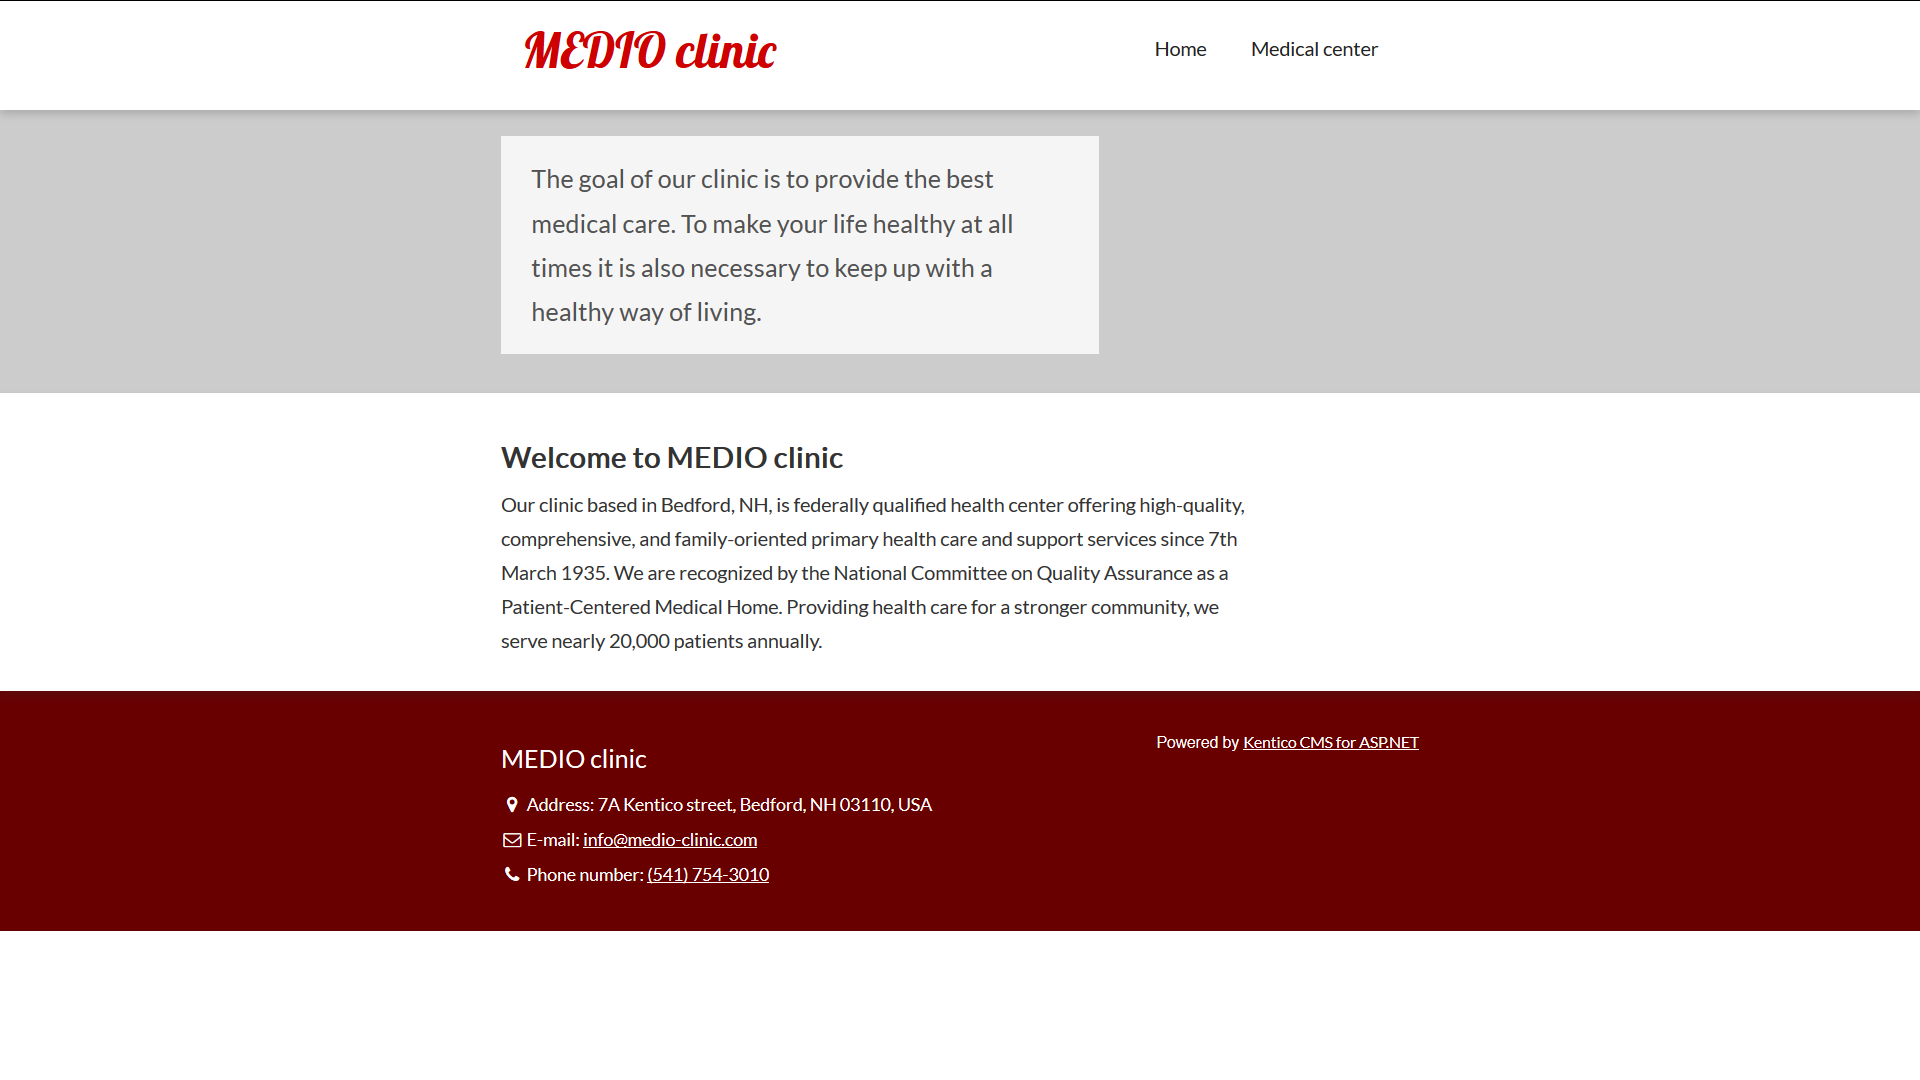
When you navigate to your website’s URL (e.g., http://localhost/Xperience13_MEDIOClinic), our configuration of the content tree-based routing feature ensures the request is redirected to ~/Home and displayed using the MEDIO_Home.cshtml view file. All without the need to write any controllers and models, or register custom routes.
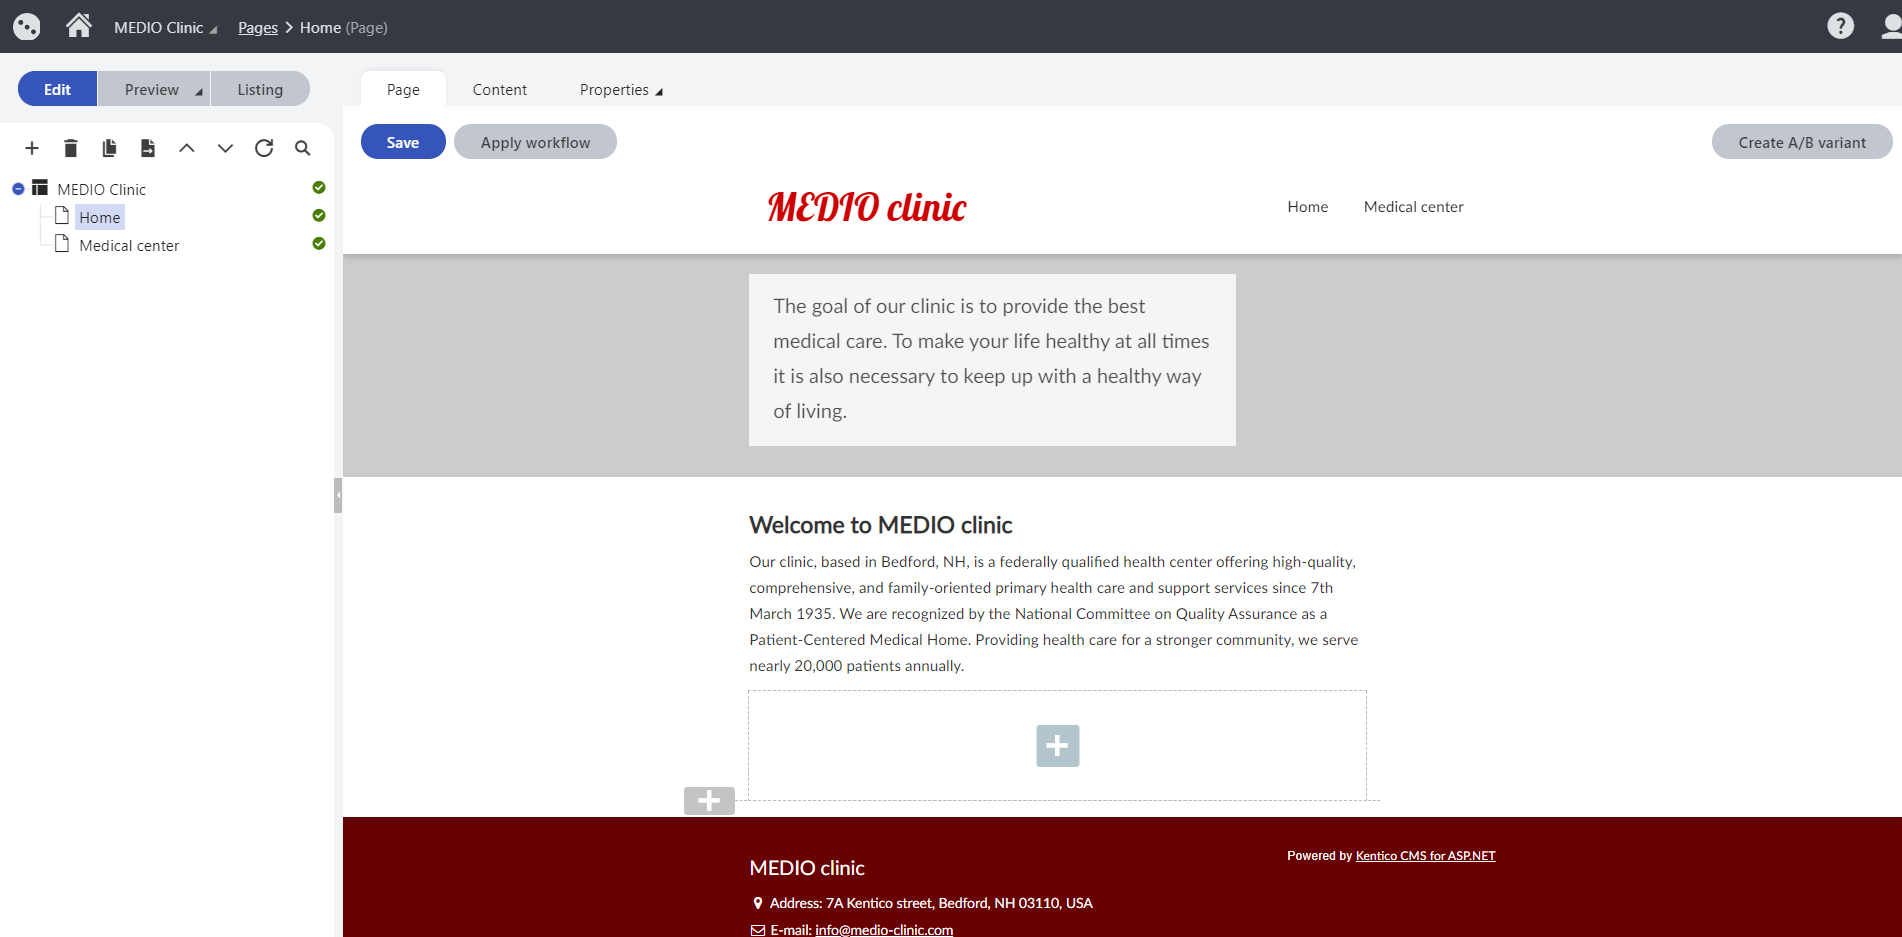
You can also preview the page directly in the Xperience administration interface (e.g., http://localhost/Xperience13_Admin). Switch to the Pages application and select the Preview mode.
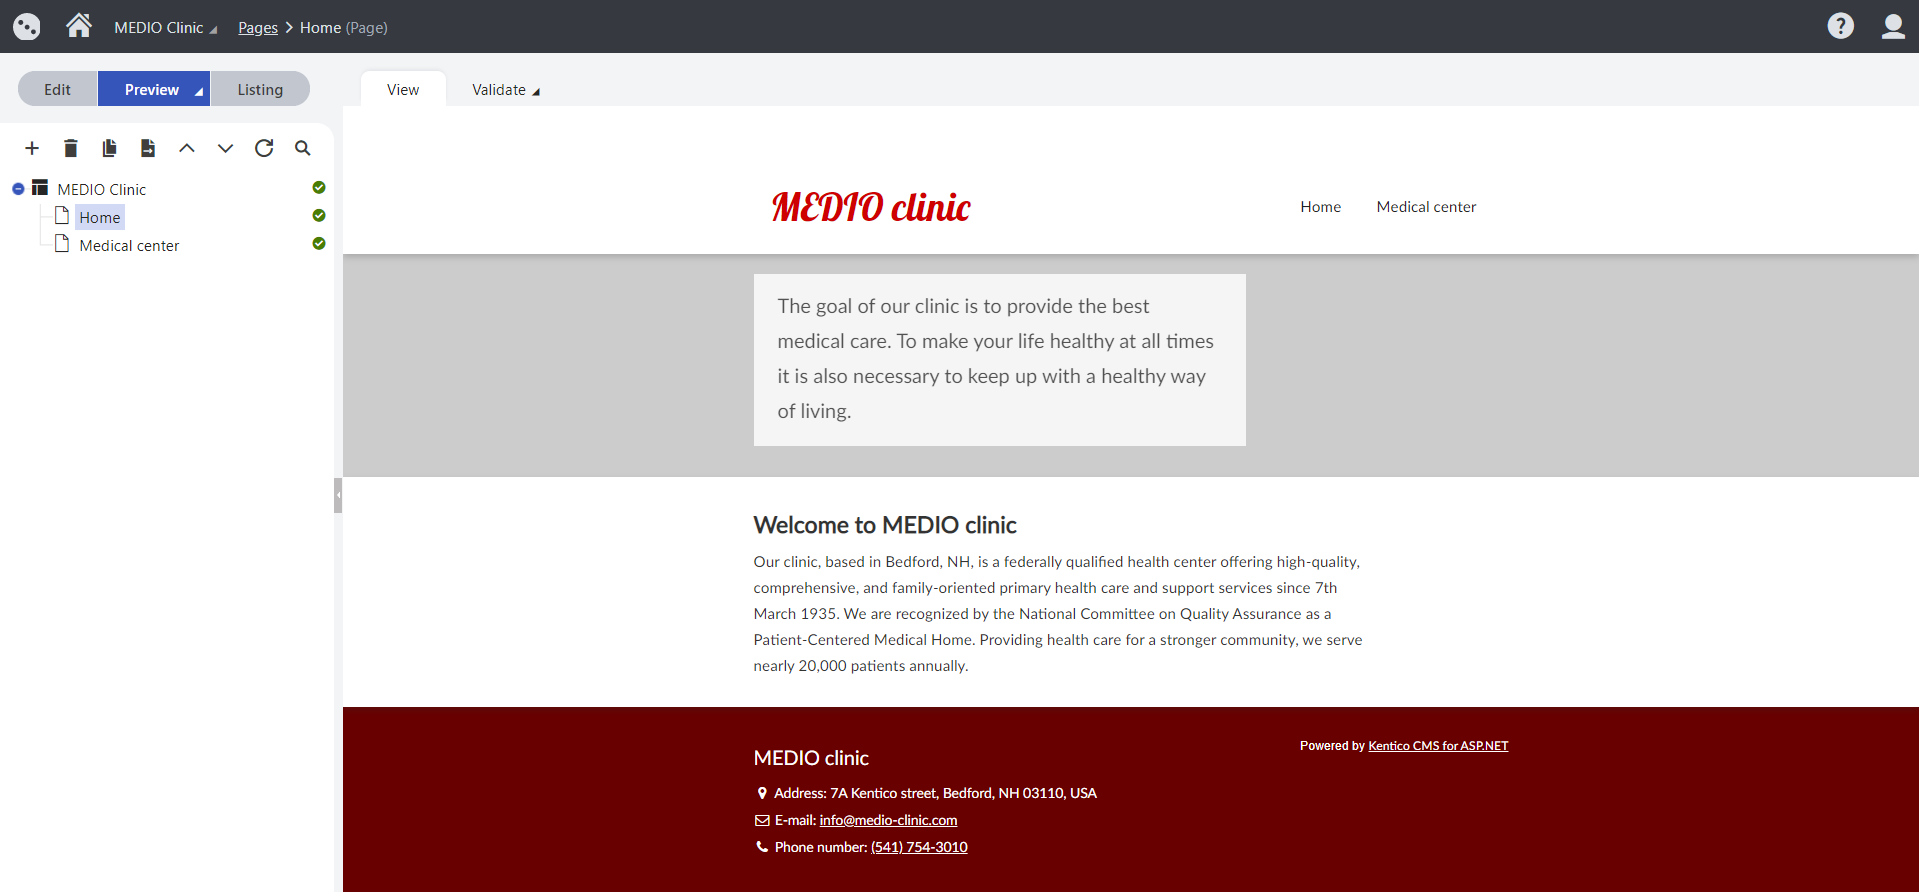
Alternatively, you can switch to the Edit mode and use the Page tab, enabled for pages of the Home type, to preview the page’s content. Since we have also enabled the page builder and included the necessary scripts and methods required for its functionality in the corresponding view, you can see the added editable area rendered at the bottom of the page.
Displaying the Medical center page
To format and display the Medical center page, create a view that uses IPageViewModel<CMS.DocumentEngine.Types.MEDIO.MedicalCenter> as its model class. Identically to the Home page’s view model, the generic parameter of the IPageViewModel interface is the strongly-typed representation of the Medical center (MEDIO Clinic) page type we generated previously.
This page type contains a field that is managed by a rich text editor, which means you need to handle potential HTML elements in the content (for example text styling, hyperlinks, images, etc.).
To display the content of the rich text editor fields in MVC views, use either the Html.Kentico().ResolveUrls extension method or the standard Html.Raw method. Both methods disable HTML encoding for the submitted value.
The ResolveUrls method additionally resolves relative URLs to their absolute form. The system already automatically resolves relative URLs by processing the output of all pages. But we still recommend calling the ResolveUrls method for rich text fields to minimize the output filtering requirements.
Right-click on ~/Views/Shared/PageTypes and select Add -> View…
Set the new view’s properties as follows:
- View name: MEDIO_MedicalCenter
- Template: Empty
Set the model class to IPageViewModel<CMS.DocumentEngine.Types.MEDIO.MedicalCenter>.
@model Kentico.Content.Web.Mvc.Routing.IPageViewModel<CMS.DocumentEngine.Types.MEDIO.MedicalCenter>In the view code, set the ViewBag.Title value to the page’s DocumentName property:
 @{
     ViewBag.Title = Model.Page.DocumentName;
 }
From the medical-center.html file in the tutorial resources, copy the HTML code of the two <section> elements in the body tag (styled with the teaser and content CSS classes) to the MedicalCenterview.
In the teaser section, replace the text of the paragraph tag with the Model.Page.Fields.Header property.
In the content section, replace both the heading and the paragraph with the following Razor call:
@Html.Kentico().ResolveUrls(Model.Page.Fields.Text)Save your changes.
The final code of your MedicalCenter view should look like this:
@model Kentico.Content.Web.Mvc.Routing.IPageViewModel<CMS.DocumentEngine.Types.MEDIO.MedicalCenter>

@{
    ViewBag.Title = Model.Page.DocumentName;
}

<section class="teaser">
    <div class="col-sm-offset-3 col-sm-4">
        <p>@Model.Page.Fields.Header</p>
    </div>
    <div class="clearfix"></div>
</section>
<section class="content">
    <div class="col-sm-offset-3 col-sm-5">
        @Html.Kentico().ResolveUrls(Model.Page.Fields.Text)
    </div>
    <div class="clearfix"></div>
</section>
Previewing the Medical center page
You can preview your page in the Pages application in the Xperience administration interface or click the Live site button to view the page in the browser. Like with the Home page, content tree-based routing ensures accessing http://localhost/Xperience13_MEDIOClinic/MedicalCenter renders the correct view for the page based on its page type.
You have now built components in your MVC application that retrieve and present the content of the site’s pages. Let’s continue by building the website’s navigation in the last step of the tutorial!
Previous page: Creating the website layout — Next page: Creating the navigation menu
Completed pages: 8 of 10