Using the Xperience page builder
This page is a part of the content management tutorial, which you should follow sequentially from beginning to end. If you haven’t completed it yet, go to the first page: Using the Pages application.
You will learn about:
Important note
Dancing Goat is a specific sample website used for the purposes of the tutorial. Your company’s website will be different, and some functionalities may also be changed.
Page builder on Xperience websites
The page builder allows you to create and manage the content of your site directly in the Xperience administration interface. Page builder’s UI is easy to use, and its drag-and-drop editor gives you a lot of possibilities to work with your pages. You access the page builder on the Page tab.
Creating pages with the page builder
![]()
The page builder gives you more control over the content than the structured content. You can build pages or adjust their content and layout using configurable sections and widgets.
Based on your business requirements, the developers set up the page builder feature and prepare all the widgets you need to create a compelling website.
The page builder gives you an almost WYSIWYG experience. You drag-and-drop your content where you need it using widgets and save your changes. You can then immediately see what your content will look like on the live site. You can also copy and paste existing widgets together with their content to save yourself some time.
Even when you want to adjust the page’s structure, you don’t need to ask developers for help. Your developers can prepare sections where you can place widgets. Each section can have different properties that you can use to change the layout and the look of the page. For example, one of the properties can give you control over the number of columns. Another property can set the section’s size or background, as you can see implemented in sections on the Dancing Goat’s Landing page.
We recommend that you use the page builder on high-traffic pages where you need to tailor both content and the design. Typical examples of such pages are the website’s Home page or campaign landing pages.
Developers can enable the page builder for the whole page, as you can see on the Dancing Goat’s Coffee samples page. The page builder gives you full control over a page’s layout and content.
Developers can also enable the page builder only for specific parts of pages. This is showcased on the Dancing Goat’s Home page. You can adjust most of the Home page using the page builder on the Page tab. But to edit the Our Story part of the page, you need to switch to the Content tab and use the structured content editor. Our story part will likely not change often, and you don’t need to personalize it. Its layout and content will remain the same most of the time. That’s why developers didn’t use the page builder to display its content.
The Xperience Page builder consists of Page templates, Editable areas, Sections, and Widgets.
- Page templates make it easy to choose and switch between page layouts. Page templates are great for creating pages with a pre-designed or repeating structure, such as landing or product pages. You can use them when you’re working with the pages that use the page builder. But developers can also use them for pages with structured content. (Later in this tutorial, you’ll work with templates for Dancing Goat’s articles.)
- Developers define the editable areas on pages. They choose which parts of the page require editing from the Content tab–and which parts content editors can edit using the page builder.
- Content sections help you layout the visual aspect of the page. For example, you can decide how many columns your section will have. Some sections can even have more properties, as you can see in a sample animation below.
- Widgets are components with a pre-defined structure that help you create your content. Using the widgets, you can upload images, edit text, or insert a call-to-action. Each section can contain multiple widgets in any configuration. You adjust the widgets’ position within the section by drag-and-dropping.
Working with the Page builder
Task:
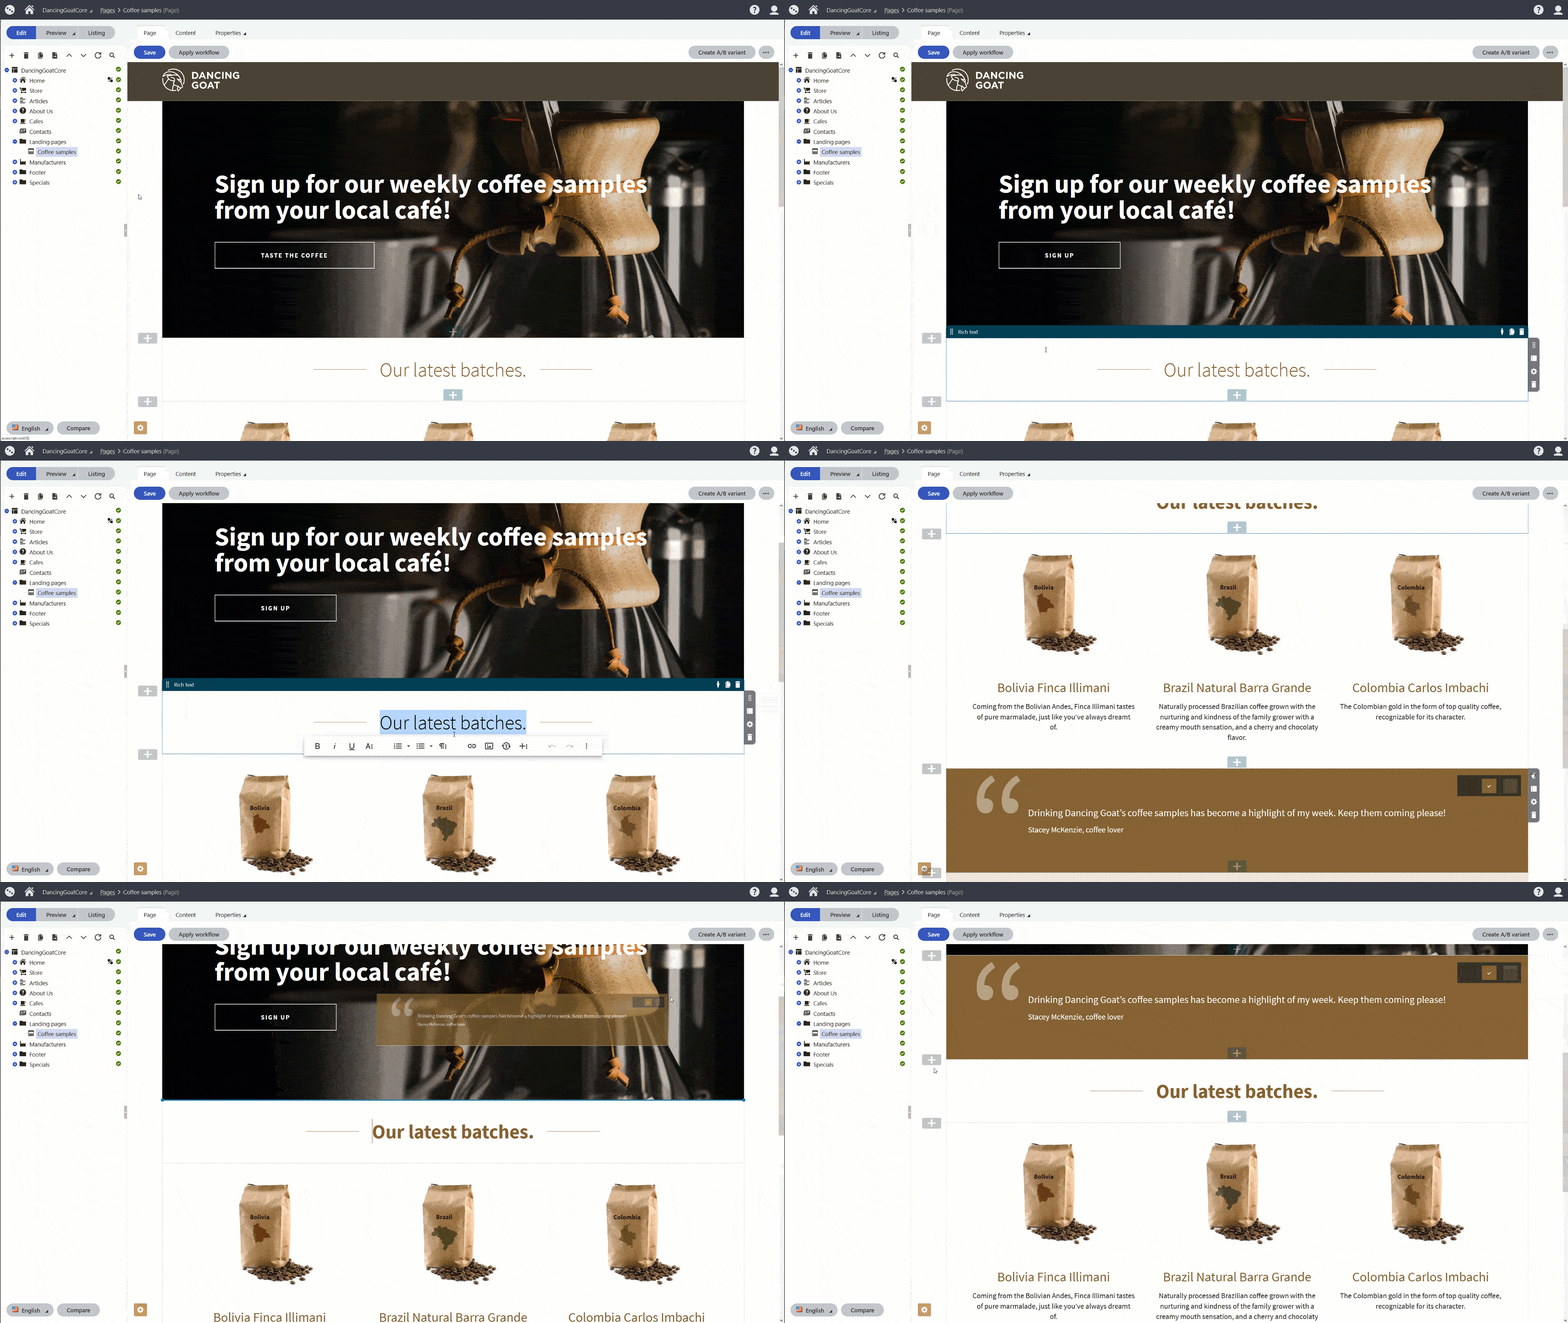
You want to make your landing page look more interesting, and you have decided on the following updates:
- Change the call-to-action button text to “Sign up”.
- Bold the text “Our previous batches”.
- Move the Testimonial widget right under the Hero image widget.
Need help?
Use the following steps to update your landing page.
Navigate to the Pages application, and open the Coffee samples in the content tree.
Switch to the Page tab if necessary.
Edit your text in the Hero image widget.
Enter “Sign up” into the Hero image call-to-action button.
Highlight the heading “Our previous batches” to open the text editor and make the text bold.
Select the Testimonial widget to display its properties.
Drag the Testimonial widget under the Hero image widget into the same section
Delete the empty section:
- Go to the 1 column section (with brown background) that contained the Testimonial widget.
- Select the Delete section button to remove the empty 1 column section from the page.
Save your changes.
The following clip also illustrates the process described above:

Next page: Working with files