
Creating page types
This page is a part of a tutorial, which you should follow sequentially from beginning to end. Go to the first page: Using the Xperience interface.
You will learn about:
- You will learn about:
- Page types in Xperience
- Creating the page type for the Home page
- Creating the page type for the Medical center page
- Page types and content tree-based routing
In step 1 and step 2 of this tutorial, you have set up your environment for development. Let’s now start building your tutorial website.
The website will have two pages and a simple navigation menu. The Home page will have content structured into a header, a text heading, and the text itself. The Medical center page will have a header text field and a content field that can be formatted using HTML. To give content editors full control over the menu, the page types will use the navigation feature, which allows users to hand-pick which pages are displayed in the website’s navigation.
In this tutorial step, you will create page types for the pages that will store the content of the site.
Page types in Xperience
Page types define a data structure and other configuration options, which are then reusable for any number of individual pages. The pages are organized within a hierarchical content tree for each site. Pages may represent actual pages available on the live site, serve as data containers (used by other pages), or folders used to organize the site’s content tree.
How is page data stored?
Page types use fields to define a data structure. Content editors use these fields to edit website content. Each page type has a separate database table storing the values of the defined fields, and also uses two general tables to store additional page information.
For example, your Home page type for the tutorial website will have three fields. The first two Textfields will hold the page header and the heading, and the third field will be a Text area. Any page based on this new page type will have its content stored in the MEDIO_Home database table. Additional data, such as general page properties, is stored in the CMS_Document table, and data related to the page’s position in the content tree hierarchy is stored in the CMS_Tree table.
Creating the page type for the Home page
Return to the Xperience administration interface in your browser (running under http://localhost/Xperience13_Admin).
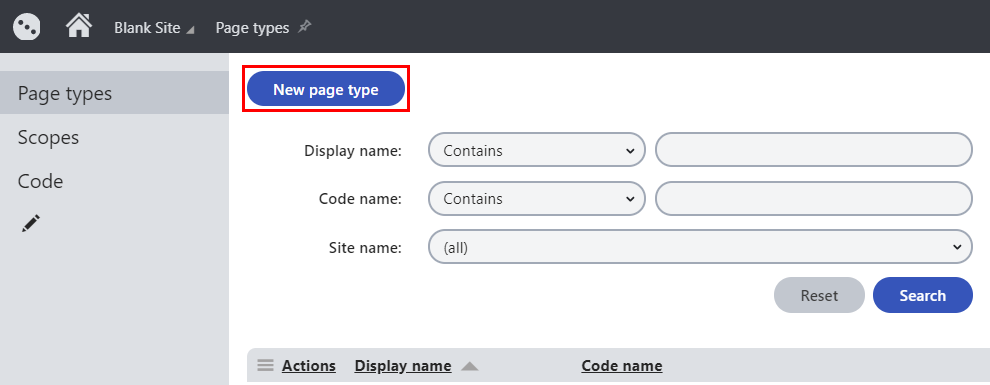
In the Page types application, click the New page type button to start the wizard.
In Step 1 of the wizard, fill in the following values:
- Page type display name: Home(MEDIO Clinic)
- Namespace: MEDIO
- Name: Home
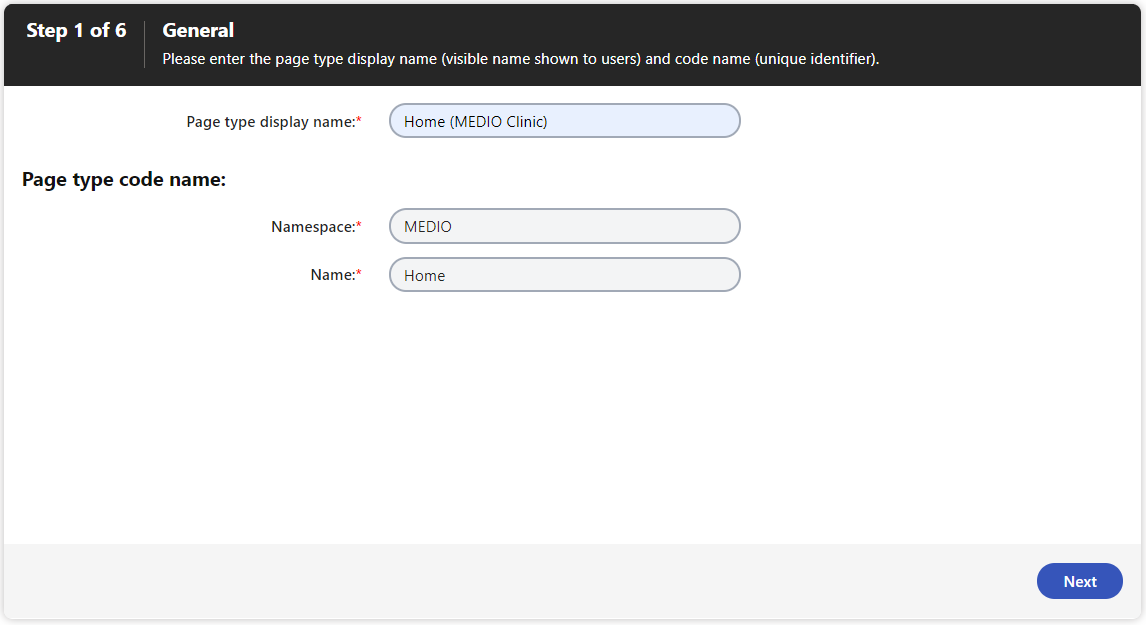
Click Next.
In Step 2, select the Page builder, URL and Navigation item features for the page type.
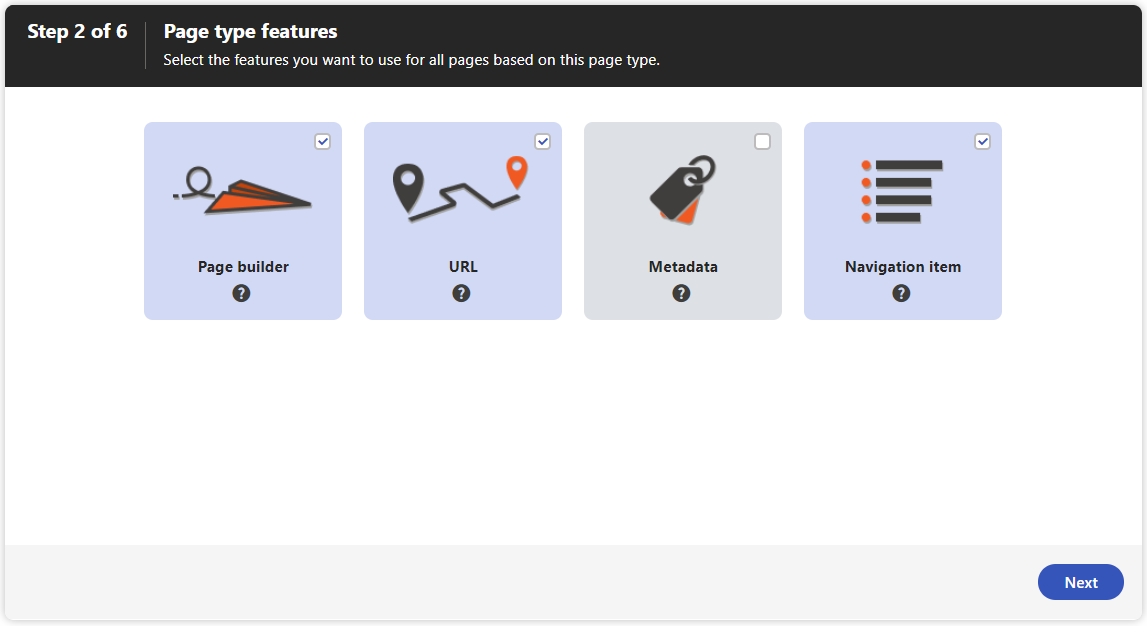
Click Next.
In Step 3, leave the default database table values and click Next.
In Step 4, click the New field button to create a field for the page header.
Fill in the following values:
- Field name: HomeHeader
- Data type: Text
- Size: 1000
- Field caption: Header
- Form control: Text area
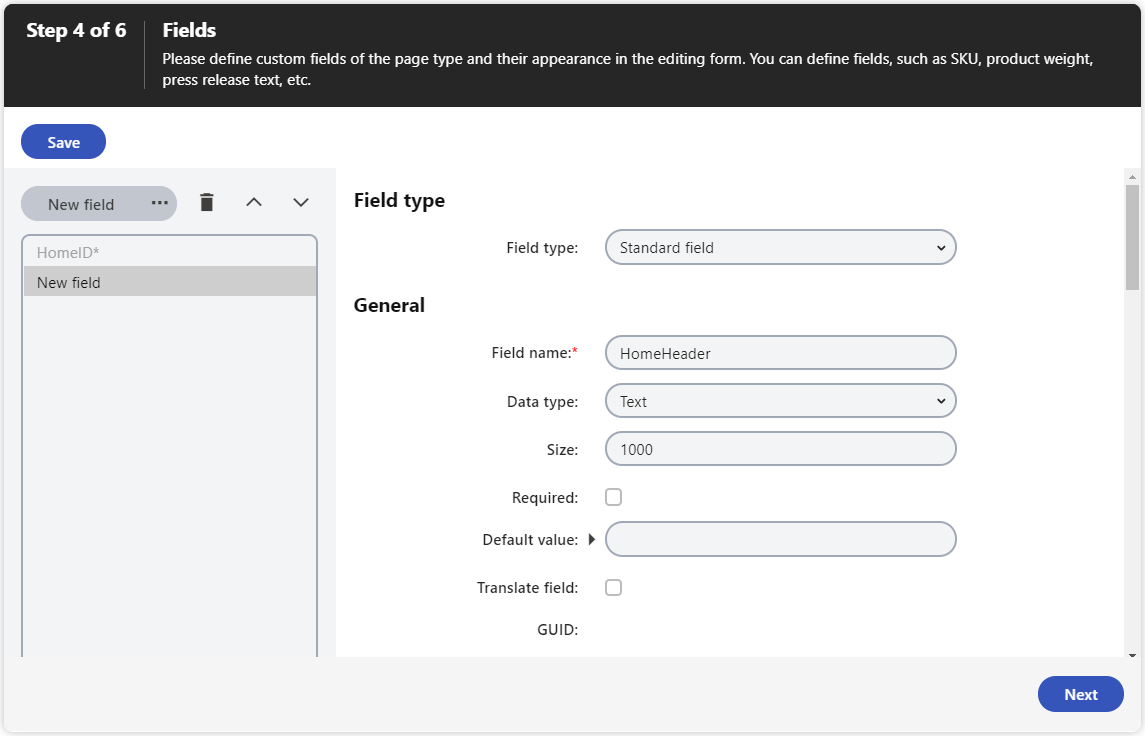
Click Save.
Click the New field button to create the second field for the page heading with the following values:
- Field name: HomeTextHeading
- Data type: Text
- Size: 200
- Field caption: Text heading
- Form control: Text box
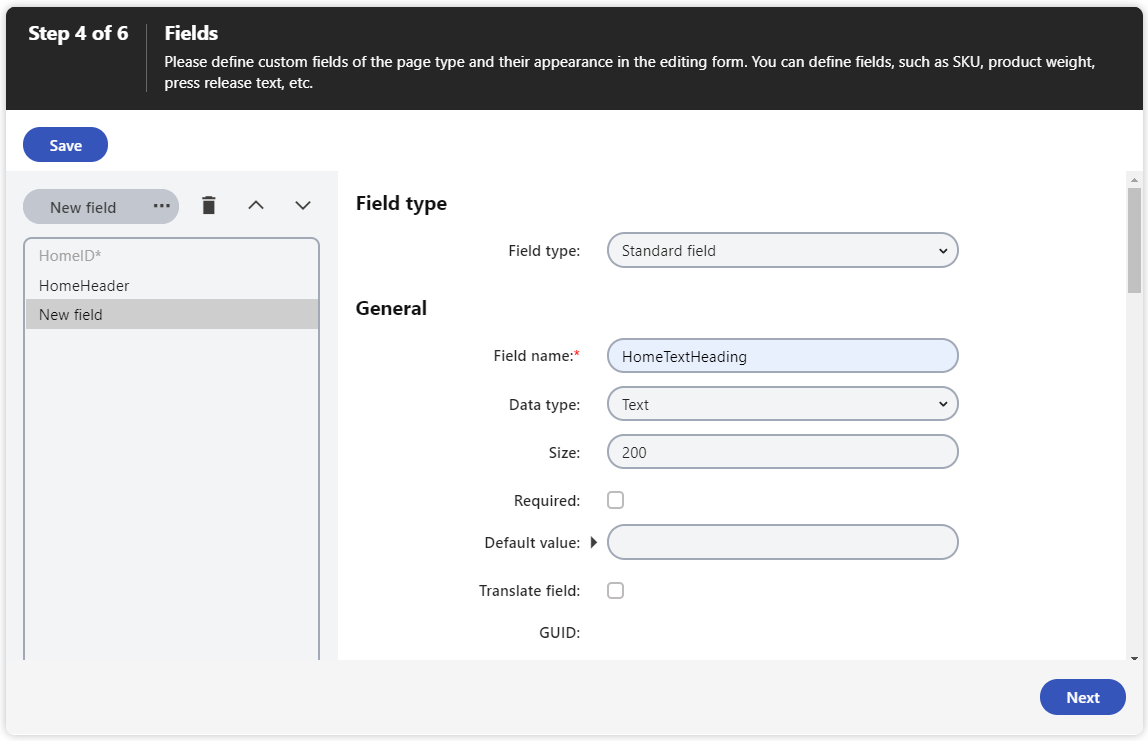
Click Save.
Create the third field for the page text with the following values:
- Field name: HomeText
- Data type: Long text
- Field caption: Text
- Form control: Text area
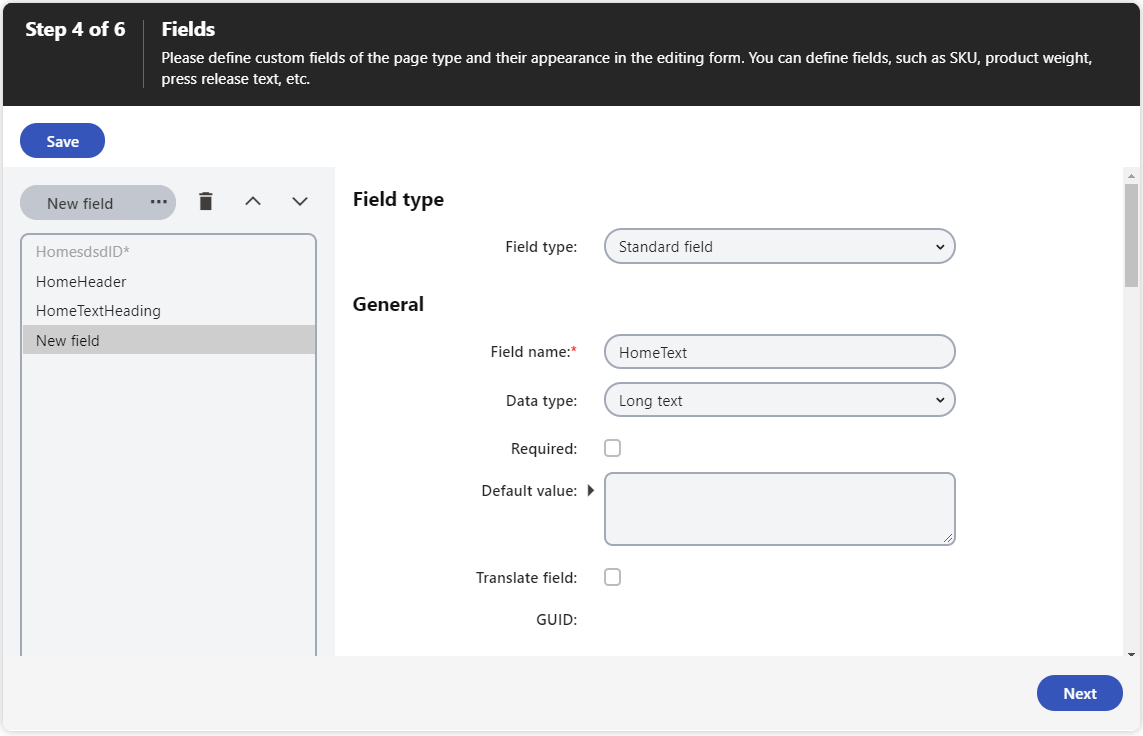
Click Save.
Click Next.
In Step 5, do not change anything, and click Next.
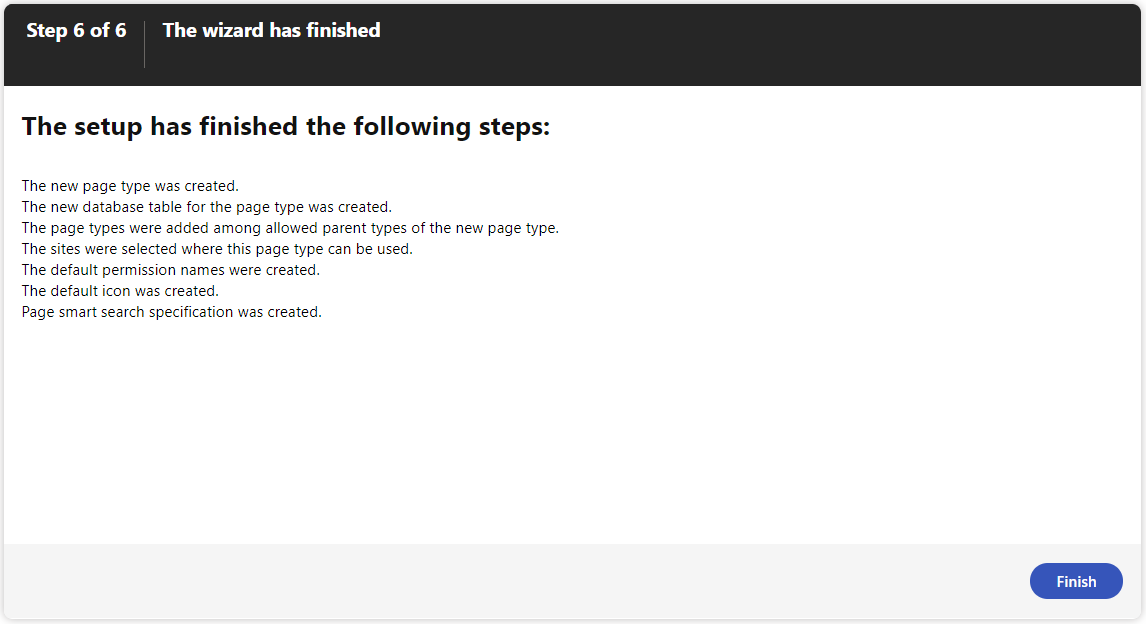
In Step 6, click Finish to complete the new page type wizard.
Preparing the page type’s wrapper classes
Before you start adding new pages and their content, let’s make sure you’ll be able to work with this page type in your MVC application. Xperience allows you to generate code for your page type directly from the user interface.
To generate code for the Home (MEDIO Clinic) page type, switch to the Code tab.
Verify the Save path (by default, the path is set to ~/Old_App_Code/CMSClasses), and click Save code.
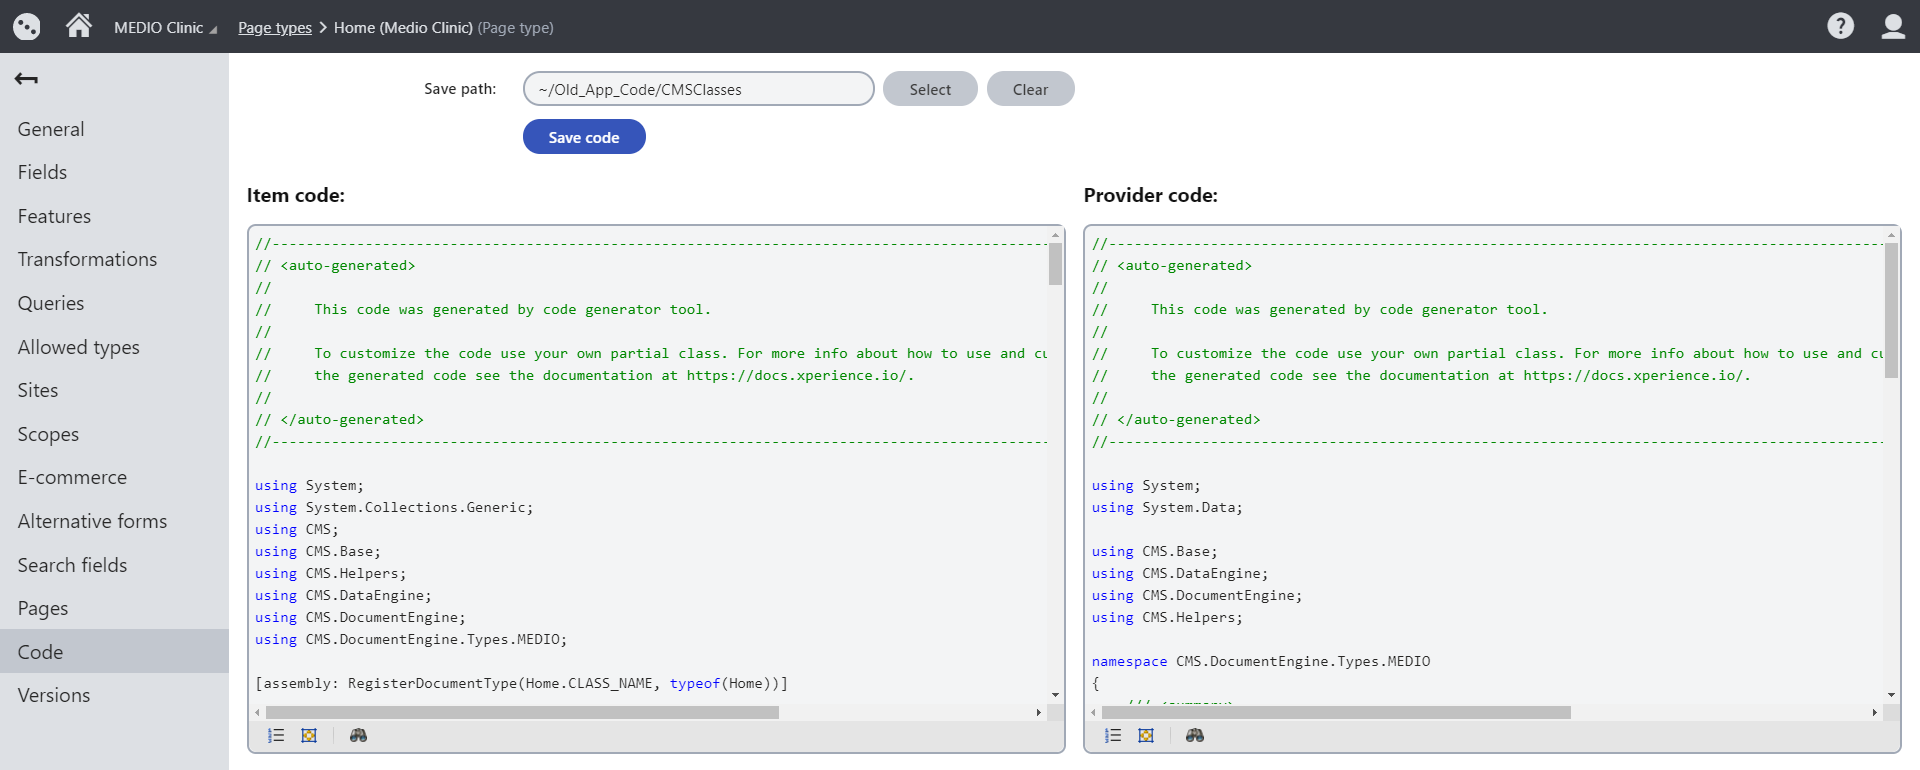
The code generator creates the Item and Provider wrapper classes – Home and HomeProvider. We’re only interested in the Item wrapper class – Home. The class contains properties matching the page type fields you have defined when creating the page type – HomeHeader, HomeTextHeading, HomeText – as well as other properties shared by all pages in the system. It allows strongly-typed access to all data stored by the page.
Later in the tutorial, you will use the Home class to display content on the website. But first, let’s finish creating all the page types you will need to build your tutorial website.
Creating the page type for the Medical center page
- In the Page types application, click the New page type button to start the wizard.
- In Step 1 of the wizard, fill in the following values:
- Page type display name:Medical center (MEDIO Clinic)
- Namespace: MEDIO
- Name: MedicalCenter
- In Step 2, select the URL and Navigation item features for the page type.
- In Step 3, leave the default database table values and click Next.
- In Step 4, create two fields with the following values:
- The field for the Medical center header
- Field name: MedicalCenterHeader
- Data type: Text
- Size: 200
- Field caption: Header
- Form control: Text box
- The field for the Medical center text
- Field name: MedicalCenterText
- Data type: Long text
- Field caption: Text
- Form control: Rich text editor
- The field for the Medical center header
- Finish the page type wizard, leaving the rest of the steps at their default values.
- Click Save.
- Switch to the Code tab.
- Verify that the Save path is set to ~/Old_App_Code/CMSClasses and save the code of the page type.
Page types and content tree-based routing
Because we’ve enabled content tree-based routing in the previous step and now enabled the URL feature for our created page types, all pages based on our page types will be automatically accessible under URLs that reflect their position in the site’s content tree. We only need to provide a view (.cshtml) file to format the page’s content.
For example, let’s say we create a page called Home (based on our Home (MEDIO Clinic) page type) and place it under the root of our website in Xperience. The created page will automatically be accessible under <domain>/home in the connected MVC application.
We’ll see the true benefit of this approach once we get to designing the live site MVC application.
Previous page: Configuring the MVC application — Next page: Adding pages to the site
Completed pages: 4 of 10