
Send regular emails to subscribers
Emails can be one of the most effective ways to promote your business or keep in touch with existing contacts.
Xperience by Kentico allows you to create and send regular emails to groups of subscribed recipients.
Prerequisites
To send emails, developers and administrators need to set up and configure:
- One or more email clients for sending emails (for example an SMTP server or SendGrid integration)
- Email channels
- Content types for emails
- Email templates
Set up a subscription process
Prepare subscription pages
Start by adding the following subscription-related pages to your website:
“Thank you” page – displayed to users after they confirm their email subscription by clicking on a double opt-in link.
“Goodbye” page – displayed to users if they choose to stop receiving your emails by clicking an unsubscribe link.
Contact your site’s developers if you need help setting up content types for the pages, or ensuring that the content is displayed correctly on the website.
Add suitable content to the pages, depending on your site’s branding and audience.
Create recipient lists
Contacts who decide to subscribe and receive your emails are stored within recipient lists. When sending out regular emails, marketers choose the target audience by selecting a recipient list.
You can either use a single recipient list for all email communication, or create multiple lists for different newsletters or email groups (each with its own separate subscription and unsubscription process).
To add a recipient list:
- Open the Recipient lists application.
- Select New recipient list.
- Enter appropriate names and optionally a Description.
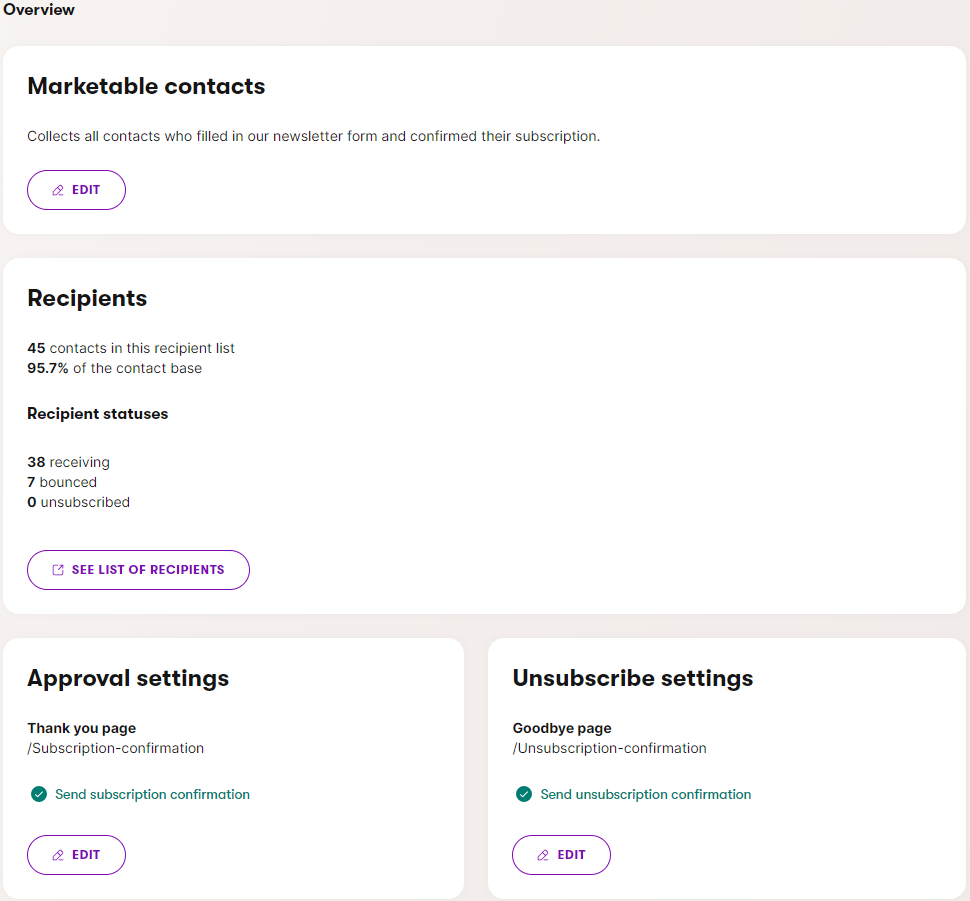
- Select the Thank you page and Goodbye page in the Approval and Unsubscribe settings sections (see Prepare subscription pages).
- (Optional) Enable the Send (un)subscription confirmation options.
- Create suitable emails with the Confirmation purpose.
- Select the emails in the recipient list’s Approval and/or Unsubscribe settings sections.
- Select Save.
The recipient list is now ready to collect subscribers. Continue by adding a subscription form to your website.
Add a subscription form
To allow people to join your recipient lists, you need to prepare a subscription form with an autoresponder email:
- Create a suitable email with the Form autoresponder purpose.
- The email must use a content type that provides one or more Rich text editor fields.
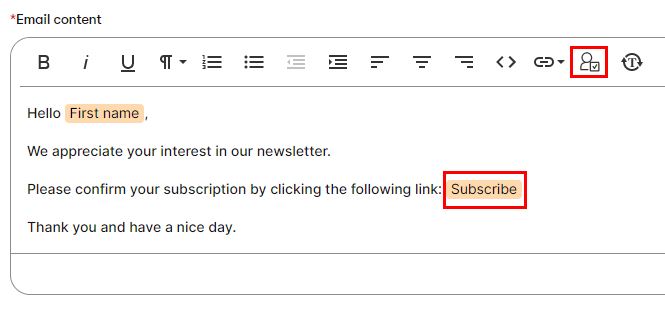
- Edit the email in the Content view mode, and add a double opt-in link:
Place the cursor in an appropriate location within a rich text field in the email content.
Select Insert Double Opt-In Link () on the editor toolbar.
Enter the Link text.
Select a recipient list – choose the recipient list where you want to add contacts after they subscribe.
Select Insert.
Save and Publish the email.
Edit double opt-in links
You can change the text and recipient list set for double opt-in links at any time. Select the highlighted link in the email content editor, adjust the values, and select Update.
- Create a form.
- Make sure the form contains a field that allows users to submit their email address. The autoresponder can only be enabled if a form field is mapped to the Email contact attribute in the Form Builder.
- Open Autoresponder in the form’s options panel.
- Choose the Select email option.
- Pick the autoresponder email containing a double opt-in link.
- Select Save.
- Place the form onto one of your website’s pages:
- For pages where Page Builder is enabled, you can add the form using the Form widget.
- To add the subscription form to a fixed part of your website, such as the shared footer, contact your project’s developers to render the form as a stand-alone widget.
Visitors can now use the form to subscribe to emails. The subscription process consists of the following steps:
- A website visitor provides their email address and submits the form.
- The form sends an autoresponder email with a double opt-in link.
- The recipient clicks the link.
- The contact representing the visitor is added to the selected recipient list.
- The “Thank you” page selected for the recipient list is displayed to the user.
- If the recipient list has subscription confirmations enabled, the user also receives the selected confirmation email informing them about the subscription.
Send regular emails
Once you have established a subscription process on your website, you can start sending emails to contacts in your recipient lists.
Start by creating an email template. Place an {%unsubscribeurl%} placeholder into the template’s Source code.
- Position the placeholder into the
hrefattribute of a suitable link tag, for example within the footer of your email template. - The placeholder resolves into an unsubscribe URL based on the unsubscribe settings of the recipient list to which the resulting emails are sent.
<p>
    If you'd rather not receive future emails, <a href="{%unsubscribeurl%}">unsubscribe here</a>.
</p>
Make sure the email template is allowed for the content types that plan to use for your regular emails.
Repeat the following steps for every email “issue” that you wish to send out:
Cloning emails
If you already have one or more existing emails, you can save time by Cloning () an email in the list within an email channel. This creates a new email with the content and settings of the original, which you can then change as required.
Create an email.
- Set the Email purpose to Regular.
- Select a Template containing an unsubscribe link.
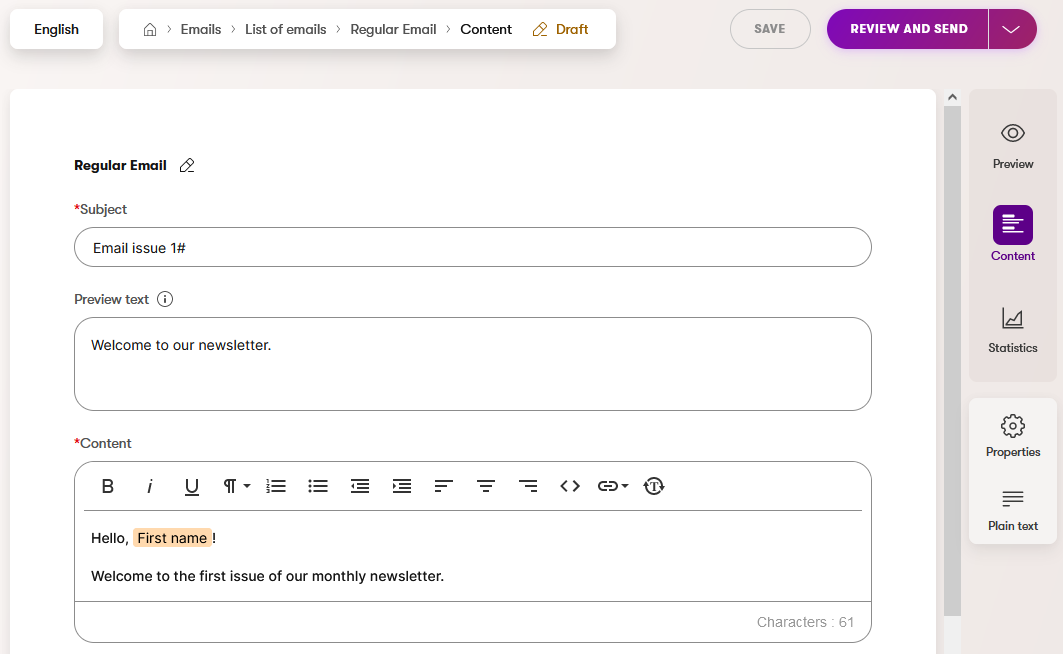
Write the email’s content, subject and preview text in the Content view mode.
Once the content is ready, select the Continue button (or Properties in the option panel on the right).
Select a Sender (senders are predefined for the email channel).
In the Send to property, choose the recipient list to which you want to send the email.
Select Save.
If the email’s content type is under workflow, you need to go through the workflow’s steps before the email becomes ready to be sent.
To send the email, select Review and send. For emails under workflow, select Change workflow step and choose the Publish step.
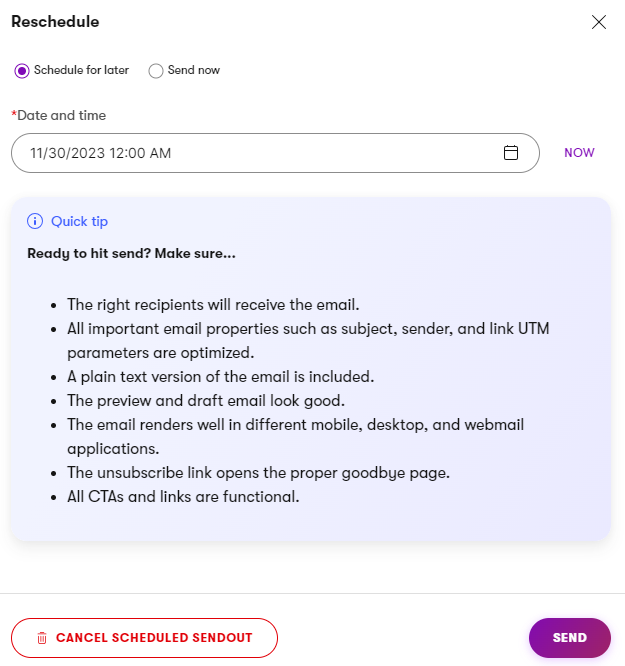
Choose one of the options:
- Schedule for later – choose a date and time in the future when the system will send the email.
- Send now
Select Send.
Cascade publishing
If the email has fields linking to reusable content items, you need to select Continue instead. The Select what should be published dialog opens, showing all linked content items that are currently not in the Published step. You can select any of the listed content items to immediately publish them. Carefully consider which items are ready to be published. If you wish to publish the items in the future together with the email’s scheduled sendout, you need to do so manually (e.g., in the Content hub application).
To learn more about cascade publishing, see Content hub.
When an email is scheduled to be sent in the future, it becomes read-only and editing is not possible. If you need to make further changes, you have the following options:
- Select Edit email in the upper right corner of the view to cancel the scheduled sendout and re-enable editing of the email content and properties.
- If you only wish to adjust the sending date and time, expand the drop-down in the upper right corner and select Reschedule. The Reschedule dialog allows you to adjust the date and time, or Cancel the scheduled sendout completely.
When you send the email or the scheduled date and time is reached, the system sends the email to all contacts in the selected recipient list. Once the sending starts, the email’s editing interface becomes read-only and you can no longer make any changes to the content or properties.
Email statistics
Remember to review and evaluate the statistics tracked for sent emails, such as the number of delivered and opened emails or clicked links. Use the results to identify content that works best for your audience and optimize subsequent emails.
Bounced email tracking
Bounced email tracking only works if it is configured for your application. Contact your site’s developers or see Set up email tracking.
When an email cannot be delivered successfully, an automatic reply informing about the problem is returned (bounced) back to the sender or another designated address. Xperience by Kentico tracks bounced emails and identifies addresses that do not correctly receive emails.
You can see the Delivery rate for individual regular emails by viewing the email statistics. The delivery rate is calculated by subtracting the bounce count from the total number of sent emails.
If an email address reaches the allowed limit for temporary delivery problems (soft bounces) or if a permanent delivery problem is encountered (a hard bounce), the given contact switches to the Bounced status and is excluded when sending further emails. This helps keep your recipient lists healthy and protects your sender reputation.
You can check the bounce status for recipients (contacts) in several locations within the administration interface:
- Contact management – in the contact listing, as well as the profile of individual contacts
- Recipient lists – in the Overview and Recipients listing of specific recipient lists
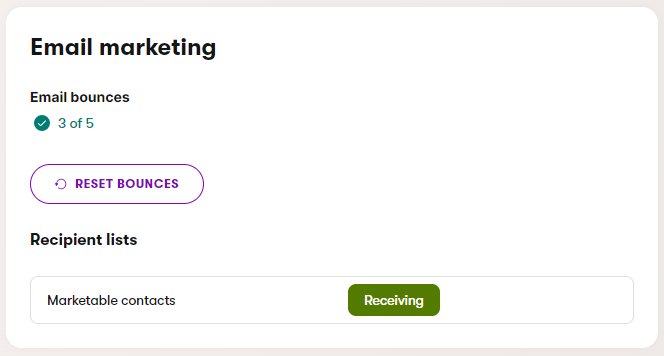
If necessary, marketers can Reset bounces for individual contacts from the Email marketing section of the contact’s profile in the Contact management application.
Unsubscription
Recipients of regular emails can choose to stop receiving your emails. The unsubscription process consists of the following steps:
- A recipient clicks an unsubscribe link in the email content.
- The “Goodbye” page selected for the recipient list is displayed to the user.
- If the recipient list has unsubscription confirmations enabled, the user also receives the selected confirmation email informing them about the unsubscription.
The given contact switches to the Unsubscribed email status in the recipient list to which the email was sent. Marketers can still see the contact when viewing the recipient list in the administration, but the contact is no longer included when sending further emails to the recipient list.
You can review the unsubscribe rate and exact number of unsubscriptions in the statistics of individual regular emails.
One-click unsubscribe support
All emails with the Regular purpose support one-click unsubscribe (based on RFC 2369 and RFC 8058).
The system automatically includes the following headers when sending regular emails:
List-Unsubscribe-Post: List-Unsubscribe=One-ClickList-Unsubscribe: <unsubscribe URL with the Service domain of the given email channel>
If a recipient uses one-click unsubscribe, the resulting request is handled in the same way as a standard unsubscribe link in email content.