
Emails
Xperience by Kentico allows you to prepare emails and edit their content directly in the administration interface.
Prerequisites and limitations
To allow the system to send out emails, developers and administrators need to set up and configure:
- Email channels
- One or more email clients for sending emails (for example an SMTP server or SendGrid integration)
- Content types for emails
- Email templates
Only emails with the purposes described on this page can be managed in the Xperience administration. Other system emails need to be created by developers. For example, user password reset and registration emails are described in Administration - Forms authentication.
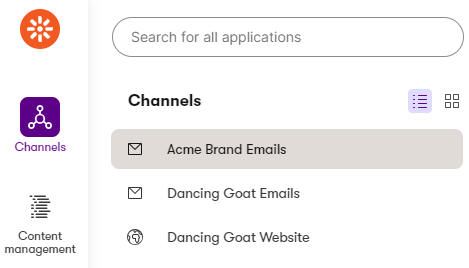
Email channels
Emails in Xperience are created and managed within email channels. A single project may contain multiple email channels, focusing on different content strategies, languages and audience engagement techniques. Each email channel has a unique sending domain, which represents your company or brand, and is used in all sender addresses for the channel’s emails.
Channels allow for a clean separation of your organization’s emails. Every email channel has its own application in the Xperience administration, where you can create and send emails.
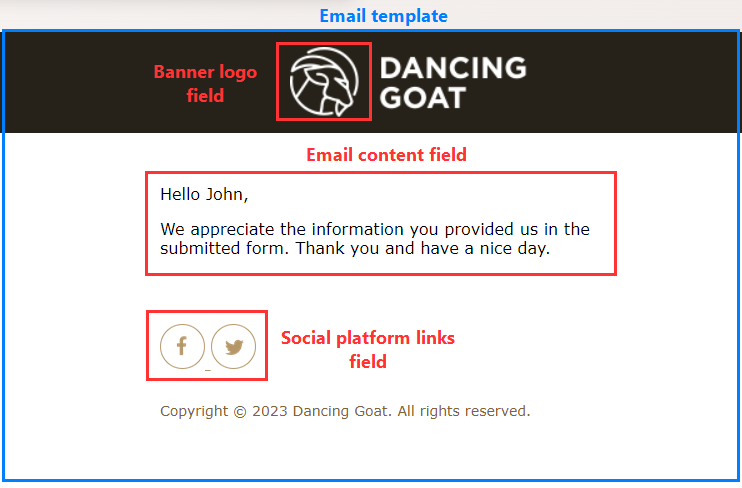
Emails and templates
Emails created in Xperience consist of two content layers:
- Email templates – define the overall layout of emails and add fixed content, such as a header or footer. You can reuse a single template for any number of emails. Templates contain macros that serve as placeholders for the fields of email content types, as well as system elements, such as a regular email’s unsubscribe link URL. Every email content type has a set of allowed email templates that can be selected.
- Emails – every email is based on a selected email template and content type. Email content is added into fields predefined by the selected content type, and then displayed within the template. Additionally, every email has system fields for setting standard email properties, such as the subject and sender information.
Email purposes
Every email is created with one of the following purposes:
- Regular – emails sent as part of a regular series to subscribed recipients. See Send regular emails to subscribers for detailed information and instructions.
- Form autoresponder – sent automatically to visitors after they submit a form. Also used to set up email marketing subscription when a double opt-in link is added to the content.
- Confirmation – confirmation messages sent to users after they subscribe or unsubscribe from email marketing.
Create emails
Open an email channel application in Xperience.
Select New email.
Fill in the email properties:
- Name – the name of the email displayed in Xperience (for example when selecting a form autoresponder email).
- Email purpose – select the email’s purpose (see Email purposes). To learn more about creating regular emails, see Send regular emails to subscribers.
- Content type – select the content type for your email.
Select Continue.
Choose a suitable email template to set the email’s fields, layout and fixed content.
Select Create.
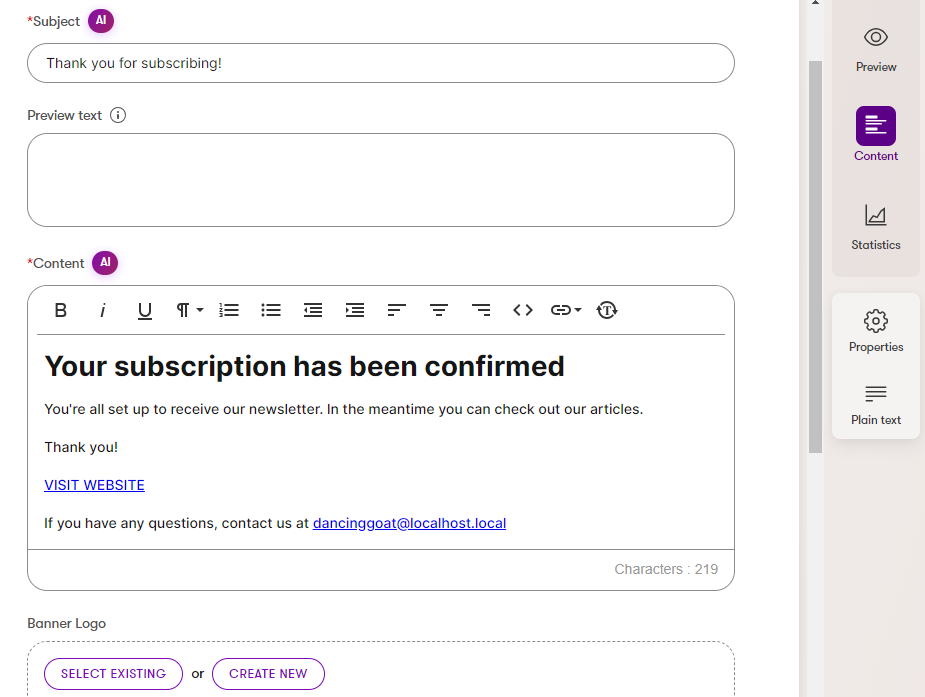
In the Content view mode, write the email’s content.
Every email has the following fields:
- Subject – the email’s subject line.
- Preview text – the brief text that recipients see in their inbox after the email sender information and the subject line. We recommend keeping the preview text between 40 and 100 characters (email clients only show a limited number of characters). The preview text only applies if the selected Email template contains a suitably placed
{%previewtext%}placeholder.
Other email content fields are available depending on the selected content type. Typically, there will be one or more fields where you can use the Rich text editor to create the email content.
In many cases, emails will have fields that allow you to add content by selecting reusable content items (blocks of text, images, etc.). See Content hub to learn more.
Email language
All emails within an email channel use the same language. If you wish to send emails in another language, you need to switch to a different email channel. You project’s administrators need to prepare an email channel for every language that you wish to use.
Secured content items
When selecting reusable content items, note that secured items with the Requires authentication flag enabled are not included in emails. If you send an email containing secured items, the corresponding content will be missing in the email.
Xperience by Kentico integrates AI features that allow you to generate content suggestions for email subjects and content fields. To learn how to get access and use the AI features, see Artificial intelligence features.
Select Save and then Continue.
In the Properties panel, select a Sender (senders are predefined for the email channel).
Select Save in the Properties panel.
When you create a new email, it is not immediately available for sending. To continue, you need to adjust the email’s workflow status.
Email life cycle
When viewing an email in an email channel application, you can find the current status at the end of the administration breadcrumbs navigation, and the available action in the upper right corner of the view.
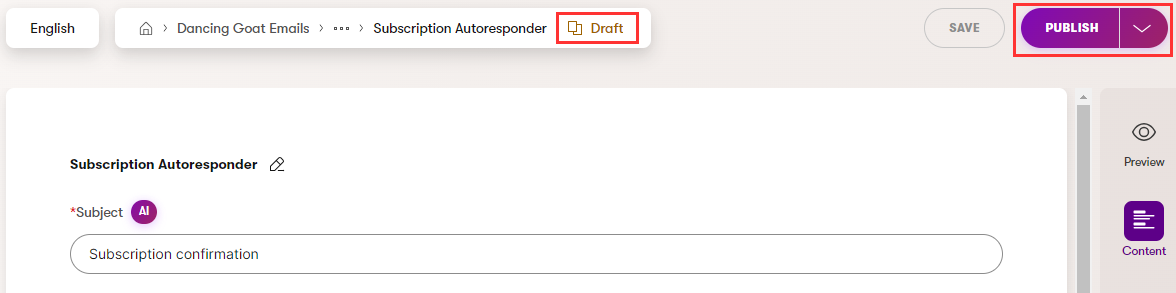
Emails with the Form autoresponder or Confirmation purpose can have one of the following statuses:
- Draft (initial) – new emails that have never been published.
- Cannot be sent until you use the Publish action to move the email to the Published status.
- Published – emails that are ready to be sent.
- Displayed as read-only and cannot be edited. If you wish to modify the email, use the Edit email action to change the status to Draft.
- Draft – emails that have already been published, but a new version is being edited.
- If the system needs to send an email while it is in the Draft status (e.g., a form autoresponder), the previously published content and properties are used.
- You can edit the email’s content or properties and Save the changes.
- When the editing is complete, use the Publish action to overwrite the previously published content and move back to the Published status.
- You can revert back to the previously published content at any time. Expand the available actions drop-down and select Revert to published.
- Custom workflow step – emails can go through custom workflow steps before they are ready to be sent (“between” the Draft and Published status). To learn more about these steps, see workflows. The email works as if in the Draft status until the workflow step is changed to Published.
Emails with the Regular purpose are sent only once to a specific list of recipients, and have a different workflow cycle. See Send regular emails to subscribers to learn more.
Linked content items and workflow
In many cases, your emails will have fields that allow you to add content by selecting reusable content items (blocks of text, images, etc.). Every linked content item has its own workflow status. If you send an email that contains unpublished content items, the corresponding content will be missing in the email.
When publishing an email with fields linking to reusable content items, the Select what should be published dialog opens. You can view all linked content items that are currently not in the Published status. Select any of the listed content items to publish them together with the email. See Content hub to learn more.
Edit emails
When editing an email in an email channel application, you can switch between view modes in the options panel on the right:
- Preview – displays a view of the email content as it will appear to recipients, including the fixed content from the email template. Any dynamic text in the email appears as it would for a fake recipient named John Doe.
- Content – allows you to edit the email content fields, as well as the email’s subject and preview text. While in the Content view mode, you can expand the following panels:
- Properties – to adjust the email properties, i.e., the email’s template and sender information.
- Plain text – to enter the plain text version of the email’s content. The plain text must combine content from all of the email’s fields, as well as static text contained in the template. Adding plain text content improves the deliverability of emails. Some recipients may prefer plain text emails, and certain email clients only accept plain text.
- Statistics – displays statistics tracked for the email, including the number of sent emails, email opens and clicked links. See Track email statistics.
Add dynamic text to emails
Emails allow you to include personalized pieces of text based on information known about the recipient.
Dynamic text is only available for emails with a content type that provides one or more Rich text editor fields.
- Edit the email in an email channel application and select the Content view.
- Place the cursor to the desired location within a rich text field and select Insert Dynamic Text () on the editor toolbar.
- Fill in the dialog:
- Recipient attribute – select the recipient attribute that will be displayed (First name, Last name or Email).
- For Regular and Confirmation emails, the email attempts to get the attribute values from the contact representing the recipient.
- For Form autoresponder emails, the attributes get their value from the matching fields of the submitted form. If fields are not available for the First or Last name, the email attempts to get the values from the contact representing the recipient.
- Backup text – text displayed to recipients who do not have a value available for the selected attribute.
- Recipient attribute – select the recipient attribute that will be displayed (First name, Last name or Email).
- Select Insert.
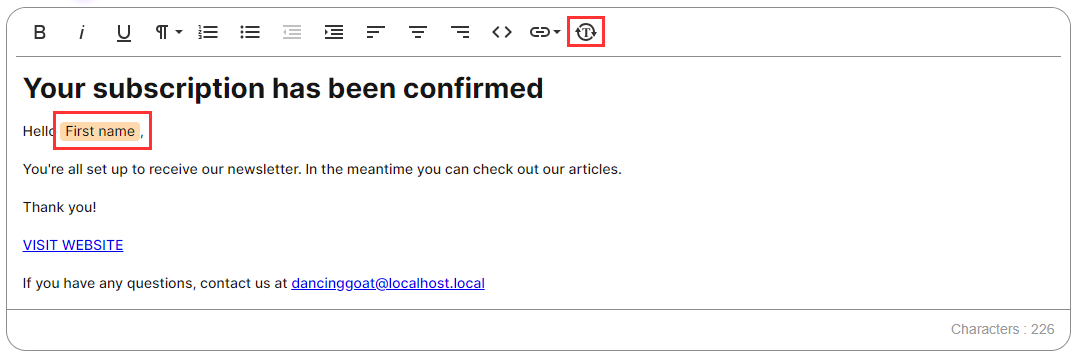
The email content now contains a highlighted piece of dynamic text, showing the selected recipient attribute. You cannot modify dynamic text after it has been added. If you need to make adjustments, delete the text and add it again with the required values.
When sending emails to specific recipients, the system replaces dynamic text with information available for the recipient.
Double opt-in links in form autoresponder emails
When editing Form autoresponder emails, the editor toolbar in the Content view mode additionally provides the Insert Double Opt-In Link () button. Such links are added to autoresponder emails assigned to a subscription form, and they allow recipients to confirm and finish the subscription process.
For detailed information about this scenario, see Send regular emails to subscribers.
Send draft emails
You can preview and test your emails by sending a draft version to any address.
Select the email in an email channel application.
Make sure there are no unintended changes in the email’s content. The system automatically saves the email when sending a draft.
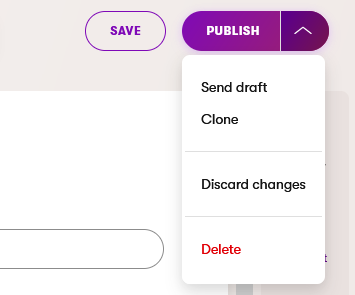
In the Content view mode, select Send draft from the drop-down list in the upper right corner of the view.
Enter the email addresses where you want to send the draft.
- By default, the To field is prefilled with the email address of your user account.
- You can enter multiple email addresses separated by semicolons (;).
Select Send.
Draft emails differ from normally sent emails in the following ways:
- The email content is sent based on the latest edited status of the email, even if the changes are not published. Normally sent emails always contain the published version of the email content.
- Email statistics are not tracked for drafts.
- Because the recipients are not linked to contacts in the system, any dynamic text in the email appears as it would for a fake recipient named John Doe.
- Certain features, such as unsubscription links, are not functional in draft emails.
Clone emails
When creating new emails, you can save time by reusing the content and settings of an existing email.
- In an email channel application, view the list of emails.
- Select the Clone () action next to the email that you want to reuse.
- Select Clone in the confirmation dialog.
You can also Clone an email by using the drop-down list in the upper right corner in the Content view mode of the email you’d like to reuse.
The application creates a new email with the same content and properties as the original. Adjust the new email’s subject, content, sender, and any other properties as required.
Send regular emails to subscribed recipients
Regular emails provide additional options that allow you to send the email to contacts in a selected recipient list.
For detailed information about this scenario, see Send regular emails to subscribers.
Assign emails to form autoresponders
After you create one or more Form autoresponder emails, you can assign them to the autoresponder of a form:
- Open the Formsapplication in Xperience.
- Select the form in the list.
- Select Autoresponder in the options panel on the right.
- Choose the Select email option.
- Pick an autoresponder email from the list.
- Select Save.
Whenever a user submits the form on your website, the system automatically sends them an email with the specified content and properties.