
Example - Importing a culture version of a document using the Kentico Import Toolkit
In this example, you will learn how to import a new culture version of a News document from one Kentico database to another database.
- Run the utility from Windows Start -> All Programs -> Kentico 8.0 -> Utilities -> Kentico Import Toolkit 8.
- Choose Start new import session.
- Click Next.
Step 1
- Choose the folder of a project into which the data will be imported.
- Backup your data and check the check-box.
- Click Next.
Step 2
Choose Documents from the Select data type to import drop-down list.
Select a site where you want to import the document in the Import data to site drop-down list.
Select the News document type from the Import as drop-down list.
Select Import new and overwrite existing documents from the Import options.
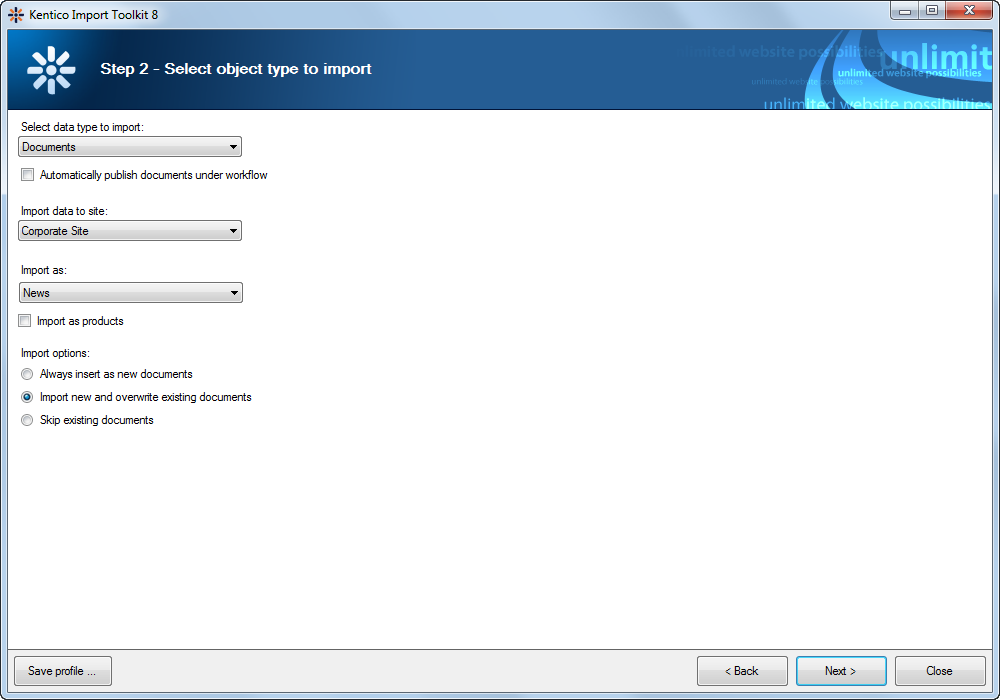
Click Next.
Step 3
- Provide the MS SQL database information and the authentication information.
- Click Next.
Step 4
Select the View option.
Choose the View_CONTENT_News_Joined view from the drop down list.
Type the Where condition into the appropriate field to select only the desired documents.
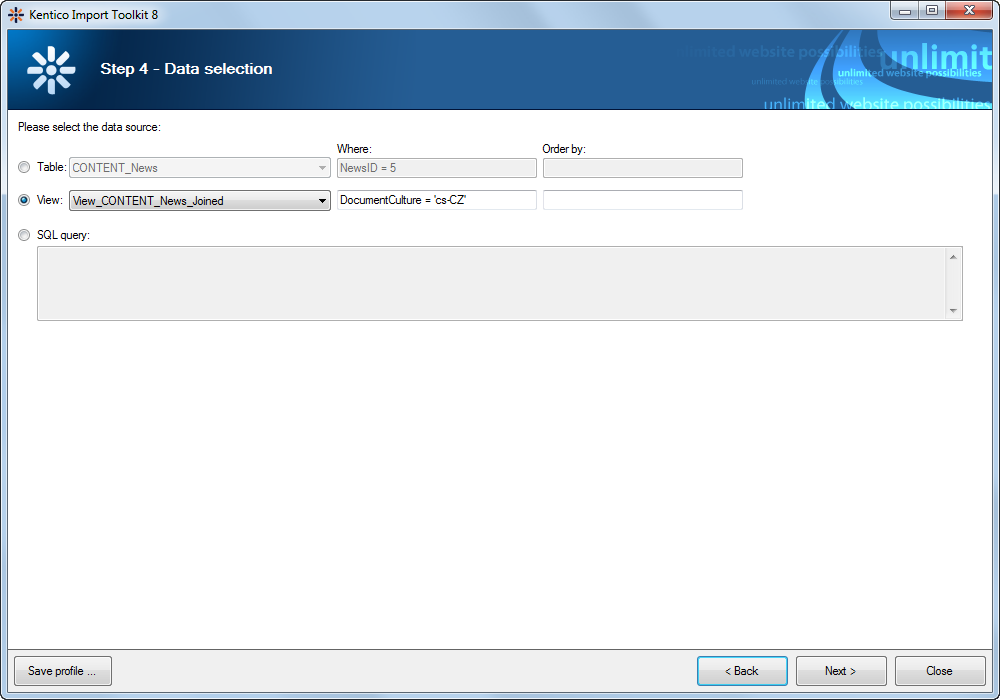
Click Next.
Step 5
- Check whether you picked the right data.
- Click Next.
Step 6
Check the Show advanced columns option.
- If the advanced column fields are not filled in automatically, please click Back once and Next again.
Check whether the NodeAliasPath target field is mapped to NodeAliasPath source field.
Erase the NodeAlias field. It has to remain blank in order to import a new culture version of the same document.
Type the parent path of the documents into the text field below the data grid (you can use macros).
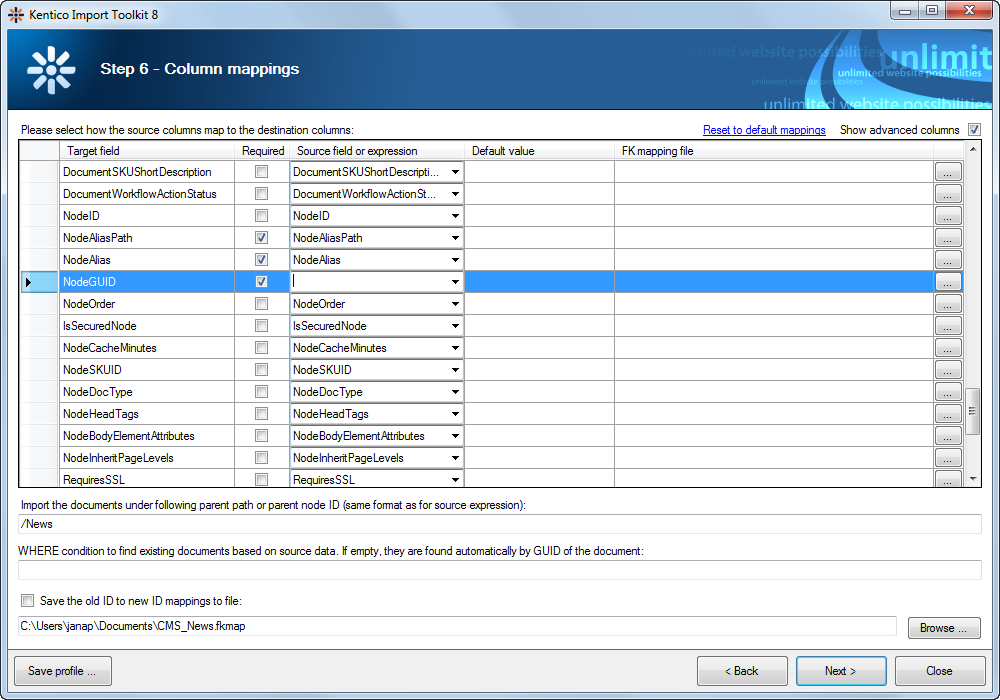
Click Next.
Step 7
- Select the Import the data option.
- Click Import data.
Step 8
After a successful import of multilingual documents, you should see the number of items, which were created.
Close the dialog.