
Placing banners on a page as widgets
You can place banners on a page in the form of the Banner rotator widget. The Banner rotator widget allows you to configure the category, width, and height of the displayed banners.
Users with the Design website permission for the Design module can place banners on a page’s Design tab as web parts, which provide more configuration options.
Note that you can only add widgets on pages where the website’s developers have prepared editor widget zones.
Adding the Banner rotator widget
To add the Banner rotator widget to a zone:
Open the Pages application on the Page tab.
Select a page in the page tree.
Open the zone menu ().
Click Add new widget.
Select the Banner rotator widget.
Click Select.
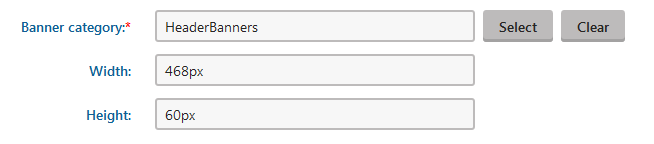
Set the widget’s Banner category, Width, and Height.
Click Save & Close.
While still on the Page tab, click Save to confirm the changes to the page’s widget content.
If you wish to configure more settings for the displayed banners than the Banner rotator widget provides, you can ask your administrator to add banners as web parts.